
图像纹理与skimage
我试图从我用greycomatrix从skimage.feature创建的GLCM中获取skimage.feature。我的输入数据是一个具有多个波段的图像,我想要每个像素的纹理属性(结果是一个尺寸为cols x rows x (properties *bands)的图像),因为它可以使用ENVI实现。但我对此太陌生了,无法应付greycomatrix和greycoprops。这就是我试过的:
import numpy as np
from skimage import io
from skimage.feature import greycomatrix, greycoprops

array = io.imread('MYFILE.tif')
array = array.astype(np.int64)
props = ['contrast', 'dissimilarity', 'homogeneity', 'energy', 'correlation', 'ASM']
textures = np.zeros((array.shape[0], array.shape[1], array.shape[2] * len(props)), np.float32)
angles = [0, np.pi / 4, np.pi / 2, 3 * np.pi / 4]
bands = array.shape[2]
for b in range(bands):
    glcm = greycomatrix(array[:, :, b], [1], angles, np.nanmax(array) + 1,
                        symmetric=True, normed=True)
    for p, prop in enumerate(props):
textures[:, :, b] = greycoprops(glcm, prop)不幸的是,这给出了每个prop的一个prop矩阵,我猜这是整个图像的每个角度的一个值,但这不是我想要的。我需要它的每个像素,如contrast的每一个像素,由其各自的环境计算。我遗漏了什么?
回答 1
Stack Overflow用户
发布于 2018-06-15 10:18:03
这个片段应该可以完成任务:
import numpy as np
from skimage import io, util
from skimage.feature.texture import greycomatrix, greycoprops

img = io.imread('fourbandimg.tif')

rows, cols, bands = img.shape

radius = 5
side = 2*radius + 1

distances = [1]
angles = [0, np.pi/2]
props = ['contrast', 'dissimilarity', 'homogeneity']
dim = len(distances)*len(angles)*len(props)*bands

padded = np.pad(img, radius, mode='reflect')
windows = [util.view_as_windows(padded[:, :, band].copy(), (side, side))
           for band in range(bands)]
feats = np.zeros(shape=(rows, cols, dim))

for row in range(rows):
    for col in range(cols):
        pixel_feats = []
        for band in range(bands):
            glcm = greycomatrix(windows[band][row, col, :, :],
                                distances=distances,
                                angles=angles)
            pixel_feats.extend([greycoprops(glcm, prop).ravel()
                                for prop in props])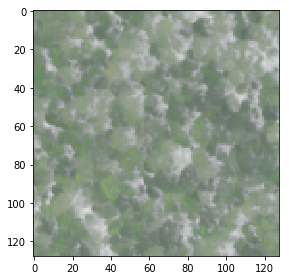
feats[row, col, :] = np.concatenate(pixel_feats)示例映像有128行、128列和4个带(单击这里下载)。在每个图像像素处,使用大小为11的方形局部邻域来计算对应于每个频带的像素的灰度矩阵。然后,计算了这些矩阵的对比度、差异性和同质性。因此,我们有4个带,1个距离,2个角度和3个性质。因此,对于每个像素,特征向量有4×1×2×3= 24分量。
注意,为了保持行数和列数,图像已经使用镜像本身填充到数组的边缘。如果这种方法不适合您的需要,您可以简单地忽略图像的外部框架。
作为最后的警告,代码可能需要一段时间才能运行。
Demo
In [193]: img.shape
Out[193]: (128, 128, 4)

In [194]: feats.shape
Out[194]: (128, 128, 24)

In [195]: feats[64, 64, :]
Out[195]:
array([  1.51690000e+04,   9.50100000e+03,   1.02300000e+03,
         8.53000000e+02,   1.25203577e+01,   9.38930575e+00,
         2.54300000e+03,   1.47800000e+03,   3.89000000e+02,
         3.10000000e+02,   2.95064854e+01,   3.38267222e+01,
         2.18970000e+04,   1.71690000e+04,   1.21900000e+03,
         1.06700000e+03,   1.09729371e+01,   1.11741654e+01,
         2.54300000e+03,   1.47800000e+03,   3.89000000e+02,
         3.10000000e+02,   2.95064854e+01,   3.38267222e+01])

In [196]: io.imshow(img)
Out[196]: <matplotlib.image.AxesImage at 0x2a74bc728d0>
编辑
您可以通过NumPy的uint8或scikit-图像的img_as_ubyte将数据转换为uint8所需的类型。
https://stackoverflow.com/questions/50834170
复制相似问题
腾讯云开发者

Copyright © 2013 - 2026 Tencent Cloud. All Rights Reserved. 腾讯云 版权所有
深圳市腾讯计算机系统有限公司 ICP备案/许可证号:粤B2-20090059 ![]() 粤公网安备44030502008569号
粤公网安备44030502008569号
腾讯云计算(北京)有限责任公司 京ICP证150476号 | 京ICP备11018762号