
CSS @page不适用于打印html页的更新页眉和页脚
我试着遵循密码。代码使用CSS中的打印媒体更新打印页面中的页眉和页脚的目的
body {counter-reset: chapter;}
div.chapter {counter-increment: chapter;}
@page {
margin: 10%;
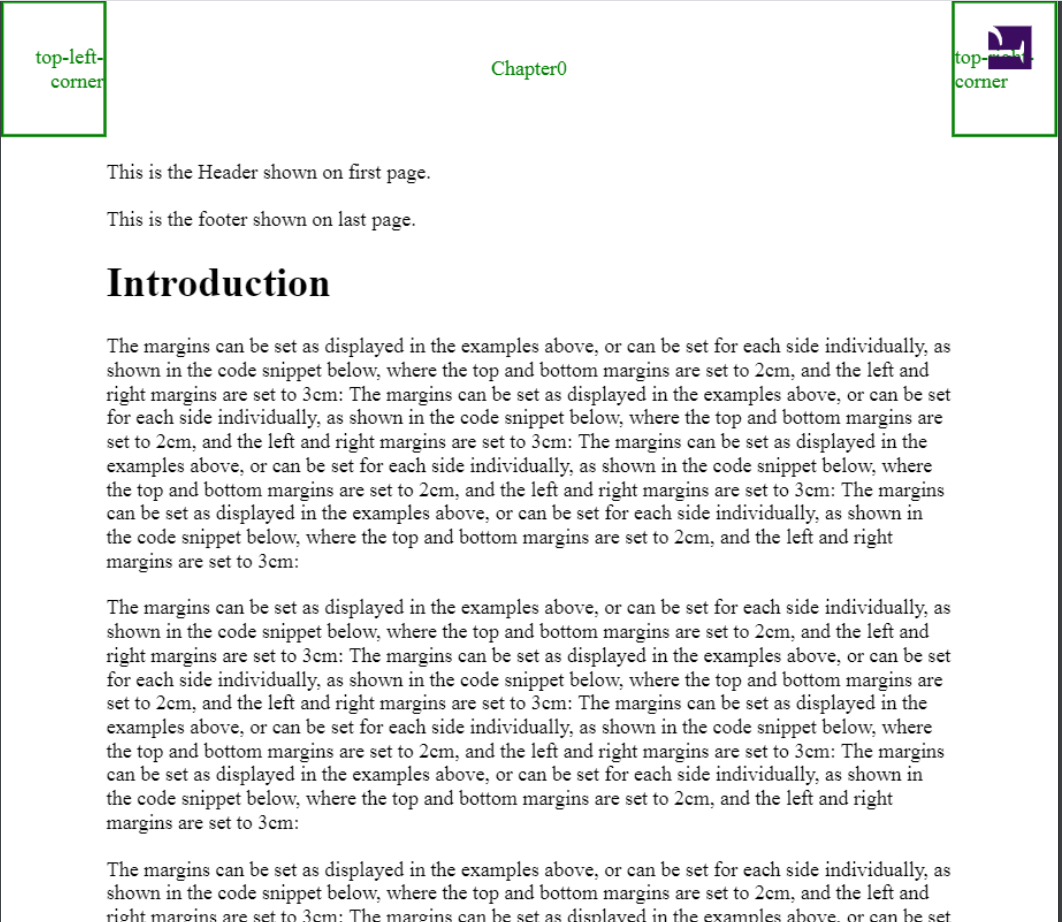
@top-center { content: "Chapter" counter(chapter) }
}<!DOCTYPE html>
<html lang="en">
<head>
<link rel="stylesheet" href="./style.css"/ media="print">
</head>
<body>
<header></header>
<div id="pageHeader">
<p>This is the Header shown on first page.</p>
</div>
<div id="pageFooter">
<p>This is the footer shown on last page.</p>
</div>
<section class="page">
<h1>Introduction</h1>
<p>The margins can be set as displayed in the examples above, or can be set for each side individually, as shown in the code snippet below, where the top and bottom margins are set to 2cm, and the left and right margins are set to 3cm:
The margins can be set as displayed in the examples above, or can be set for each side individually, as shown in the code snippet below, where the top and bottom margins are set to 2cm, and the left and right margins are set to 3cm:
The margins can be set as displayed in the examples above, or can be set for each side individually, as shown in the code snippet below, where the top and bottom margins are set to 2cm, and the left and right margins are set to 3cm:
The margins can be set as displayed in the examples above, or can be set for each side individually, as shown in the code snippet below, where the top and bottom margins are set to 2cm, and the left and right margins are set to 3cm:</p>
<p>
The margins can be set as displayed in the examples above, or can be set for each side individually, as shown in the code snippet below, where the top and bottom margins are set to 2cm, and the left and right margins are set to 3cm:
The margins can be set as displayed in the examples above, or can be set for each side individually, as shown in the code snippet below, where the top and bottom margins are set to 2cm, and the left and right margins are set to 3cm:
The margins can be set as displayed in the examples above, or can be set for each side individually, as shown in the code snippet below, where the top and bottom margins are set to 2cm, and the left and right margins are set to 3cm:
The margins can be set as displayed in the examples above, or can be set for each side individually, as shown in the code snippet below, where the top and bottom margins are set to 2cm, and the left and right margins are set to 3cm:
</p>
<p>The margins can be set as displayed in the examples above, or can be set for each side individually, as shown in the code snippet below, where the top and bottom margins are set to 2cm, and the left and right margins are set to 3cm:
The margins can be set as displayed in the examples above, or can be set for each side individually, as shown in the code snippet below, where the top and bottom margins are set to 2cm, and the left and right margins are set to 3cm:
The margins can be set as displayed in the examples above, or can be set for each side individually, as shown in the code snippet below, where the top and bottom margins are set to 2cm, and the left and right margins are set to 3cm:
The margins can be set as displayed in the examples above, or can be set for each side individually, as shown in the code snippet below, where the top and bottom margins are set to 2cm, and the left and right margins are set to 3cm:</p>
</section>
</body>
</html>
下面的URL是我尝试过的代码at-rule.cfm https://www.w3.org/TR/css-page-3/#cascading-and-page-context的位置
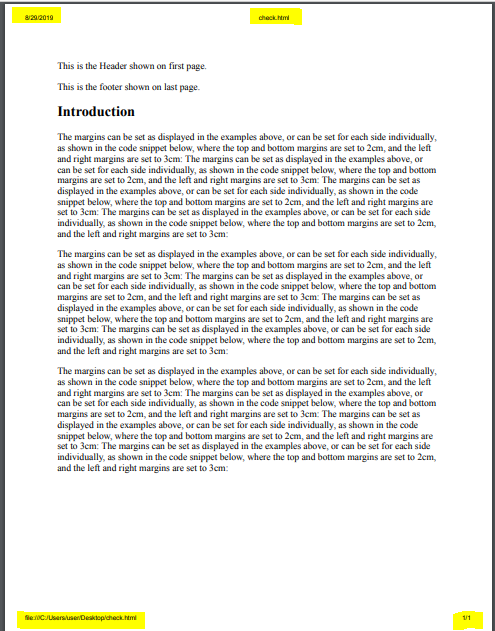
但是,当我打印它时,它会应用@page规则中的页边距,但不会从其他定义规则中更新页眉和页脚中的内容。我附上了下面的图片,它显示了用于更改特定代码区域的规则。
但是,当我打印除@page以外的其他“规则”时(设置页边距正确)
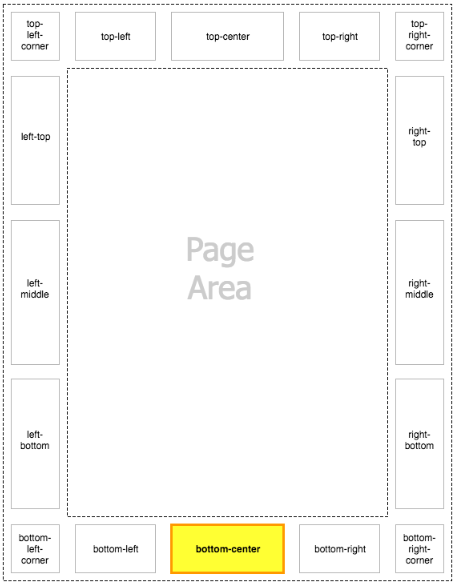
我想使用下面的css @规则更新打印页面中突出显示的区域
- @底部中心
- @左下角
- @右下角
回答 2
Stack Overflow用户
发布于 2021-05-06 16:42:32
我所有的@page css都通过prince命令工作,它用我定义的css为我创建pdf。
这意味着我们必须使用@media print来定义打印css。
关于突出显示的标题和页脚,在我的问题的打印页面中,它们不是通过@page控制的,@page将创建所有定义css的pdf。
我们不仅有prince工具,还有许多其他的通过命令行或gui将html转换为pdf,例如
prince path/to/book.html --style path/to/book.css --output book.pdf它为我创建的pdf
Stack Overflow用户
发布于 2021-05-06 20:43:22
根据屏幕截图中页边距中的日期和URL,看起来您正在使用桌面web浏览器的“打印”功能。不幸的是,)目前。
如果您想自己生成PDF文件或纸张副本,请考虑使用专用于打印呈现的工具,如:
- WeasyPrint (免责声明:我曾经做过这件事)
- 王子
- (还有其他人,但我也不太了解他们)
如果你正在制作一个网站,并想控制它将如何被其他人的网页浏览器打印,恐怕你运气不好。
https://stackoverflow.com/questions/57710321
复制相似问题
腾讯云开发者

Copyright © 2013 - 2026 Tencent Cloud. All Rights Reserved. 腾讯云 版权所有
深圳市腾讯计算机系统有限公司 ICP备案/许可证号:粤B2-20090059 ![]() 粤公网安备44030502008569号
粤公网安备44030502008569号
腾讯云计算(北京)有限责任公司 京ICP证150476号 | 京ICP备11018762号