
ImageMagick:如何从掩码的每个区域得到一个像素?
如何使用ImageMagick从掩码的每个区域获取像素?
我现在可以这样得到不同区域的质心:

convert circles.jpg -define connected-components:area-threshold=800 -define connected-components:verbose=true -connected-components 8 null: | sed '1,2d;$d' | awk '{print $1 $3}' > circles_centroids.txt给出了这些坐标:
3994:668.1,373.8
660:145.2,161.5
7301:278.1,547.5
2973:666.8,372.6
49:143.6,156.0
顺便问一下,为什么我有五个坐标,而我只有三个圆圈?
然后,我在每个坐标上加了一个红点:
while IFS=: read -r n xy ; do
  mogrify -stroke red -strokewidth 3 -draw "stroke-linecap round line ${xy%,*},${xy#*,} ${xy%,*},$(bc<<<${xy#*,}+0.0001)" circles.jpg;
done < circles_centroids.txt
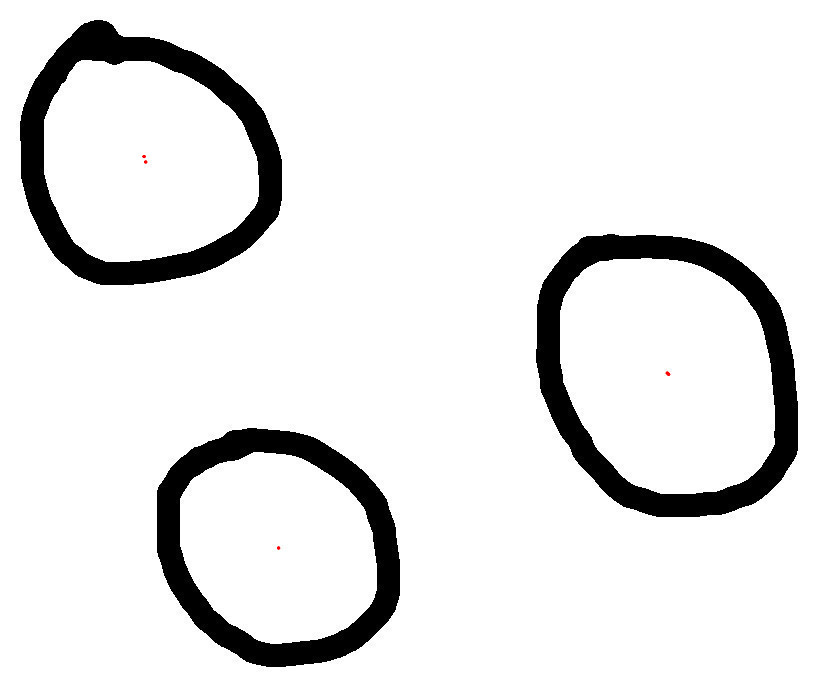
是否有可能,用同样的方式,得到一个坐标列表,每个区域只有一个像素,而不是质心?如果是,怎么做?
===编辑===
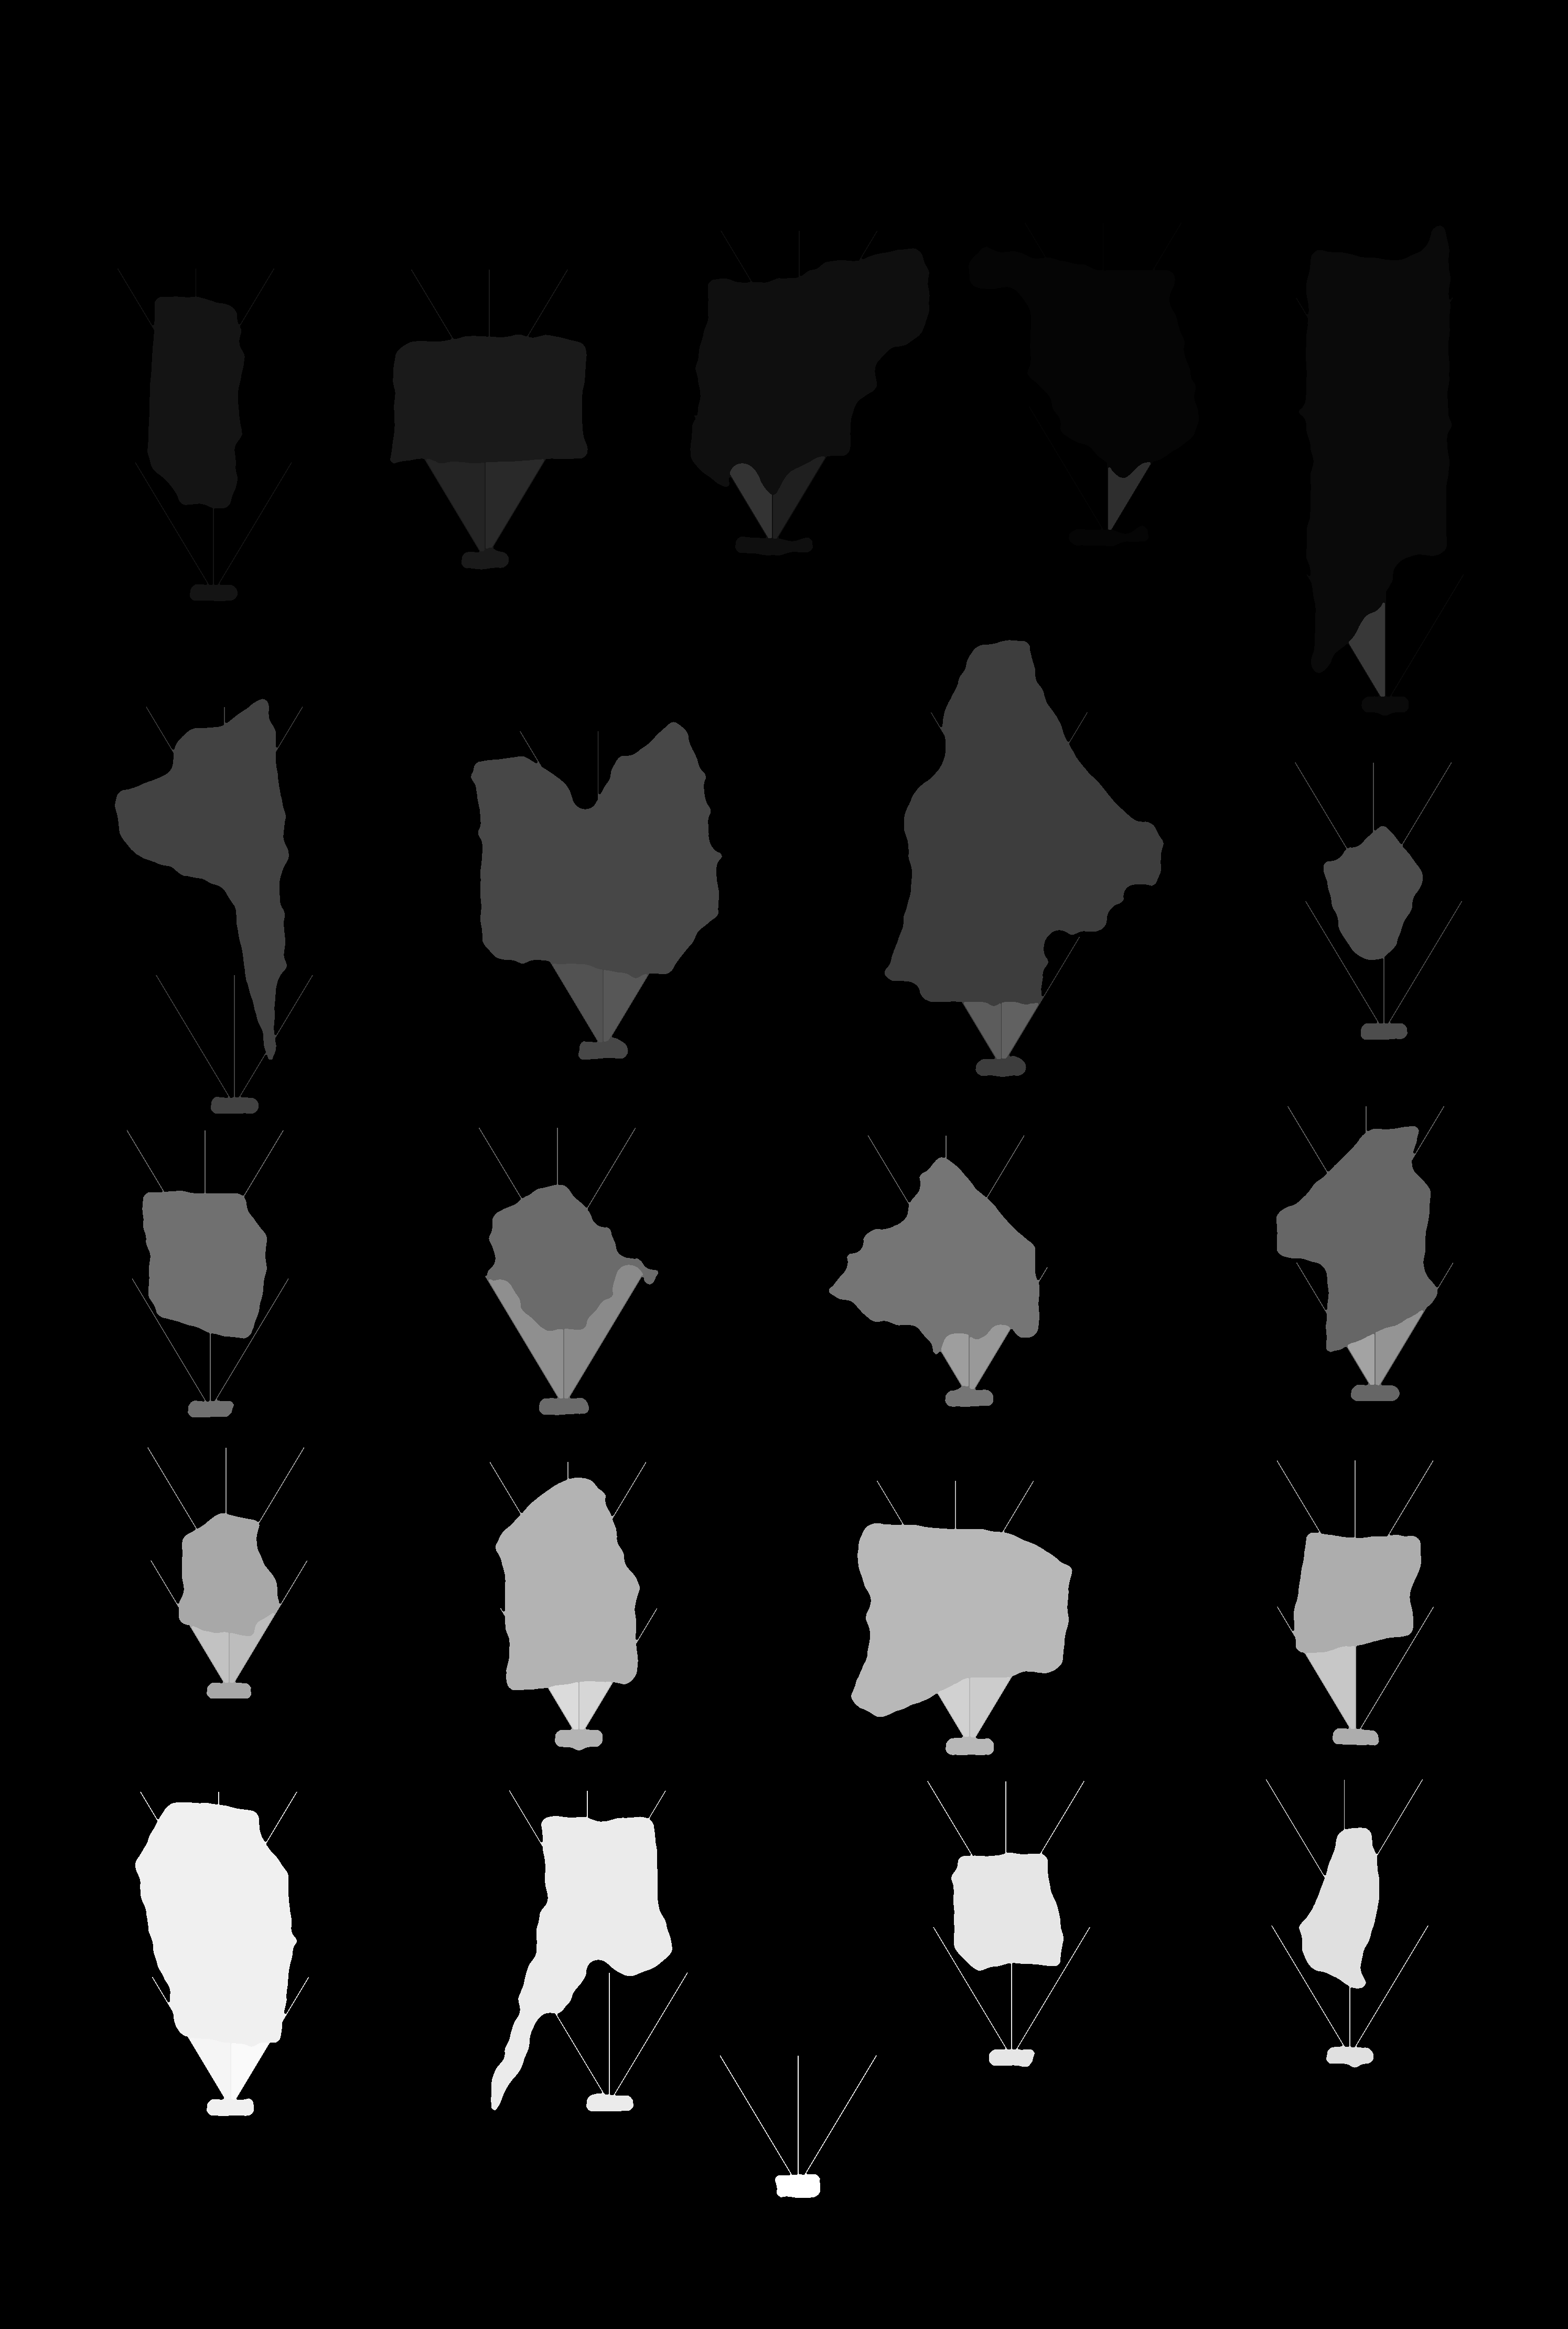
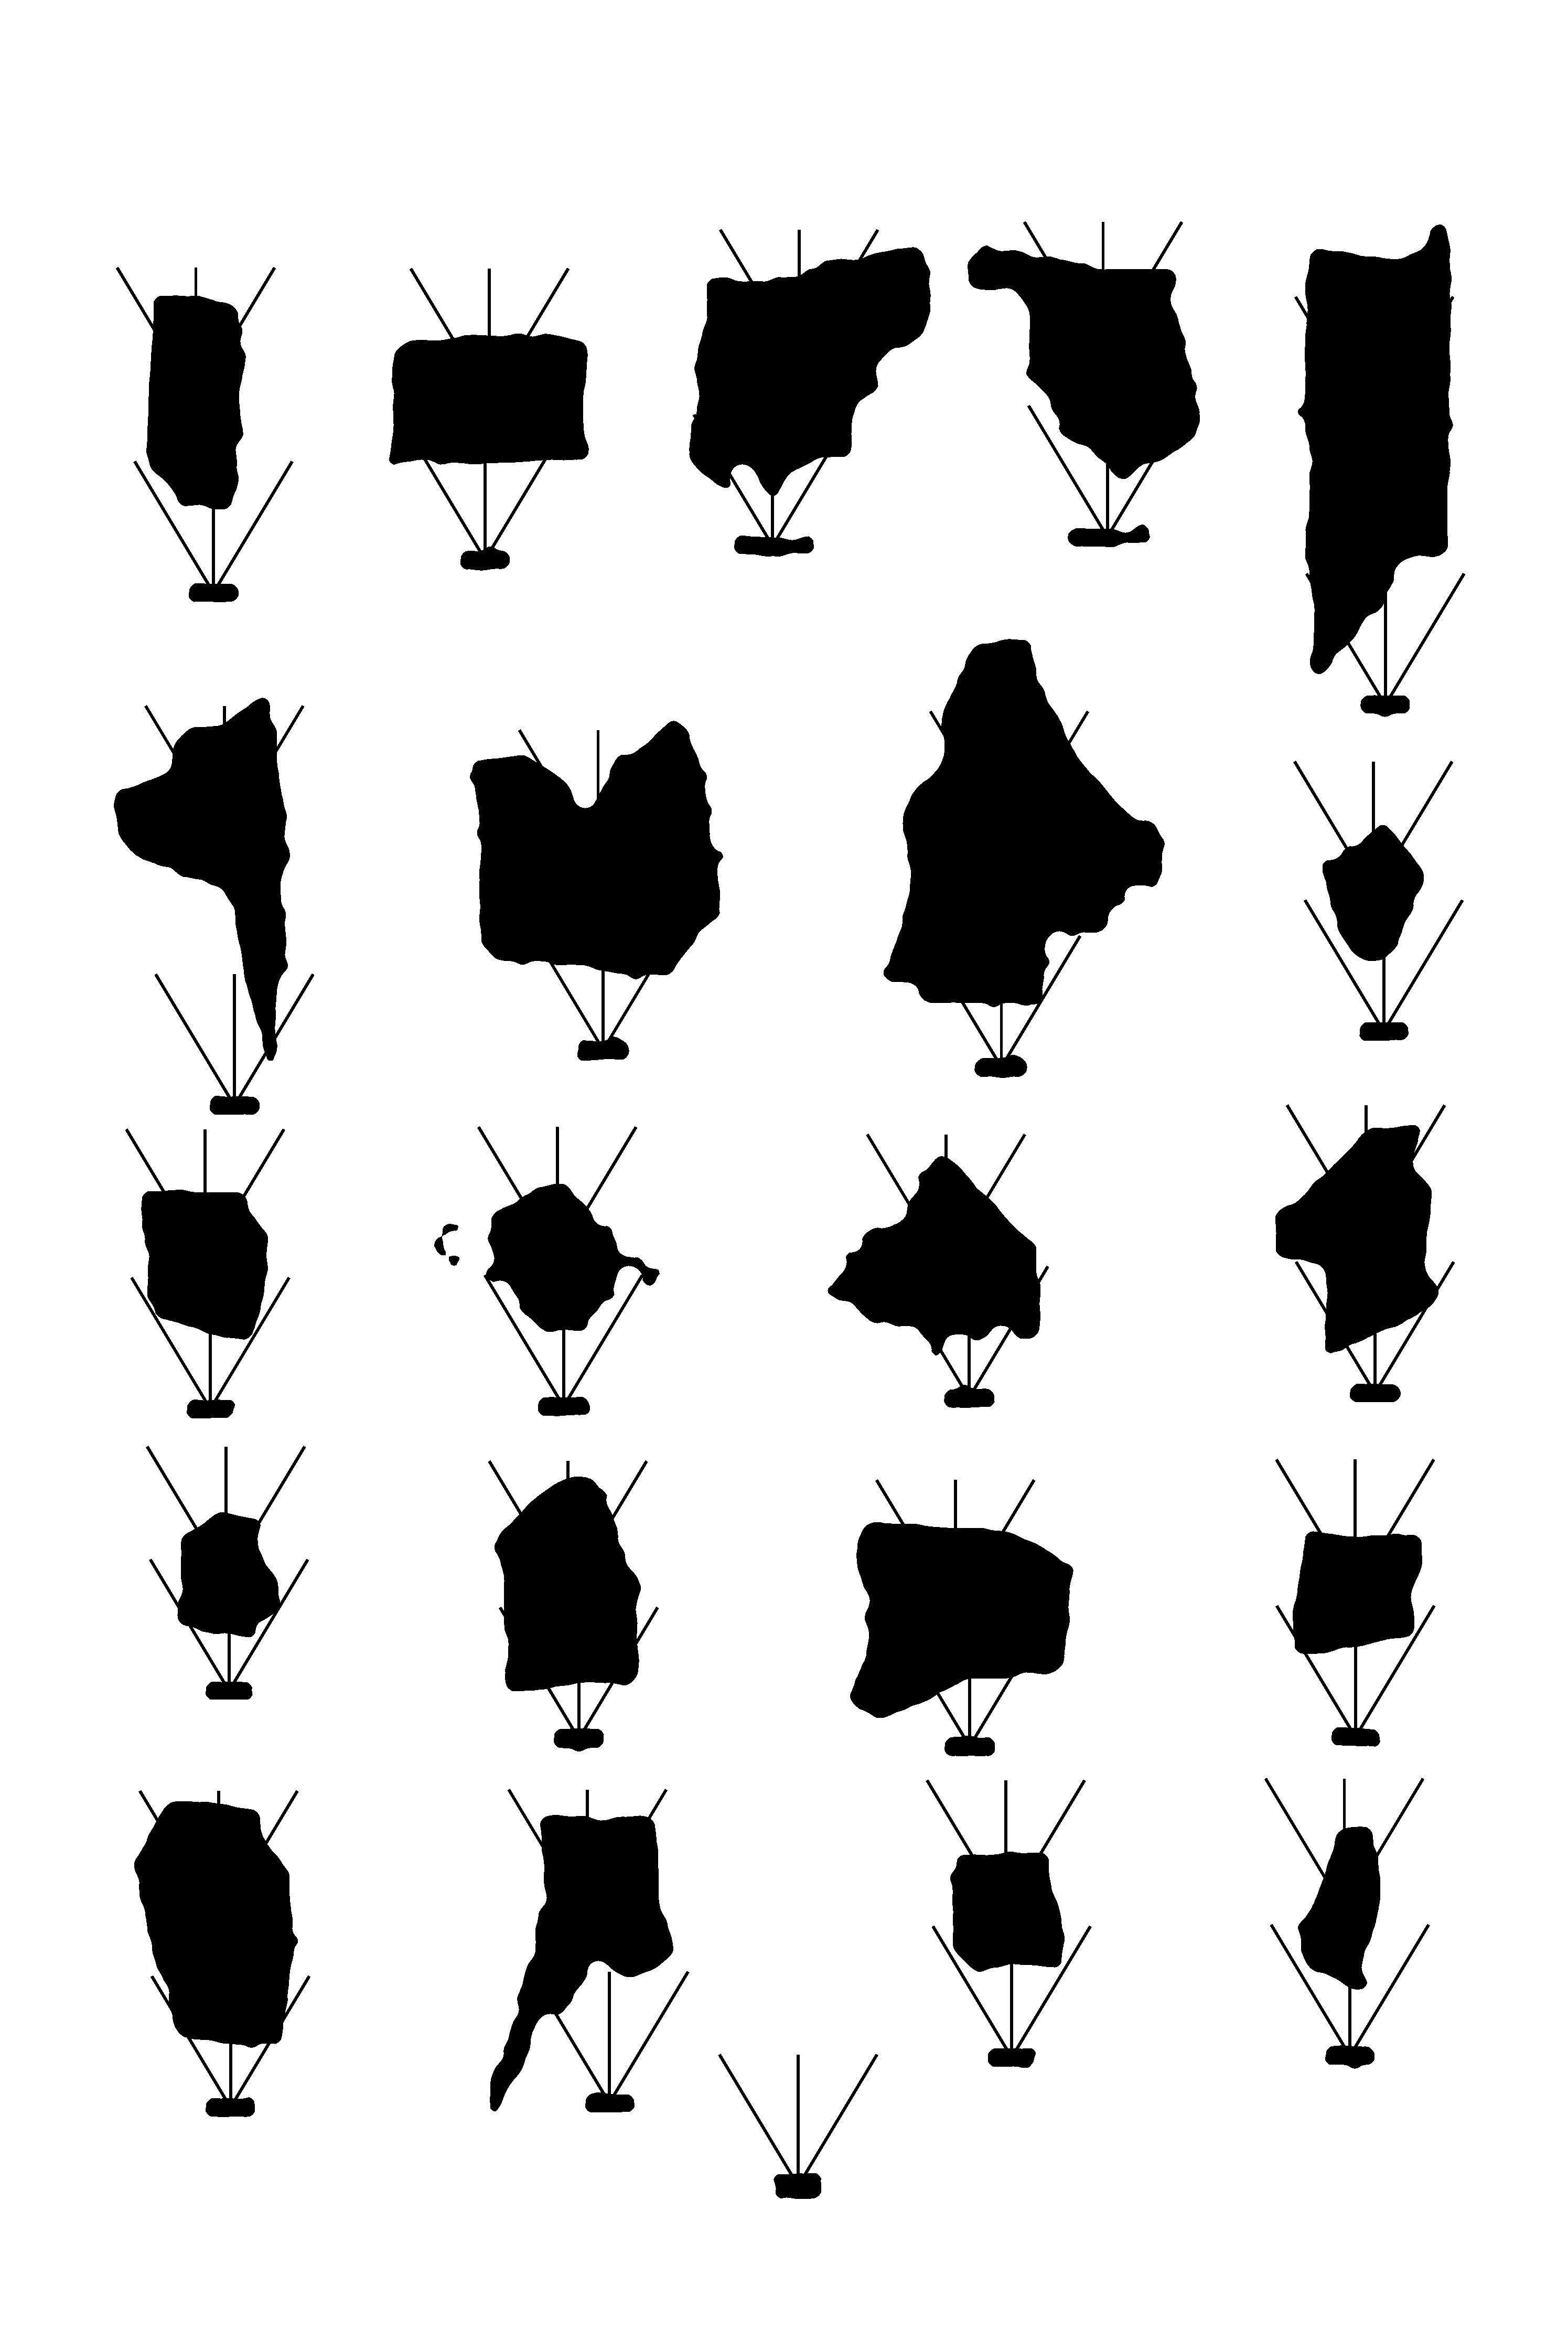
我的目标实际上是为下面的图像的每个组成部分获取一个掩码图像,每个区域的像素坐标将允许我使用填充边界选项来隔离每个区域,并为每个组件获取一个掩码。

我还尝试了“不同的灰色级别方法这里,但我得到了下面的无关联结果,在这里,我可以有不同的灰色为一个组成部分。
回答 2
Stack Overflow用户
发布于 2019-01-24 22:46:54
为了在Imagemagick中使用连接组件,您需要修复两个问题。
首先,您的图像是JPG,可能是反别名的,因此是灰度的。(JPG是有损压缩和更改值)。因此,它需要成为二进制,否则您将得到太多的区域,您想要做的。
其次,您需要使用-define连接组件:mean=true,以便使输出图像看起来像输入图像,而不具有与区域ID号相对应的灰度。
例如,如果我对您的输入图像执行以下操作,就会得到许多灰度区域。
convert image.jpg \
-define connected-components:verbose=true \
-define connected-components:area-threshold=0 \
-define connected-components:mean-color=true \
-connected-components 4 \
null:

  0: 818x687+0+0 420.4,339.2 393850 gray(255)
  6405: 213x232+560+260 667.8,373.2 38867 gray(255)
  1066: 212x197+46+61 145.7,161.0 32689 gray(255)
  11470: 197x189+180+453 278.4,547.6 27921 gray(255)
  4764: 259x279+536+236 667.8,372.1 14056 gray(0)
  86: 258x261+22+21 144.0,156.7 13604 gray(0)
  10418: 241x236+159+430 278.8,546.4 12060 gray(0)
  8450: 4x40+538+304 539.5,323.5 160 gray(2)
  14378: 2x57+158+496 158.5,523.8 113 gray(3)
  10247: 31x6+260+425 278.7,427.6 98 gray(255)
  5996: 32x5+106+257 121.2,259.2 89 gray(255)
  15035: 43x3+656+514 676.8,515.5 85 gray(0)
  14031: 41x4+659+490 678.3,492.3 81 gray(255)
  9942: 2x41+795+407 795.5,427.2 81 gray(4)
  3152: 2x32+22+144 22.5,159.5 64 gray(3)
  11234: 29x6+264+449 279.1,451.8 64 gray(0)
  15824: 4x16+378+568 379.5,575.5 64 gray(2)
  284: 28x5+127+33 140.6,35.3 61 gray(255)
  14375: 3x58+153+496 154.9,525.4 60 gray(254)
  14374: 1x56+154+496 154.0,523.5 56 gray(252)
  14377: 1x56+157+496 157.0,523.5 56 gray(0)
  14376: 1x56+156+496 156.0,523.5 56 gray(252)
  7795: 28x3+101+282 114.5,283.5 54 gray(0)
...
在上面的完整列表中,有3个以上的黑色区域。
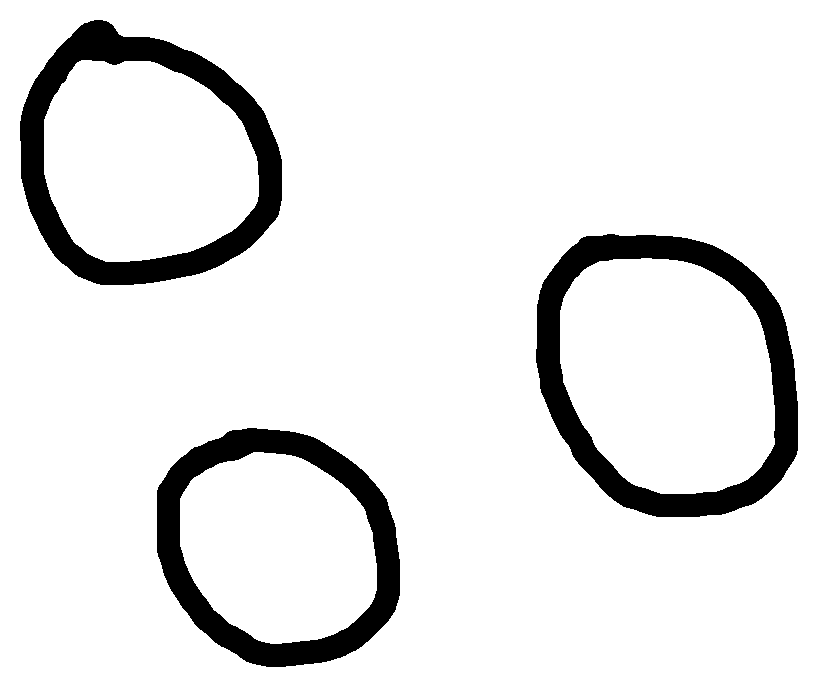
但是,如果我以50%的阈值来使图像纯黑白保存为PNG,那么我就得到了
convert image.jpg -threshold 50% -type bilevel \
-define connected-components:verbose=true \
-define connected-components:area-threshold=0 \
-define connected-components:mean-color=true \
-connected-components 4 \
null:
Objects (id: bounding-box centroid area mean-color):
  0: 818x687+0+0 419.2,339.3 401926 gray(255)
  4: 215x236+560+258 668.0,373.6 41506 gray(255)
  2: 215x202+44+60 145.1,161.4 34718 gray(255)
  6: 197x192+180+452 278.1,547.3 29700 gray(255)
  3: 262x283+536+234 666.8,372.5 19261 gray(0)
  1: 262x265+20+20 143.2,155.8 18388 gray(0)
  5: 243x239+157+428 277.3,546.1 16467 gray(0)
请注意,现在只有3个灰色(0),即黑色区域。如果有一些小黑点,你可以提高面积阈值,以消除它们。
现在,为了提取你们的区域,我会做以下工作。我将提取边框和质心,并在它们之间加上下划线,并放入数组。我会将阈值图像保存为连接组件的输出(这可以通过使用-define连接组件实现:mean=true)。然后,我会在阈值图像上循环,在提取质心后洪水填充区域(假设它们是封闭的),然后在提取边界框后进行裁剪。
输入:

box_cent_Arr=(`convert image.jpg -threshold 50% -type bilevel \
-define connected-components:verbose=true \
-define connected-components:mean-color=true \
-connected-components 4 \
image_t50.png | grep "gray(0)" | awk 'BEGIN {OFS="_"} {print $2,$3}'`)
num=${#box_cent_Arr[*]}
for ((i=0; i<num; i++)); do
bbox=`echo "${box_cent_Arr[$i]}" | cut -d\_ -f1`
centroid=`echo "${box_cent_Arr[$i]}" | cut -d\_ -f2`
convert image_t50.png -fill black -draw "color $centroid floodfill" -alpha off -crop $bbox +repage image_$i.png
done
缩影图像:
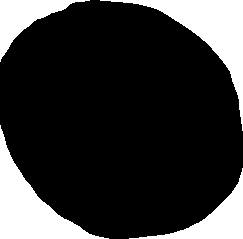
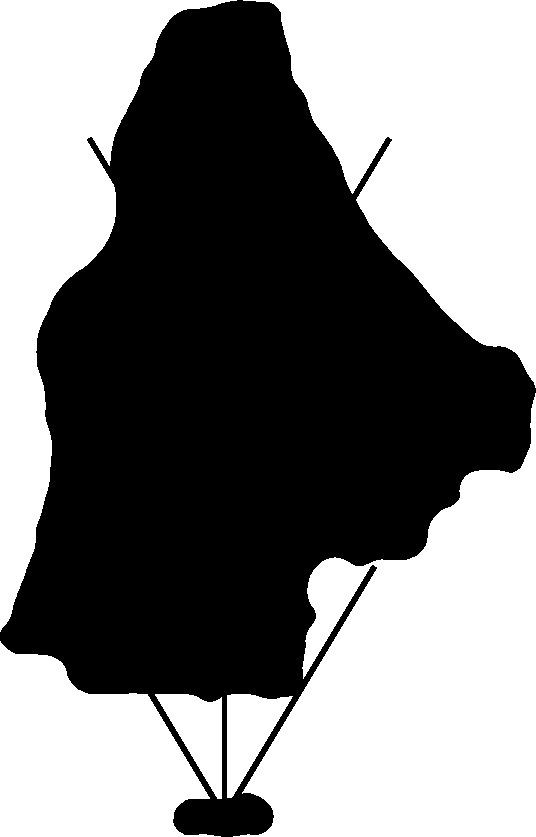
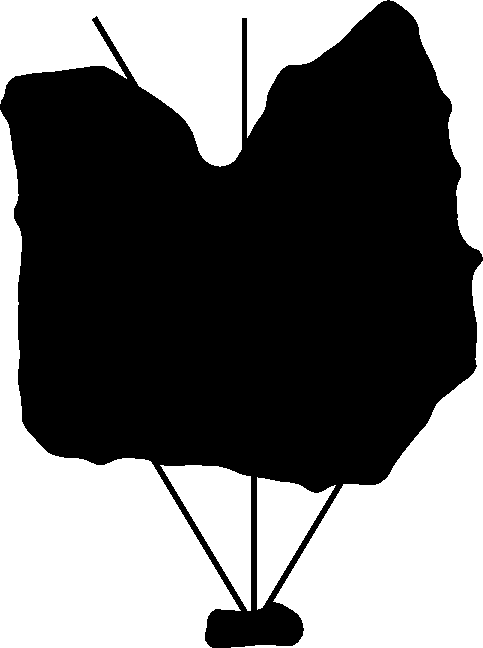
三个提取的填充区域:


关于你的第二个形象:
在这种情况下,您不需要填充它们,所以只需使用边框。但是,您需要增加区域阈值,以删除第三行/第二列区域旁边的小点。因此,在这里,我要做以下几点:
bboxArr=(`convert image.png -threshold 50% -type bilevel \
-define connected-components:verbose=true \
-define connected-components:area-threshold=1000 \
-define connected-components:mean-color=true \
-connected-components 4 \
image_t50.png | grep "gray(0)" | awk '{print $2}'`)
num=${#bboxArr[*]}
for ((i=0; i<num; i++)); do
bbox=`echo "${bboxArr[$i]}" | cut -d\_ -f1`
convert image_t50.png -crop $bbox +repage image_$i.png
done
结果是提取了22个区域(我编号为0到21)。例如,以下是前3条:

Stack Overflow用户
发布于 2019-01-24 08:53:42
最新答案
啊,我看这个问题比最初的例子要复杂一些!我用弗雷德·温豪斯( Fred )的multicrop 脚本做了实验,它似乎做得相当好。
我建议你联系弗雷德(@fmw42 42,在StackOverflow上)或私下通过他的网站讨论适合你的问题和许可。
我跑了:
./multicrop blobs.png result.png然后把结果蒙蔽到红色的背景上:
magick montage -background red -geometry +10+10 result-*png montage.png
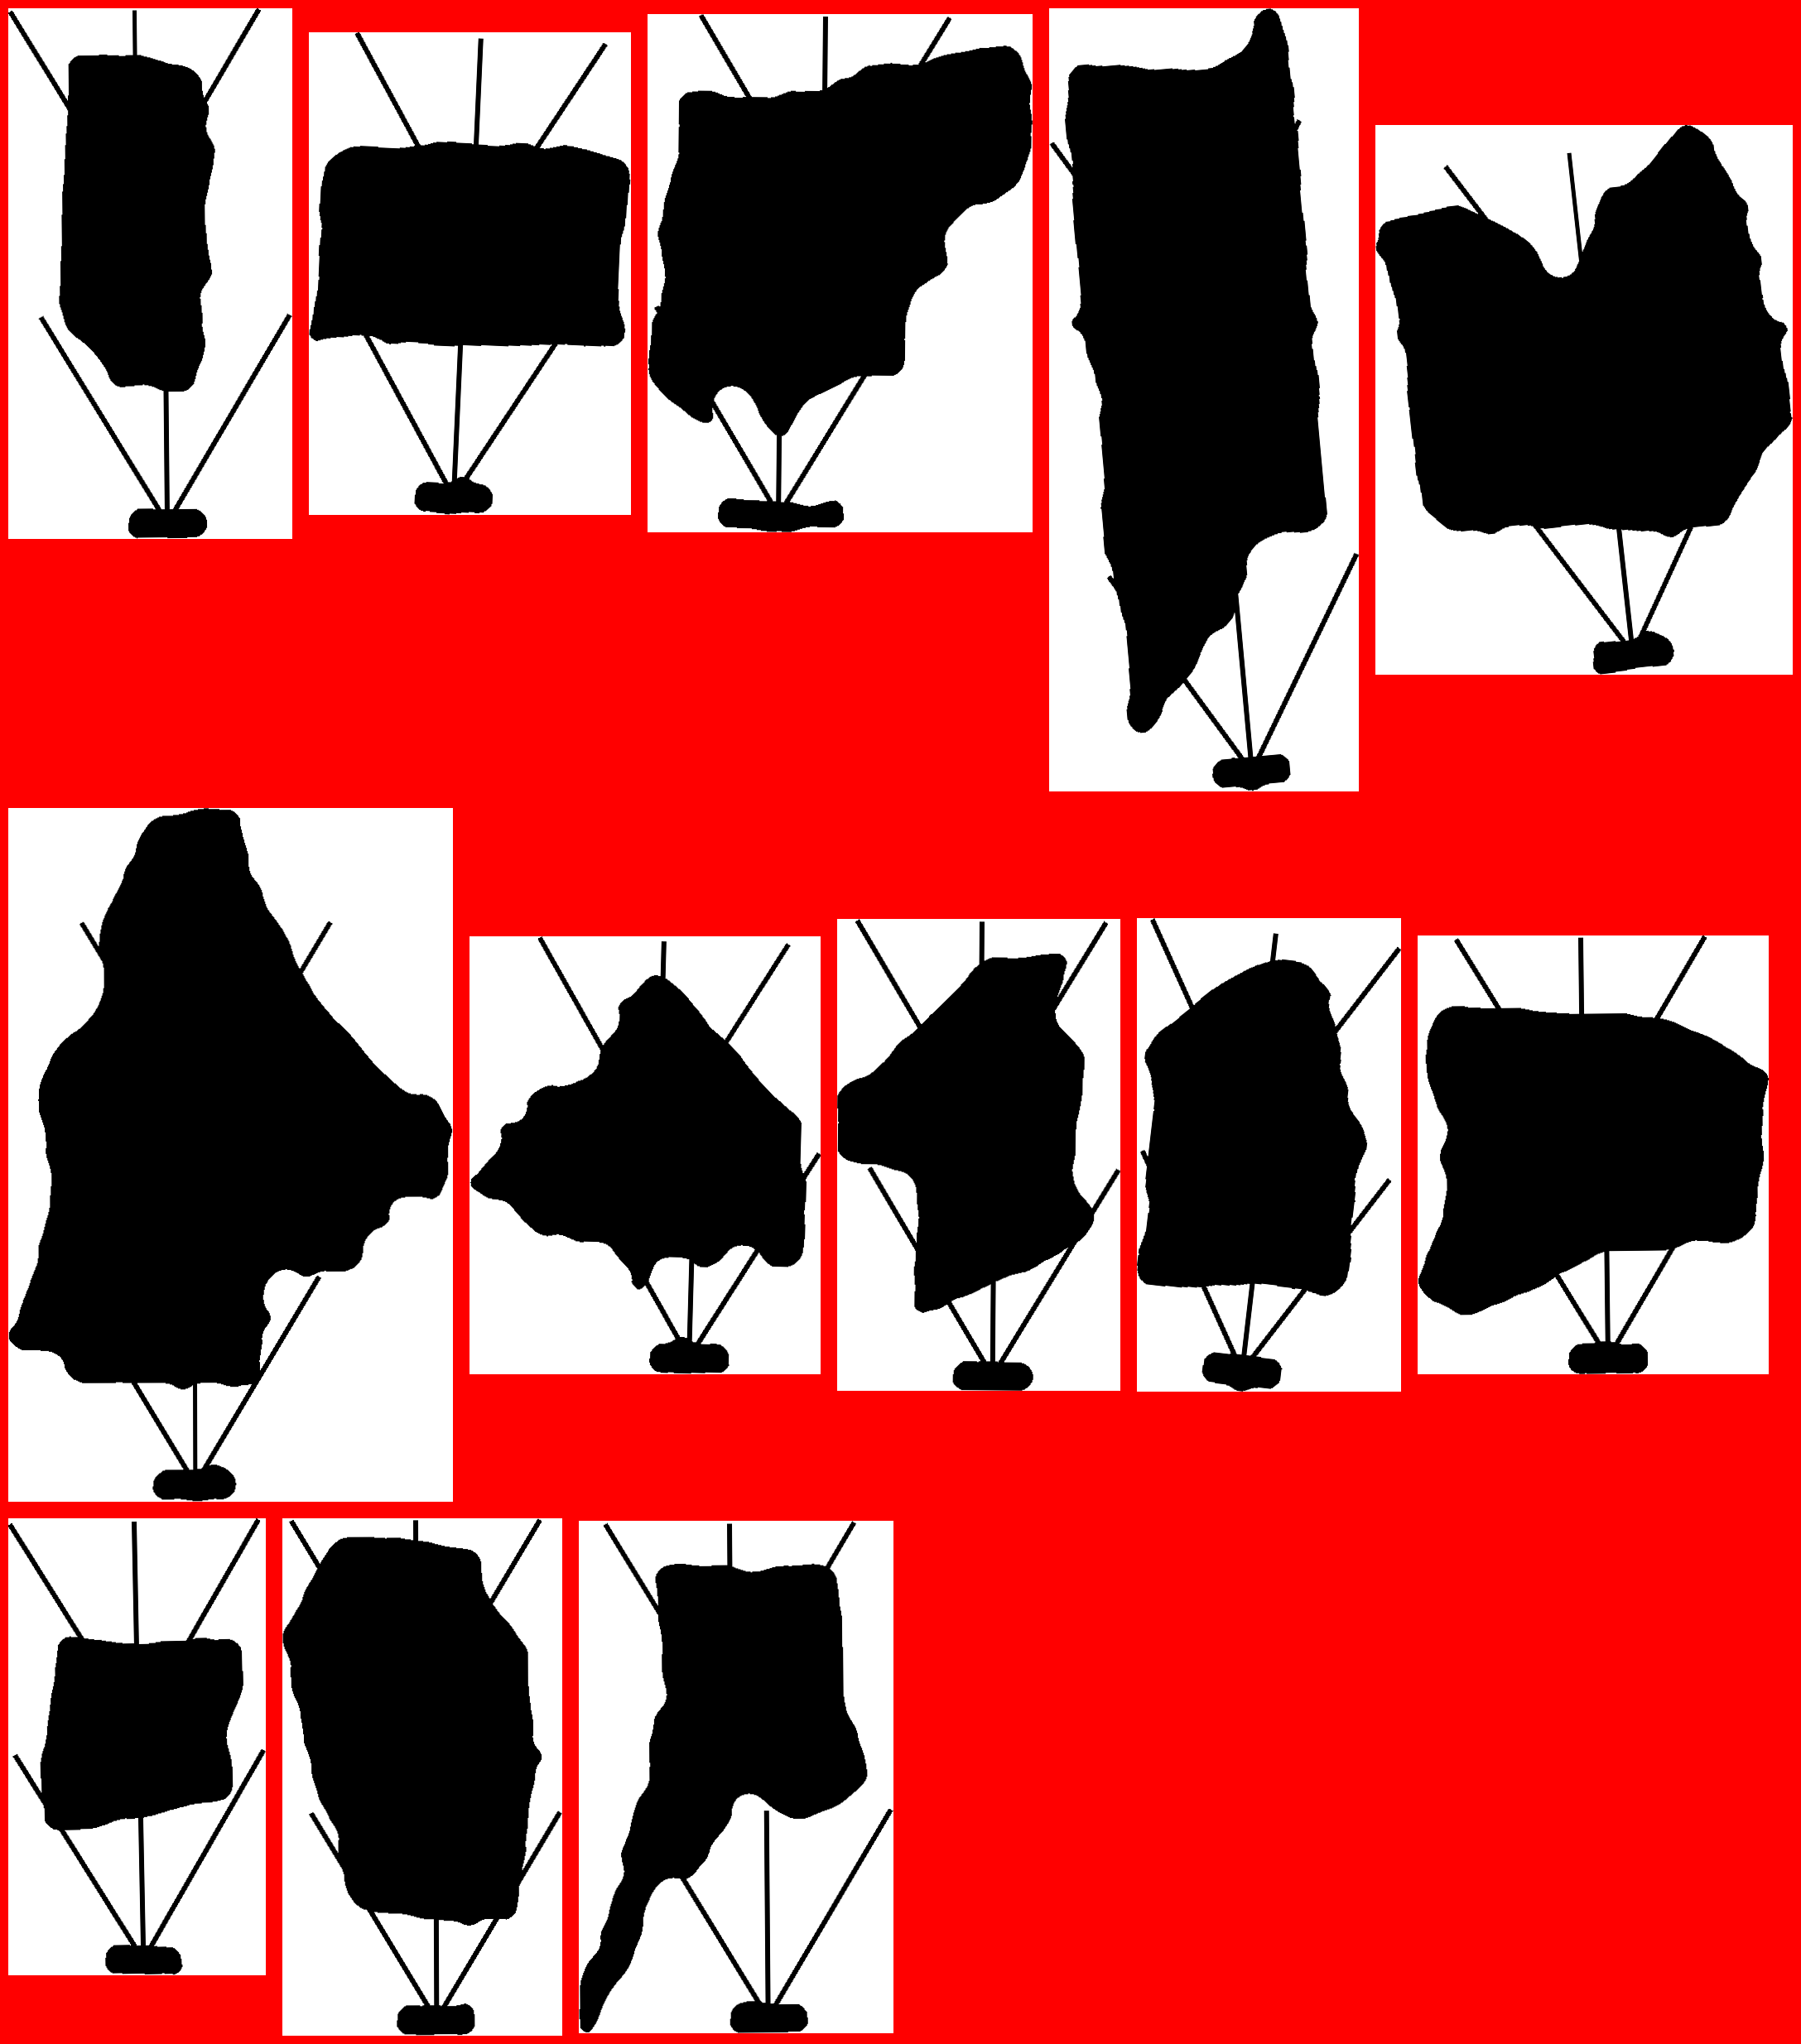
各种作物框的位置和大小显示在脚本的调试输出中:
width=2990; height=4440; wg=299; hg=444; num=8

299 444 0 none
598 444 0 none
897 444 0 none
1196 444 0 none
1495 444 0 none
1794 444 0 none
2093 444 0 none
2392 444 0 none
2691 444 0 none
299 888 1 red
Processing Image 0
Initial Crop Box: 339x639+221+509

598 888 0 none
897 888 1 red
Processing Image 1
Initial Crop Box: 381x577+742+511

1196 888 0 none
1495 888 1 red
Processing Image 2
Initial Crop Box: 461x624+1314+437

1794 888 0 none
2093 888 0 none
2392 888 0 none
2691 888 1 red
Processing Image 3
Initial Crop Box: 326x939+2468+428

299 1332 0 none
598 1332 0 none
897 1332 0 none
1196 1332 0 none
1495 1332 0 none
1794 1332 0 none
2093 1332 0 none
2392 1332 0 none
2691 1332 0 none
299 1776 0 none
598 1776 0 none
897 1776 0 none
1196 1776 1 red
Processing Image 4
Initial Crop Box: 483x648+896+1374

1495 1776 0 none
1794 1776 1 red
Processing Image 5
Initial Crop Box: 536x837+1685+1218

2093 1776 0 none
2392 1776 0 none
2691 1776 0 none
299 2220 0 none
598 2220 0 none
897 2220 0 none
1196 2220 0 none
1495 2220 0 none
1794 2220 1 red
Processing Image 6
Initial Crop Box: 422x523+1578+2161

2093 2220 0 none
2392 2220 0 none
2691 2220 1 red
Processing Image 7
Initial Crop Box: 342x568+2432+2105

299 2664 0 none
598 2664 0 none
897 2664 0 none
1196 2664 0 none
1495 2664 0 none
1794 2664 0 none
2093 2664 0 none
2392 2664 0 none
2691 2664 0 none
299 3108 0 none
598 3108 0 none
897 3108 0 none
1196 3108 1 red
Processing Image 8
Initial Crop Box: 325x555+931+2784

1495 3108 0 none
1794 3108 1 red
Processing Image 9
Initial Crop Box: 426x528+1621+2820

2093 3108 0 none
2392 3108 0 none
2691 3108 1 red
Processing Image 10
Initial Crop Box: 305x549+2432+2781

299 3552 1 red
Processing Image 11
Initial Crop Box: 336x623+256+3413

598 3552 0 none
897 3552 0 none
1196 3552 1 red
Processing Image 12
Initial Crop Box: 381x617+934+3410

1495 3552 0 none
1794 3552 0 none
2093 3552 0 none
2392 3552 0 none
2691 3552 0 none
299 3996 0 none
598 3996 0 none
897 3996 0 none
1196 3996 0 none
1495 3996 0 none
1794 3996 0 none
2093 3996 0 none
2392 3996 0 none
2691 3996 0 none如果您使用-m选项运行,您还将得到结果掩码:
原始答案
如果你在它找到的盒子里画,你就会立刻看到问题!
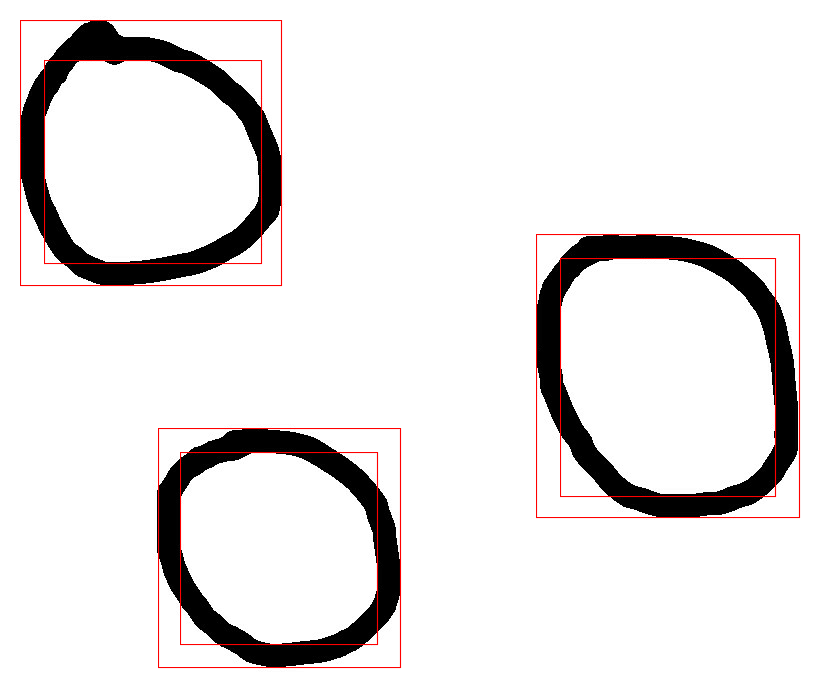
一种解决方案可能是查找gray(255)只获取白色区域,因此您可以这样做:
convert .. -connected-components ... | awk '/gray\(255\)/{print $1,$3}' > circles.txthttps://stackoverflow.com/questions/54341728
复制相似问题
腾讯云开发者

Copyright © 2013 - 2026 Tencent Cloud. All Rights Reserved. 腾讯云 版权所有
深圳市腾讯计算机系统有限公司 ICP备案/许可证号:粤B2-20090059 ![]() 粤公网安备44030502008569号
粤公网安备44030502008569号
腾讯云计算(北京)有限责任公司 京ICP证150476号 | 京ICP备11018762号