
灰度图像到矩阵,矩阵到灰度图像。
灰度图像到矩阵,矩阵到灰度图像。
提问于 2018-10-18 07:45:59
我试图从灰度图像中获取2D矩阵并对其进行修改,然后返回到灰度图像。
但是,当试图将图像转换为矩阵时,像素返回黑色值。
我怎样才能找到解决这个问题的办法?
您可以在代码下面找到图像。
Java代码:
public class MyImageProcessing {
private SampleModel sampleModel;
public int[][] compute(File file)
{
try
{
BufferedImage img= ImageIO.read(file);
Raster raster=img.getData();
sampleModel = raster.getSampleModel();
int w=raster.getWidth(),h=raster.getHeight();
int pixels[][]=new int[w][h];
for (int x=0;x<w;x++)
{
for(int y=0;y<h;y++)
{
pixels[x][y]=raster.getSample(x,y,0);
}
}
return pixels;
}
catch (Exception e)
{
e.printStackTrace();
}
return null;
}
public void getImage(int pixels[][])
{
int w=pixels.length;
int h=pixels[0].length;
WritableRaster raster= Raster.createWritableRaster(sampleModel, new Point(0,0));
for(int i=0;i<w;i++)
{
for(int j=0;j<h;j++)
{
raster.setSample(i,j,0,pixels[i][j]);
}
}
BufferedImage image=new BufferedImage(w,h,BufferedImage.TYPE_BYTE_GRAY);
image.setData(raster);
File output=new File("C:\\Users\\salam\\Pictures\\3.png");
try {
ImageIO.write(image,"png",output);
}
catch (Exception e)
{
e.printStackTrace();
}
}
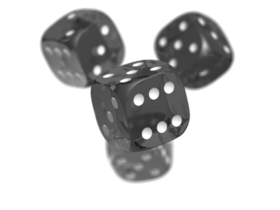
}原始图像:

从矩阵检索的图像:

回答 1
Stack Overflow用户
发布于 2018-10-18 12:25:26
尝试这段代码.
如果这不是您所需要的,那么也许您可以从我的文章中删除的是,代码应该总是整洁、可读的、适当的缩进和注释,所有这些都增加了程序的可理解性。
注:您的图像在转换为灰度时返回几乎相同的黑白图像,因为您的图像是黑白的,非常类似于二值图像。
我还可以建议OpenCV (https://opencv.org/),这是一个BSD许可,它简单,强大,并可用于Java -尽管我记得它是一个皮塔当安装在Ubuntu16.04。
import java.io.File;
import java.io.IOException;
import java.awt.image.BufferedImage;
import javax.imageio.ImageIO;

/**
 * This class converts images to grayscale color.
 */

public class GrayscaleConverter {

/**
 * Creates a new grayscaled BufferedImage object from the given source image
 * by averaging each pixels RGB value.
 *
 * @param inputImageAbsPath the absolute path of the image file, including its name and extension.
 * @return a BufferedImage object.
 */
private BufferedImage compute(String inputImageAbsPath) {

    System.out.println("... Converting source image to gray scale.");

    BufferedImage img = null; // image file

    // Read the source image or throw an exception
    try {
        img = ImageIO.read(new File(inputImageAbsPath));
    } catch(Exception e) {
        e.printStackTrace();
    }

    // Get the image width and height dimensions
    int width = img.getWidth();
    int height = img.getHeight();

    // Convert to grayscale by looping over pixels, beginning at top-most left coordinate (0,0)
    for (int y = 0; y < height; y++) { // y = rows
        for (int x = 0; x < width; x++) { // x = columns

            // Get the pixel value at this (x,y) coordinate
            int p = img.getRGB(x,y);

            // Extract the alpha, R, G, B values from pixel p
            int a = (p>>24) & 0xff; // Shift bits and unsign
            int r = (p>>16) & 0xff;
            int g = (p>>8) & 0xff;
            int b = p & 0xff;

            // Calculate average color (grayscale it)
            int avg = (r+g+b)/3;

            // Replace RGB value with avg
            p = (a<<24) | (avg<<16) | (avg<<8) | avg;
            img.setRGB(x, y, p);
        }
    }
    return img;
}

/**
 * Saves the converted grayscale image. This method builds the save path from the provided file name,
 * file extension, and absolute path of the folder that you want to save the image in.
 *
 * @param path the absolute path of the folder that you would like to save the image inside.
 * @param imageName the name you would like to save the image with.
 * @param imageFileType the image file extension, without the dot (.) preceding the image file type.
 * @param image the BufferedImage object returned from the compute method.
 */
private void saveImage(String path, String imageName, String imageFileType, BufferedImage image) {

    // Save or throw exception
    try {
        System.out.println("... Saving grayscale image to "
                + path.concat("\\").concat(imageName).concat(".").concat(imageFileType)); // save path displayed to user

        ImageIO.write(image,
                    imageFileType,
                    new File(path.concat("\\").concat(imageName).concat(".").concat(imageFileType)));

    } catch(Exception e) {
        e.printStackTrace();
    }
    System.out.println("... Image saved.");
}


// Driver
public static void main(String args[]) throws IOException {

    /*
     * Tested for .png and .jpg files. Both worked successfully.
     */

    // Test
    System.out.println("Testing GrayscaleConverter.\n");

    String input = "*source images absolute file path including name and extension*";
    String outputPath = "*absolute path to folder where you will save grayscale image in*";
    String outputFileName = "*save image with this name*";
    String outputFileType = "*save image with this file extension (no dot (.) e.g. png or jpg)*";

    GrayscaleConverter gsc = new GrayscaleConverter();
    BufferedImage convertedImage = gsc.compute(input);
    gsc.saveImage(outputPath, outputFileName, outputFileType, convertedImage );

    System.out.println("\nTest complete.");
}
}
提供的输入映像:

输出图像:

另一个示例输入图像:

另一个示例输出映像:
我用.png和.jpg图像文件测试了我的程序,它成功了。祝好运。
页面原文内容由Stack Overflow提供。腾讯云小微IT领域专用引擎提供翻译支持
原文链接:
https://stackoverflow.com/questions/52869288
复制相关文章
相似问题
腾讯云开发者

Copyright © 2013 - 2026 Tencent Cloud. All Rights Reserved. 腾讯云 版权所有
深圳市腾讯计算机系统有限公司 ICP备案/许可证号:粤B2-20090059 ![]() 粤公网安备44030502008569号
粤公网安备44030502008569号
腾讯云计算(北京)有限责任公司 京ICP证150476号 | 京ICP备11018762号