
Android开发:创建Splash屏幕的正确方法
我知道这已经被问过好几次了,但我真的想知道实现Android屏幕的正确方法。
1.我们应该创建一个SplashActivity布局并在SplashActivity中添加可运行的SplashActivity代码吗?
2.,还是,只需在Styles.xml下生成一个可绘制的xml文件并调用它?
我都试过了。但对我来说,对于初学者来说#1更难。
现在,我正在使用方法2开发一个启动屏幕。
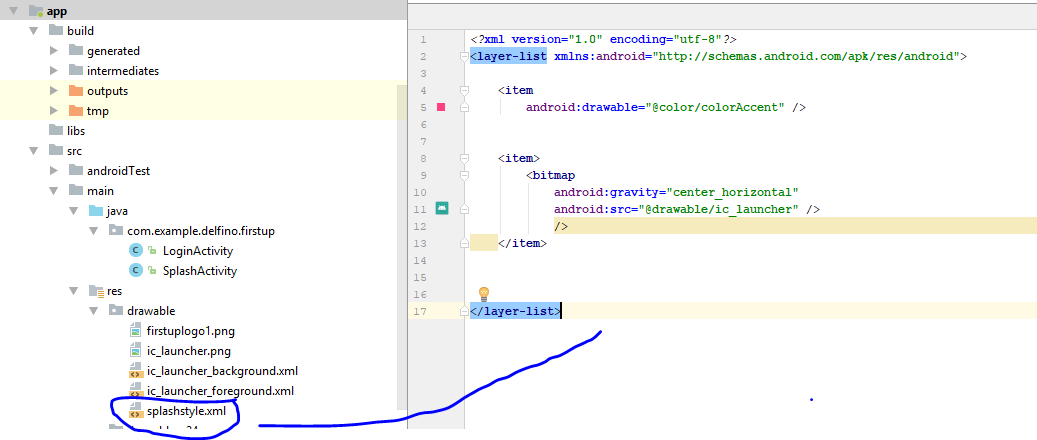
现在,我用Styles.xml的样式名叫SplashTheme。
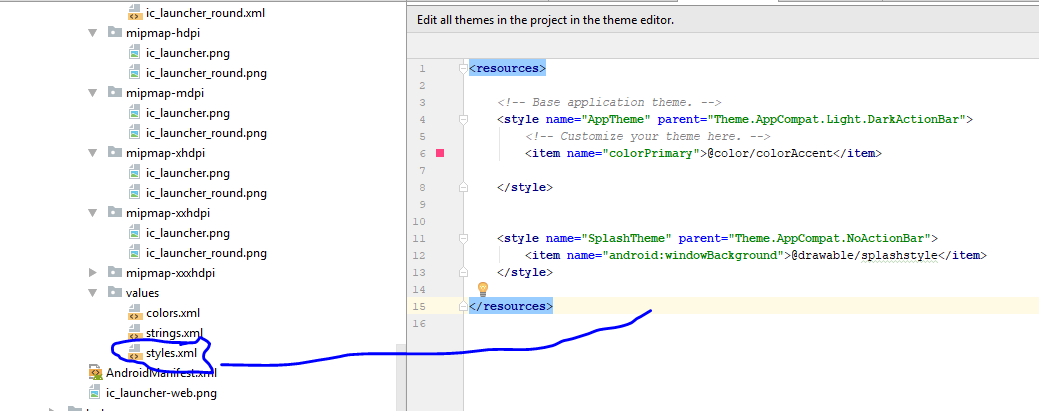
更新了我的AndroidManifest文件。
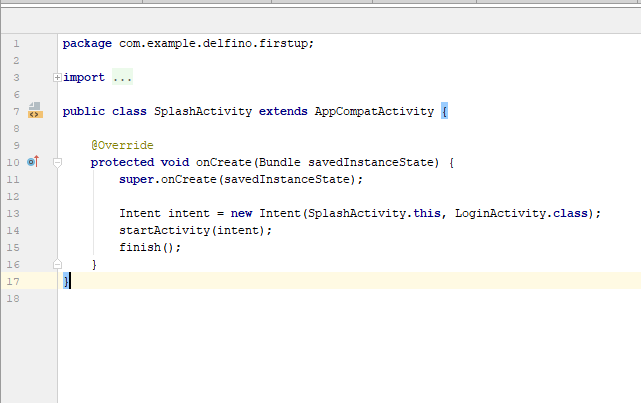
然后,这是我的SplashActivity.java。注意,这个类上没有可运行的代码。只是一个简单的意图。
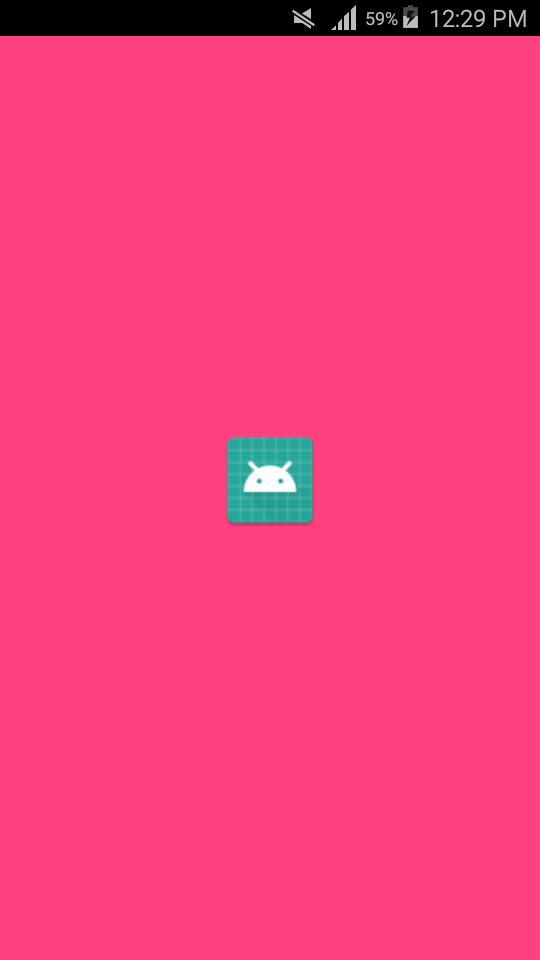
现在,这是最后的输出。因为这只是个练习。别指望有个漂亮的喷溅屏幕。
Question1:,现在,我想调整一下屏幕上的图像。调整它的大小。既然我没有使用xml布局,我该怎么做呢?
Question2:,我想在我的屏幕底部放一条短信。我该怎么做?是否有一种只使用splashstyle.xml或styles.xml添加文本的方法?
Question3:,我观察到我的飞溅屏幕显示的时间不长。是不是因为我的应用程序还没有更多的内容?我想让飞溅的屏幕显示3-5秒。如果不实现runnable,我该怎么做呢?
回答 5
Stack Overflow用户
发布于 2018-01-19 06:13:13
如果图像大小很大,我们可以像这样缩小大小
<?xml version="1.0" encoding="utf-8"?>
<layer-list xmlns:android="http://schemas.android.com/apk/res/android">

    <item android:drawable="@color/colorPrimary"></item>

    <item
        android:left="20dp"
        android:right="20dp"
        android:top="20dp"
        android:bottom="20dp">

        <bitmap

            android:gravity="center"
            android:src="@drawable/delete"></bitmap>
    </item>
</layer-list>Stack Overflow用户
发布于 2018-01-19 05:02:16
以下是启动屏幕的活动代码:
public class SplashScreenActivity extends AppCompatActivity {

    private final int SPLASH_TIME_OUT = 2000; Time in miliseconds, change it according to your needs

    @Override
    protected void onCreate(Bundle savedInstanceState) {
        super.onCreate(savedInstanceState);
        setContentView(R.layout.activity_splash_screen);

        new Handler().postDelayed(new Runnable() {

            /**
             * Showing splash screen with a timer. This will be useful when you
             * want to showcase your app logo or company logo
             */

            @Override
            public void run() {
                startActivity(new Intent(SplashScreenActivity.this, LoginCustomerActivity.class));
                finish();
            }
        }, SPLASH_TIME_OUT);

    } // End On-Create \\

} // End Class \\
以下是style.xml代码:
<!-- Base application theme. -->
    <style name="AppTheme" parent="Theme.AppCompat.Light.DarkActionBar">
        <!-- Customize your theme here. -->
        <item name="colorPrimary">@color/colorPrimary</item>
        <item name="colorPrimaryDark">@color/colorPrimaryDark</item>
        <item name="colorAccent">@color/colorAccent</item>
    </style>

<style name="Theme.AppCompat.Light.NoActionBar.FullScreen" parent="@style/Theme.AppCompat.Light">
        <item name="windowNoTitle">true</item>
        <item name="windowActionBar">false</item>
        <item name="android:windowFullscreen">true</item>
        <item name="android:windowContentOverlay">@null</item>
    </style>
舱单代码:
<activity
            android:name=".activity.SplashScreenActivity"
            android:screenOrientation="portrait"
            android:theme="@style/Theme.AppCompat.Light.NoActionBar.FullScreen">
            <intent-filter>
                <action android:name="android.intent.action.MAIN" />

                <category android:name="android.intent.category.LAUNCHER" />
            </intent-filter>
        </activity>
使用xml进行适当的布局,就更容易了。希望这能有所帮助
Stack Overflow用户
发布于 2018-01-19 05:14:11
尝尝这个,
SplashActivity
public class SplashActivity extends Activity {

    final private Context mContext = SplashActivity.this;
    final private static int SPLASH_TIME_OUT = 3500;
    private Handler handler;
    private Runnable runnable;

    @Override
    protected void onCreate(Bundle savedInstanceState) {
        super.onCreate(savedInstanceState);

        setContentView(R.layout.activity_splash);

        handler = new Handler();
        runnable = new Runnable() {
            @Override
            public void run() {
                Intent intent = new Intent(mContext, LoginActivity.class);
                startActivity(intent);
                finish();
            }
        };
        handler.postDelayed(runnable, SPLASH_TIME_OUT);
    }

    /* remove call back in on destroy */
    @Override
    protected void onDestroy() {
        if (handler != null) {
            handler.removeCallbacks(runnable);
        }
        super.onDestroy();
    }

    /* device back button click event */
    @Override
    public void onBackPressed() {
        if (handler != null) {
            handler.removeCallbacks(runnable);
        }
        super.onBackPressed();
    }
}
activity_splash.xml:
<?xml version="1.0" encoding="utf-8"?>
<RelativeLayout xmlns:android="http://schemas.android.com/apk/res/android"
    android:layout_width="match_parent"
    android:layout_height="match_parent"
    android:orientation="vertical">

    <ImageView
        android:layout_width="wrap_content"
        android:layout_height="wrap_content"
        android:layout_centerInParent="true"
        android:contentDescription="@string/Image"
        android:src="@drawable/ic_logo" />

</RelativeLayout>
AndroidManifest.xml
<manifest xmlns:android="http://schemas.android.com/apk/res/android"
package="com.example.packagename">

<application
    android:allowBackup="true"
    android:icon="@mipmap/ic_launcher"
    android:label="@string/app_name"
    android:roundIcon="@mipmap/ic_launcher_round"
    android:supportsRtl="true"
    android:theme="@style/AppTheme"
    android:name=".Halt">
    <activity android:name=".SplashActivity"
        android:theme="@style/SplashTheme">
        <intent-filter>
            <action android:name="android.intent.action.MAIN" />

            <category android:name="android.intent.category.LAUNCHER" />
        </intent-filter>
    </activity>
    <activity android:name=".LoginActivity"/>
</application>https://stackoverflow.com/questions/48334216
复制相似问题
腾讯云开发者

Copyright © 2013 - 2026 Tencent Cloud. All Rights Reserved. 腾讯云 版权所有
深圳市腾讯计算机系统有限公司 ICP备案/许可证号:粤B2-20090059 ![]() 粤公网安备44030502008569号
粤公网安备44030502008569号
腾讯云计算(北京)有限责任公司 京ICP证150476号 | 京ICP备11018762号