
Python +处理中的图像分割
我在试图运行这个图像分割代码时遇到了困难。
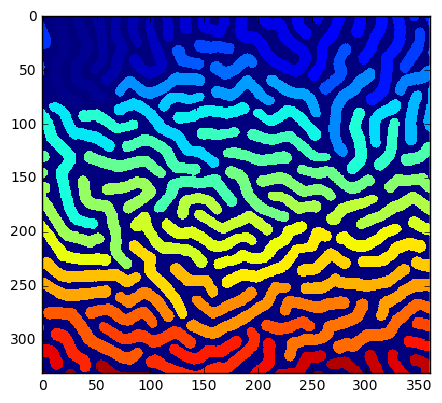
我的想法是拍一张像这样的照片:
并提取出所有的黑色骗子,并将每一个人随意保存为自己的形象。
看起来这段代码很有效,但由于某种原因,它并没有分割我的图像。
我得到的错误是:('segments detected:', 0)
下面是我使用的代码:
import os, sys
import numpy as np
from scipy import ndimage as ndi
from scipy.misc import imsave
import matplotlib.pyplot as plt

from skimage.filters import sobel, threshold_local
from skimage.morphology import watershed
from skimage import io


def open_image(name):
    filename = os.path.join(os.getcwd(), name)
    return io.imread(filename, as_grey=True)


def adaptive_threshold(image):
    print(type(image))
    print(image)
    block_size = 41
    binary_adaptive = threshold_local(image, block_size, offset=10)
    binary_adaptive = np.asarray(binary_adaptive, dtype=int)
    return np.invert(binary_adaptive) * 1.


def segmentize(image):
    # make segmentation using edge-detection and watershed
    edges = sobel(image)
    markers = np.zeros_like(image)
    foreground, background = 1, 2
    markers[image == 0] = background
    markers[image == 1] = foreground

    ws = watershed(edges, markers)

    return ndi.label(ws == foreground)


def find_segment(segments, index):
    segment = np.where(segments == index)
    shape = segments.shape

    minx, maxx = max(segment[0].min() - 1, 0), min(segment[0].max() + 1, shape[0])
    miny, maxy = max(segment[1].min() - 1, 0), min(segment[1].max() + 1, shape[1])

    im = segments[minx:maxx, miny:maxy] == index

    return (np.sum(im), np.invert(im))


def run(f):
    print('Processing:', f)

    image = open_image(f)
    processed = adaptive_threshold(image)
    segments = segmentize(processed)

    print('Segments detected:', segments[1])

    seg = []
    for s in range(1, segments[1]):
        seg.append(find_segment(segments[0], s))

    seg.sort(key=lambda s: -s[0])

    for i in range(len(seg)):
        imsave('segments/' + f + '_' + str(i) + '.png', seg[i][1])

folder = os.path.join(os.getcwd(), 'segments')
os.path.isfile(folder) and os.remove(folder)
os.path.isdir(folder) or os.mkdir(folder)
for f in sys.argv[1:]:
    run(f)
我还将提到我正在处理3.3.5中运行这个Python脚本,使用它作为我的草图文件:
import deadpixel.command.Command;

static final String BASH =
  platform == WINDOWS? "cmd /C " :
  platform == MACOSX? "open" : "xdg-open";

static final String CD = "cd ", PY_APP = "python ";
static final String AMP = " && ", SPC = " ";

static final String PY_DIR = "scripts/";
//static final String PY_FILE = PY_DIR + "abc.py";
static final String PY_FILE = PY_DIR + "segmenting.py";

static final String PICS_DIR = "images/";
static final String PICS_EXTS = "extensions=,png,jpg,jpeg,gif";

void setup() {
  final String dp = dataPath(""), py = dataPath(PY_FILE);
  final String prompt = BASH + CD + dp + AMP + PY_APP + py;

  final String pd = dataPath(PICS_DIR);
  final String pics = join(listPaths(pd, PICS_EXTS), SPC);

  final Command cmd = new Command(prompt + SPC + pics);
  println(cmd.command, ENTER);

  println("Successs:", cmd.run(), ENTER);
  printArray(cmd.getOutput());

  exit();
}
在处理过程中的一个新选项卡中:
https://github.com/GoToLoop/command/blob/patch-1/src/deadpixel/command/Command.java
回答 1
Stack Overflow用户
发布于 2017-07-15 22:13:02
快速调查就会发现这个问题:这里的这个函数
def adaptive_threshold(image):
    print(type(image))
    print(image)
    block_size = 41
    binary_adaptive = threshold_local(image, block_size, offset=10)
    binary_adaptive = np.asarray(binary_adaptive, dtype=int)
    return np.invert(binary_adaptive) * 1.
应该通过自适应阈值来创建图像的掩码,但这是错误的。
主要原因似乎是对threshold_local工作方式的误解:这段代码希望它返回一个二进制分段的输入映像版本,而实际上它返回一个threshold image,请参见解释这里。
然而,这并不是唯一的问题。对于您的示例中的图像,offset=10将threshold_local产生的阈值降低得太远了,因此整个图像将超过阈值。
下面是该函数的工作版本:
def adaptive_threshold(image):

    # Create threshold image
    # Offset is not desirable for these images
    block_size = 41
    threshold_img = threshold_local(image, block_size)

    # Binarize the image with the threshold image
    binary_adaptive = image < threshold_img

    # Convert the mask (which has dtype bool) to dtype int
    # This is required for the code in `segmentize` (below) to work
    binary_adaptive = binary_adaptive.astype(int)

    # Return the binarized image
return binary_adaptive如果代码是用这个函数运行的(使用python;据我所知,这个问题与处理无关),它返回Segments detected: 108并生成一个很好的分段:
plt.imshow(segments[0],interpolation='none')
plt.show()
边注:基于你如何表达你的问题,我是否正确地假设你没有自己写这段代码,而且你在这一领域的专业知识有限?
如果是这样的话,您可能有兴趣学习更多关于基于python的图像处理和分割的知识。最近,我在这个主题上运行了一个简短的课程,其中包括一个与您在这里使用的管道类似的完全不言自明的动手教程。材料是可公开访问的,因此可以随意查看。
编辑:
根据您的评论,这里有一个解决方案,应该允许程序以完整的路径作为输入来运行。
首先,删除所有这些:
folder = os.path.join(os.getcwd(), 'segments')
os.path.isfile(folder) and os.remove(folder)
os.path.isdir(folder) or os.mkdir(folder)
因此,只有这一点:
for f in sys.argv[1:]:
    run(f)
接下来,将其替换为:
    for i in range(len(seg)):
        imsave('segments/' + f + '_' + str(i) + '.png', seg[i][1])
通过这一点:
    # Get the directory name (if a full path is given)
    folder = os.path.dirname(f)

    # Get the file name
    filenm = os.path.basename(f)

    # If it doesn't already exist, create a new dir "segments"
    # to save the PNGs
    segments_folder = os.path.join(folder,"segments")
    os.path.isdir(segments_folder) or os.mkdir(segments_folder)

    # Save the segments to the "segments" directory
    for i in range(len(seg)):
imsave(os.path.join(segments_folder, filenm + '_' + str(i) + '.png'), seg[i][1]) 该解决方案可以处理仅文件输入(例如'test.png')和路径输入(例如'C:\Users\Me\etc\test.png')。
编辑2:
关于透明度,如果数组被保存为RGBA (MxNx4),则scipy.misc.imsave允许alpha层,请参见这里。
替换这个
imsave(os.path.join(segments_folder, filenm + '_' + str(i) + '.png'), seg[i][1]) 通过这个
        # Create an MxNx4 array (RGBA)
        seg_rgba = np.zeros((seg[i][1].shape[0],seg[i][1].shape[1],4),dtype=np.bool)

        # Fill R, G and B with copies of the image
        for c in range(3):
            seg_rgba[:,:,c] = seg[i][1]

        # For A (alpha), use the invert of the image (so background is 0=transparent)
        seg_rgba[:,:,3] = ~seg[i][1]

        # Save image
        imsave(os.path.join(segments_folder, filenm + '_' + str(i) + '.png'), seg_rgba)
编辑3:
用于保存到具有每个分割图像的单独子文件夹的不同目标文件夹中:
而不是这一行
folder = os.path.dirname(f)您可以指定目标文件夹,例如
folder = r'C:\Users\Dude\Desktop'(请注意r'...'格式,它生成一个原始字符串文字。)
接下来,替换这个
segments_folder = os.path.join(folder,"segments")通过这个
segments_folder = os.path.join(folder,filenm[:-4]+"_segments")为了更干净,换掉这个
imsave(os.path.join(segments_folder, filenm + '_' + str(i) + '.png'), seg_rgba) 通过这个
imsave(os.path.join(segments_folder, filenm[:-4] + '_' + str(i) + '.png'), seg_rgba) https://stackoverflow.com/questions/45112422
复制相似问题
腾讯云开发者

Copyright © 2013 - 2026 Tencent Cloud. All Rights Reserved. 腾讯云 版权所有
深圳市腾讯计算机系统有限公司 ICP备案/许可证号:粤B2-20090059 ![]() 粤公网安备44030502008569号
粤公网安备44030502008569号
腾讯云计算(北京)有限责任公司 京ICP证150476号 | 京ICP备11018762号