
RealSense OpenCV深度图像太暗
RealSense OpenCV深度图像太暗
提问于 2017-02-21 00:25:25
各位,
我有一个realsense SR300,但是当我在opencv窗口中显示我的深度图像时,它看起来太暗了。我怎么才能解决这个问题?当我运行realsense示例时,图像看起来很好,但是示例使用OpenGL。但是我的项目需要OpenCV。这是我的代码:
int main(int argc, char ** argv)
{
  // realsense camera setup
  rs::log_to_console(rs::log_severity::warn);
  // Create a context object. This object owns the handles to all connected realsense devices
  rs::context ctx;
  if (ctx.get_device_count() == 0)
  {
    throw std::runtime_error("No device detected. Is it plugged in?");
  }
  // Access the first available RealSense device
  rs::device * dev = ctx.get_device(0);
  // Configure depth to run at VGA resolution at 30 frames per second
  dev->enable_stream(rs::stream::depth, 640, 480, rs::format::z16, 30);
  rs::intrinsics depth_intrin;
  rs::format depth_format;
  depth_intrin = dev->get_stream_intrinsics(rs::stream::depth);
  depth_format = dev->get_stream_format(rs::stream::depth);
  cv::namedWindow("Send Display Image", CV_WINDOW_AUTOSIZE);

  /* Set callbacks prior to calling start(). */
  auto depth_callback = [depth_intrin, depth_format](rs::frame f)
  {
    cv::Mat image(cv::Size(640, 480), CV_16UC1,
      (void*)f.get_data(), cv::Mat::AUTO_STEP);
    cv::imshow("Send Display Image", image);
    cv::waitKey(1000/80);
  };
  /* callback to grab depth fream and publish it. */
  dev->set_frame_callback(rs::stream::depth, depth_callback);
  // Start streaming
  dev->start();
  While(1)
  {

  }
  return 0;
}
我不知道为什么我的形象如此黑暗。当我从ROS运行openni_launch时,我希望它看起来像kinect或Xtion
回答 2
Stack Overflow用户
回答已采纳
发布于 2017-02-21 13:59:17
编辑:
下面的规范化函数产生了一些闪烁:
- 我怀疑这是由于最大深度值闪烁。
- 最小深度值总是
0,因为当深度无效时使用该值,因此深度范围变为假。
相反,您应该使用以下内容:
void make_depth_histogram(const Mat &depth, Mat &normalized_depth) {
  normalized_depth = Mat(depth.size(), CV_8U);
  int width = depth.cols, height = depth.rows;

  static uint32_t histogram[0x10000];
  memset(histogram, 0, sizeof(histogram));

  for(int i = 0; i < height; ++i) {
    for (int j = 0; j < width; ++j) {
      ++histogram[depth.at<ushort>(i,j)];
    }
  }

  for(int i = 2; i < 0x10000; ++i) histogram[i] += histogram[i-1]; // Build a cumulative histogram for the indices in [1,0xFFFF]

  for(int i = 0; i < height; ++i) {
    for (int j = 0; j < width; ++j) {
      if (uint16_t d = depth.at<ushort>(i,j)) {
        int f = histogram[d] * 255 / histogram[0xFFFF]; // 0-255 based on histogram location
        normalized_depth.at<uchar>(i,j) = static_cast<uchar>(f);
      } else {
        normalized_depth.at<uchar>(i,j) = 0;
      }
    }
  }
}您所观察到的是因为深度流是在16位(rs::stream::z16)上编码的,而当显示时只使用8位。
你可以标准化你的深度图:
double min, max;
minMaxLoc(depth, &min, &max);
Mat depth_normalized;
double alpha = 255.0/(max-min);
depth.convertTo(depth_normalized, CV_8U, alpha, -min*alpha);或者使用一种颜色图来显示深度:make_depth_histogram()。
完整演示代码:
inline void make_depth_histogram(const Mat &depth, Mat &color_depth) {
  color_depth = Mat(depth.size(), CV_8UC3);
  int width = depth.cols, height = depth.rows;

  static uint32_t histogram[0x10000];
  memset(histogram, 0, sizeof(histogram));

  for(int i = 0; i < height; ++i) {
    for (int j = 0; j < width; ++j) {
      ++histogram[depth.at<ushort>(i,j)];
    }
  }

  for(int i = 2; i < 0x10000; ++i) histogram[i] += histogram[i-1]; // Build a cumulative histogram for the indices in [1,0xFFFF]

  for(int i = 0; i < height; ++i) {
    for (int j = 0; j < width; ++j) {
      if (uint16_t d = depth.at<ushort>(i,j)) {
        int f = histogram[d] * 255 / histogram[0xFFFF]; // 0-255 based on histogram location
        color_depth.at<Vec3b>(i,j) = Vec3b(f, 0, 255 - f);
      } else {
        color_depth.at<Vec3b>(i,j) = Vec3b(0, 5, 20);
      }
    }
  }
}

int main(int argc, char *argv[]) {
    // Create a context object. This object owns the handles to all connected realsense devices
    rs::context ctx;

    // Access the first available RealSense device
    rs::device * dev = ctx.get_device(0);

    // Configure Infrared stream to run at VGA resolution at 30 frames per second
    dev->enable_stream(rs::stream::depth, 640, 480, rs::format::z16, 30);

    // Start streaming
    dev->start();

    // Camera warmup - Dropped several first frames to let auto-exposure stabilize
    for(int i = 0; i < 30; i++)
       dev->wait_for_frames();

    // Creating OpenCV Matrix from a color image
    Mat depth(Size(640, 480), CV_16U, (void*)dev->get_frame_data(rs::stream::depth), Mat::AUTO_STEP);

    // Create a color depth
    Mat color_depth;
    make_depth_histogram(depth, color_depth);

    // Create a normalized depth
    double min, max;
    minMaxLoc(depth, &min, &max);
    Mat depth_normalized;
    double alpha = 255.0/(max-min);
    depth.convertTo(depth_normalized, CV_8U, alpha, -min*alpha);

    // Display in a GUI
    imshow("Display normalized depth", depth_normalized);
    imshow("Display color depth", color_depth);

    waitKey(0);

    return 0;
}Stack Overflow用户
发布于 2017-05-17 14:52:28
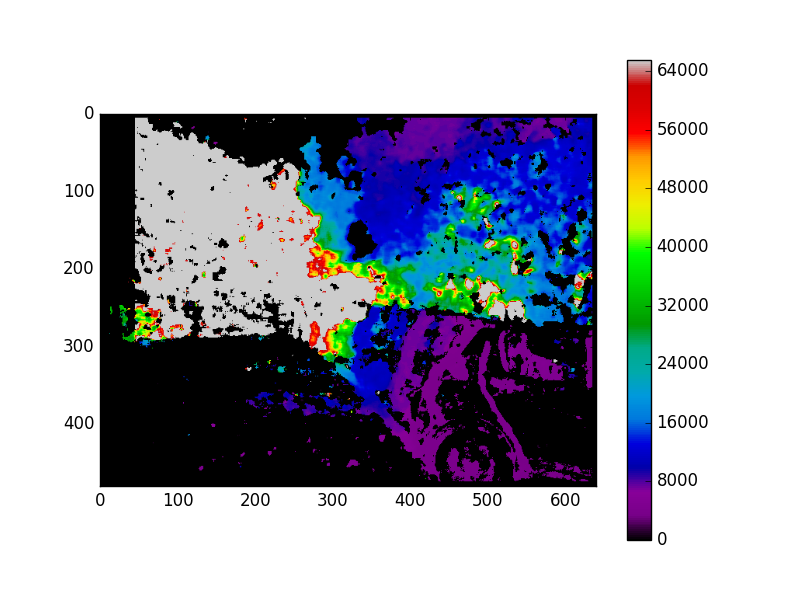
我为这个问题找到的唯一令人满意的解决办法是:
- 将图像保存为PNG文件。(PNG支持保存16位图像)
- 使用
matplotlib在彩色地图中查看它: #!/usr/bin/python3 3将numpy作为np导入cv2导入sys从matplotlib导入printCoordinates(事件):x,y= event.xdata,如果x != None: print("X:",x,“Y:",y,”Value = ",imgnp.int(y),np.int(x)) img = cv2.imread(sys.argv1,cv2.CV_16UC1) #img = img/65535图= plt.figure() plt.imshow(img,cmap=‘nipy_谱’)img=fig.canvas.mpl_connect(按钮_press_event,printCoordinates) plt.colorbar() plt.show()
button_press_event将在单击的像素上打印精确的像素值。
RGB图像:
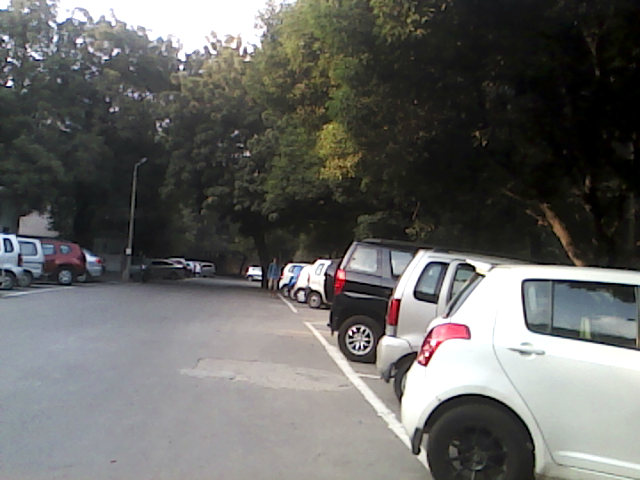
对应深度图像:
页面原文内容由Stack Overflow提供。腾讯云小微IT领域专用引擎提供翻译支持
原文链接:
https://stackoverflow.com/questions/42356562
复制相关文章
相似问题
腾讯云开发者

Copyright © 2013 - 2026 Tencent Cloud. All Rights Reserved. 腾讯云 版权所有
深圳市腾讯计算机系统有限公司 ICP备案/许可证号:粤B2-20090059 ![]() 粤公网安备44030502008569号
粤公网安备44030502008569号
腾讯云计算(北京)有限责任公司 京ICP证150476号 | 京ICP备11018762号