
在Go与覆盖信息(coveralls.io/Goveralls)中测试os.Exit场景
这个问题:如何在Go中测试os.exit场景 (以及其中投票最多的答案)列出了如何在go中测试os.Exit()场景。由于os.Exit()不易被截获,所以使用的方法是重新调用二进制文件并检查退出值。这个方法是由Andrew (围棋团队的核心成员之一)在本演示文稿幻灯片23上描述的;代码非常简单,并在下面全部复制。
相关的测试和主文件类似于这个(请注意,这对文件本身就是一个)
package foo

import (
    "os"
    "os/exec"
    "testing"
)

func TestCrasher(t *testing.T) {
    if os.Getenv("BE_CRASHER") == "1" {
        Crasher() // This causes os.Exit(1) to be called
        return
    }
    cmd := exec.Command(os.Args[0], "-test.run=TestCrasher")
    cmd.Env = append(os.Environ(), "BE_CRASHER=1")
    err := cmd.Run()
    if e, ok := err.(*exec.ExitError); ok && !e.Success() {
        fmt.Printf("Error is %v\n", e)
    return
    }
    t.Fatalf("process ran with err %v, want exit status 1", err)
}
和
package foo
import (
"fmt"
"os"
)
// Coverage testing thinks (incorrectly) that the func below is
// never being called
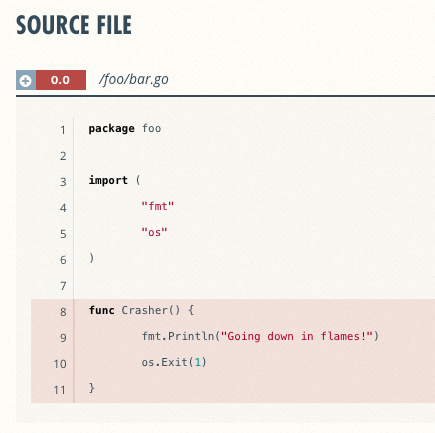
func Crasher() {
fmt.Println("Going down in flames!")
os.Exit(1)
}然而,这种方法似乎受到某些限制:
- 使用goveralls / coveralls.io进行覆盖率测试不起作用-例如,参见示例这里 (与上面的代码相同,但为了方便起见将其放入github中),它生成覆盖率测试这里,也就是说,它不记录正在运行的测试函数。注意,你不需要通过这些链接来回答这个问题--上面的例子会很好--它们只是用来说明如果你把上面的链接放到github中,然后一路经过特拉维斯到coveralls.io,会发生什么?
- 重新运行测试二进制文件似乎很脆弱。
具体来说,按照要求,这里有一个覆盖失败的屏幕截图(而不是链接);红色阴影表示就coveralls.io而言,Crasher()没有被调用。
有办法绕道吗?尤其是第一点。
在黄金层面,问题在于:
- Goveralls框架运行
go test -cover ...,它调用上面的测试。 - 上面的测试在OS参数中调用没有
-cover的-cover - 无条件地将
-cover等放在参数列表中是没有吸引力的,因为它随后将在不覆盖测试中运行覆盖测试(作为子进程),而解析参数列表以获得-cover等的存在似乎是一种繁重的解决方案。 - 即使我将
-cover等放在参数列表中,我的理解是,我将有两个覆盖输出写到同一个文件中,这是行不通的--这些输出需要某种方式的合并。我最接近的是这个黄金问题。
摘要
我想要的是一种简单的方法来运行go覆盖测试(最好是通过travis、goveralls和coveralls.io),在这两个测试案例中,测试例程与OS.exit()一起退出,并且注意到该测试的覆盖率。我非常希望它使用上面的re方法(如果可以的话),如果可以的话。
解决方案应该显示Crasher()的覆盖测试。将Crasher()排除在覆盖测试之外并不是一种选择,因为在现实世界中,我要做的是测试一个更复杂的函数,在某些条件下,它在很深的范围内调用log.Fatalf();我所要测试的是,针对这些条件的测试工作正常。
回答 2
Stack Overflow用户
发布于 2016-11-25 09:36:53
只要稍加重构,您就可以轻松地达到100%的覆盖率。
foo/bar.go
package foo

import (
    "fmt"
    "os"
)

var osExit = os.Exit

func Crasher() {
    fmt.Println("Going down in flames!")
    osExit(1)
}以及测试代码:foo/bar_test.go
package foo

import "testing"

func TestCrasher(t *testing.T) {
    // Save current function and restore at the end:
    oldOsExit := osExit
    defer func() { osExit = oldOsExit }()

    var got int
    myExit := func(code int) {
        got = code
    }

    osExit = myExit
    Crasher()
    if exp := 1; got != exp {
        t.Errorf("Expected exit code: %d, got: %d", exp, got)
    }
}运行go test -cover
Going down in flames!
PASS
coverage: 100.0% of statements
ok foo 0.002s是的,如果os.Exit()被显式调用,您可能会说这是有效的,但是如果os.Exit()被其他人调用,例如log.Fatalf(),该怎么办?
同样的技术也适用于此,您只需切换log.Fatalf()而不是os.Exit(),例如:
foo/bar.go相关部分
var logFatalf = log.Fatalf

func Crasher() {
    fmt.Println("Going down in flames!")
    logFatalf("Exiting with code: %d", 1)
}以及测试代码:TestCrasher() in foo/bar_test.go
func TestCrasher(t *testing.T) {
    // Save current function and restore at the end:
    oldLogFatalf := logFatalf
    defer func() { logFatalf = oldLogFatalf }()

    var gotFormat string
    var gotV []interface{}
    myFatalf := func(format string, v ...interface{}) {
        gotFormat, gotV = format, v
    }

    logFatalf = myFatalf
    Crasher()
    expFormat, expV := "Exiting with code: %d", []interface{}{1}
    if gotFormat != expFormat || !reflect.DeepEqual(gotV, expV) {
        t.Error("Something went wrong")
    }
}运行go test -cover
Going down in flames!
PASS
coverage: 100.0% of statements
ok foo 0.002sStack Overflow用户
发布于 2016-11-27 13:08:06
接口和模拟
使用Go接口可以创建可模拟的组合。类型可以将接口作为绑定依赖项。这些依赖项可以很容易地被适合于接口的模拟替换。
type Exiter interface {
    Exit(int)
}

type osExit struct {}

func (o* osExit) Exit (code int) {
    os.Exit(code)
}

type Crasher struct {
    Exiter
}

func (c *Crasher) Crash() {
    fmt.Println("Going down in flames!")
    c.Exit(1)
}
测试
type MockOsExit struct {
    ExitCode int
}

func (m *MockOsExit) Exit(code int){
    m.ExitCode = code
}

func TestCrasher(t *testing.T) {
    crasher := &Crasher{&MockOsExit{}}
    crasher.Crash() // This causes os.Exit(1) to be called
    f := crasher.Exiter.(*MockOsExit)
    if f.ExitCode == 1 {
        fmt.Printf("Error code is %d\n", f.ExitCode)
        return
    }
    t.Fatalf("Process ran with err code %d, want exit status 1", f.ExitCode)
}
缺点
原来的Exit方法仍然不会被测试,所以它应该只负责退出,仅此而已。
功能是一流的公民。
参数依赖性
功能是围棋中的一级市民。很多操作都允许使用函数,所以我们可以直接对函数进行一些操作。
使用“pass参数”操作,我们可以执行依赖项注入:
type osExit func(code int)

func Crasher(os_exit osExit) {
    fmt.Println("Going down in flames!")
    os_exit(1)
}
测试:
var exit_code int
func os_exit_mock(code int) {
     exit_code = code
}

func TestCrasher(t *testing.T) {

    Crasher(os_exit_mock) // This causes os.Exit(1) to be called
    if exit_code == 1 {
        fmt.Printf("Error code is %d\n", exit_code)
        return
    }
    t.Fatalf("Process ran with err code %v, want exit status 1", exit_code)
}
缺点
必须将依赖项作为参数传递。如果您有许多依赖项,那么params列表的长度可能会很大。
变量替换
实际上,可以使用“赋值到变量”操作来完成该操作,而无需将函数显式地作为参数传递。
var osExit = os.Exit

func Crasher() {
    fmt.Println("Going down in flames!")
    osExit(1)
}
测试
var exit_code int
func osExitMock(code int) {
    exit_code = code
}

func TestCrasher(t *testing.T) {
    origOsExit := osExit
    osExit = osExitMock
    // Don't forget to switch functions back!
    defer func() { osExit = origOsExit }()

    Crasher()
    if exit_code != 1 {
        t.Fatalf("Process ran with err code %v, want exit status 1", exit_code)
    }
}
disadvantages
这是隐含的,很容易崩溃。
设计说明
如果您计划在Exit下面声明某些逻辑,则退出逻辑必须使用else块或退出后的额外return隔离,因为return不会停止执行。
func (c *Crasher) Crash() {
    if SomeCondition == true {
        fmt.Println("Going down in flames!")
        c.Exit(1)  // Exit in real situation, invoke mock when testing
    } else {
        DoSomeOtherStuff()
    }

}https://stackoverflow.com/questions/40615641
复制相似问题
腾讯云开发者

Copyright © 2013 - 2026 Tencent Cloud. All Rights Reserved. 腾讯云 版权所有
深圳市腾讯计算机系统有限公司 ICP备案/许可证号:粤B2-20090059 ![]() 粤公网安备44030502008569号
粤公网安备44030502008569号
腾讯云计算(北京)有限责任公司 京ICP证150476号 | 京ICP备11018762号