
用OpenCV从图像中去除水印
用OpenCV从图像中去除水印
提问于 2015-08-20 18:03:12
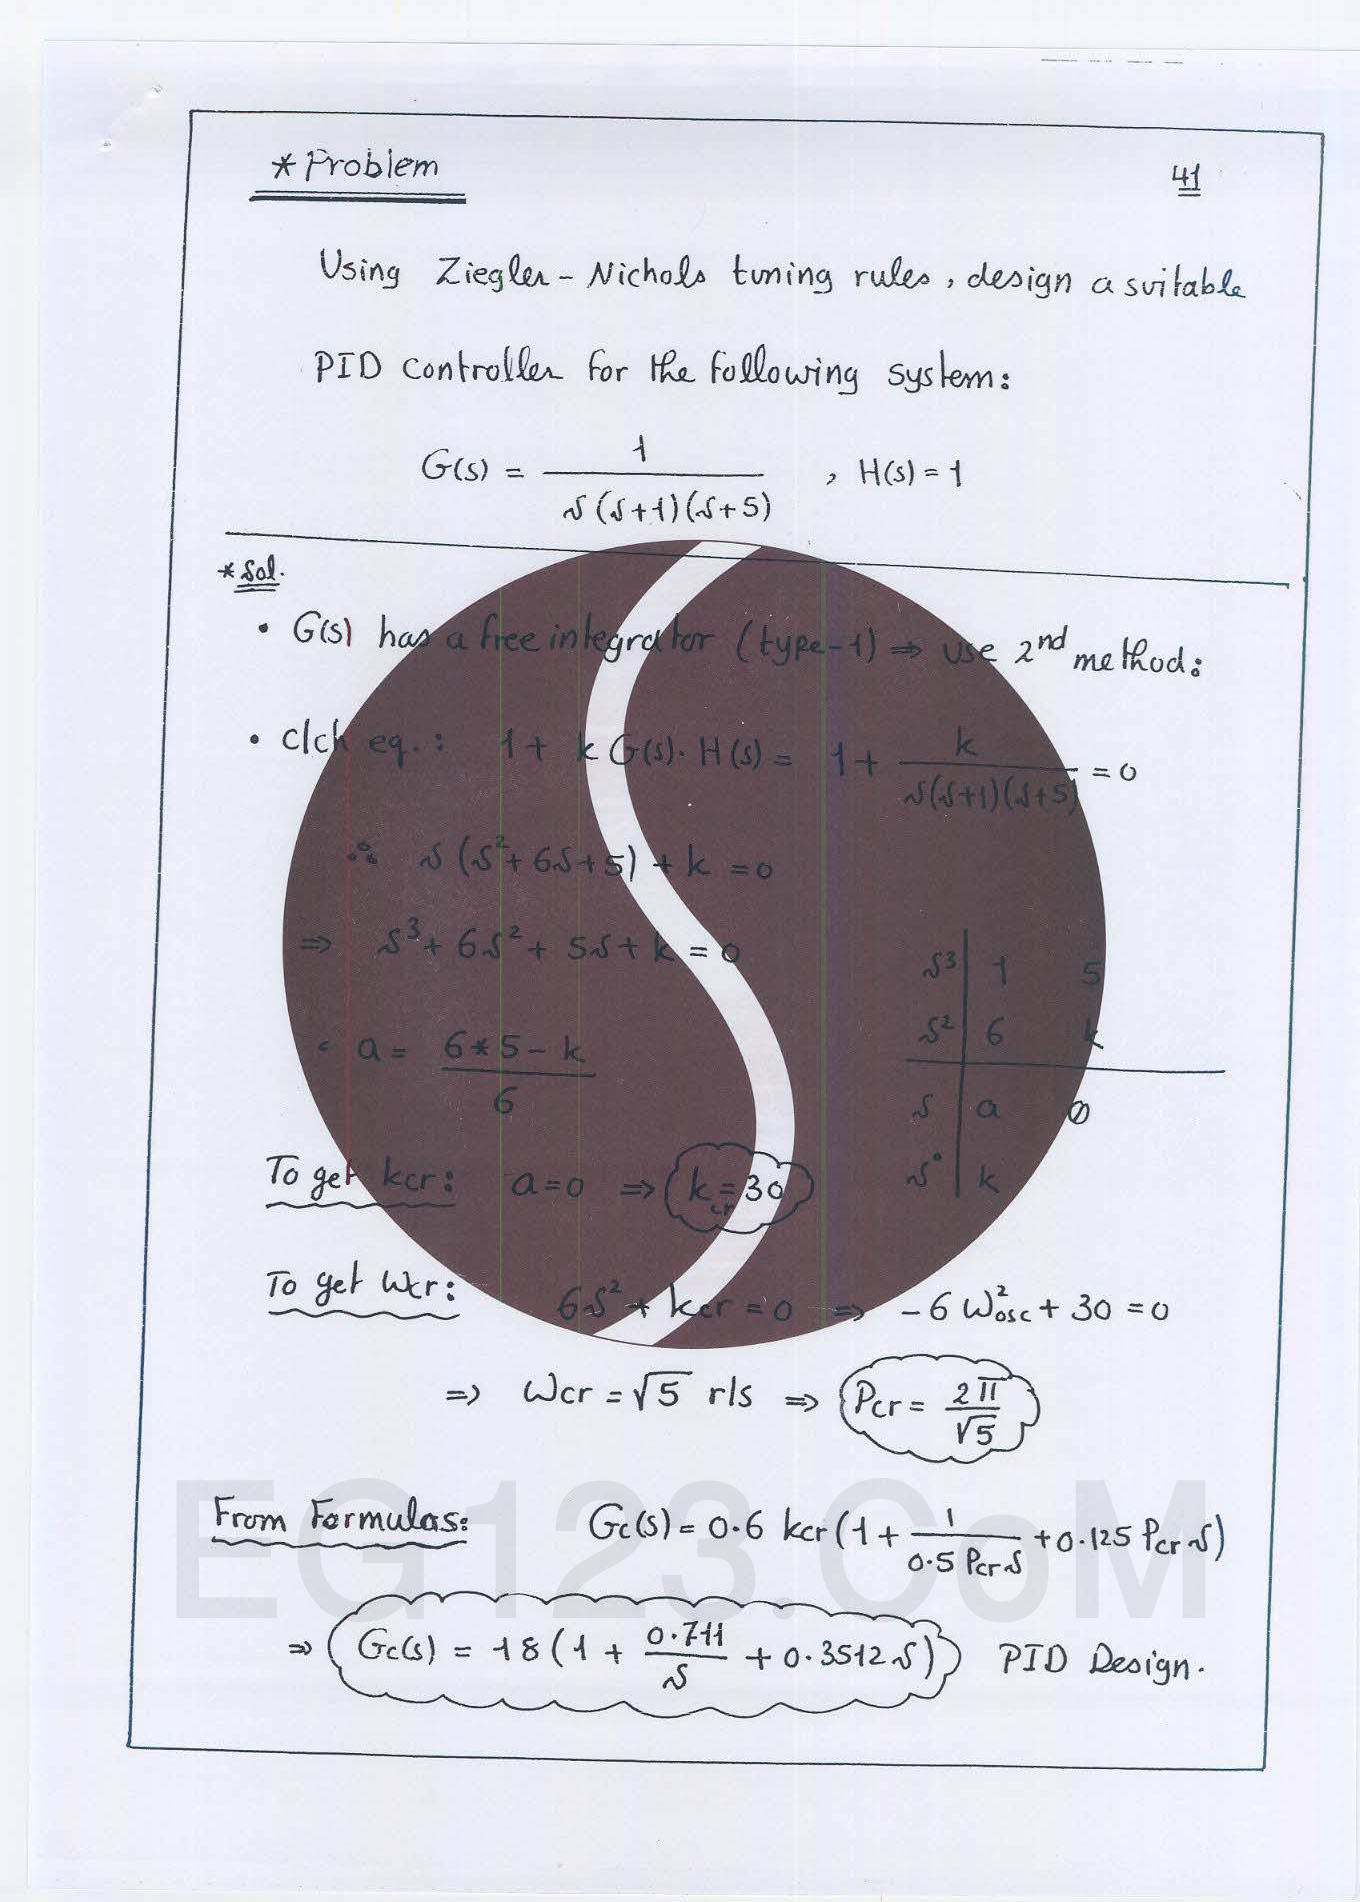
首先,我有这个图像,我想做一个应用程序,可以检测像它这样的图像,并从其中删除圆圈(水印)。
int main(){
Mat im1,im2,im3,gray,gray2,result;
im2=imread(" (2).jpg");
namedWindow("x",CV_WINDOW_FREERATIO);
imshow("x",im2);
//converting it to gray
cvtColor(im2,gray,CV_BGR2GRAY);
// creating a new image that will have the cropped ellipse
Mat ElipseImg(im2.rows,im2.cols,CV_8UC1,Scalar(0,0,0));
//detecting the largest circle
GaussianBlur(gray,gray,Size(5,5),0);
vector<Vec3f> circles;
HoughCircles(gray,circles,CV_HOUGH_GRADIENT,1,gray.rows/8,100,100,100,0);
uchar x;
int measure=0;int id=0;
for(int i=0;i<circles.size();i++){
if(cvRound(circles[i][2])>measure && cvRound(circles[i][2])<1000){
measure=cvRound(circles[i][2]);
id=i;
}
}
Point center(cvRound(circles[id][0]),cvRound(circles[id][1]));
int radius=cvRound(circles[id][2]);
circle(im2,center,3,Scalar(0,255,0),-1,8,0);
circle(im2,center,radius,Scalar(0,255,0),2,8,0);
ellipse(ElipseImg,center,Size(radius,radius),0,0,360,Scalar(255,255,255),-1,8);
cout<<"center: "<<center<<" radius: "<<radius<<endl;
Mat res;
bitwise_and(gray,ElipseImg,result);
namedWindow("bitwise and",CV_WINDOW_FREERATIO);
imshow("bitwise and",result);
// trying to estimate the Intensity of the circle for the thresholding
x=result.at<uchar>(cvRound(circles[id][0]+30),cvRound(circles[id][1]));
cout<<(int)x;
//thresholding the output image
threshold(ElipseImg,ElipseImg,(int)x-10,250,CV_THRESH_BINARY);
namedWindow("threshold",CV_WINDOW_FREERATIO);
imshow("threshold",ElipseImg);
// making bitwise_or
bitwise_or(gray,ElipseImg,res);
namedWindow("bitwise or",CV_WINDOW_FREERATIO);
imshow("bitwise or",res);
waitKey(0);
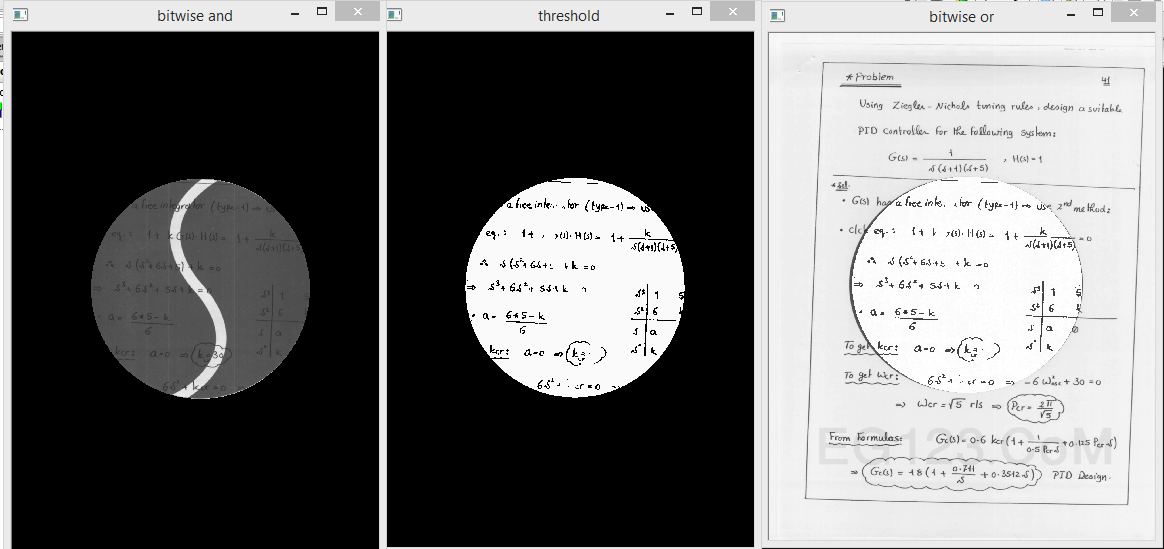
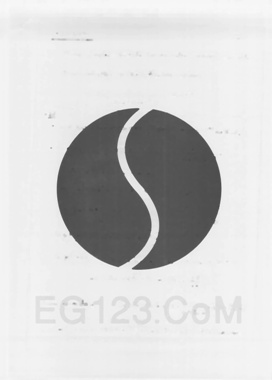
}到目前为止我做的是:
- 我把它转换成灰度
- 我用霍夫圆检测出最大的圆,然后在新的图像中形成一个半径相同的圆。
- 这个新的带灰度的圆圈(
bitwise_and)给了我一个只有那个圆的图像。 - 新图像的阈值
bitwise_or阈值的结果
我的问题是,这个圆圈内弯曲的白线上的任何黑色文本都没有出现。我试图通过使用像素值而不是阈值来删除颜色,但问题是一样的。那么有什么解决办法或建议吗?
以下是研究结果:
回答 2
Stack Overflow用户
回答已采纳
发布于 2015-08-21 13:02:05
我不确定在您的情况下,下面的解决方案是否可以接受。但我认为它的性能稍好,不关心水印的形状。
- 使用形态过滤删除笔画。这应该给你一个背景图像。
- 计算差分图像:差分=背景-初始值,阈值它:二进制=阈值(差)
- 对背景图像进行阈值化处理,提取水印覆盖的黑暗区域。

- 从初始图像中提取水印区域内的像素并对这些像素进行阈值化,然后将它们粘贴到先前的二值图像中。
以上是一个粗略的描述。下面的代码应该能更好地解释它。
Mat im = [load the color image here];

Mat gr, bg, bw, dark;

cvtColor(im, gr, CV_BGR2GRAY);

// approximate the background
bg = gr.clone();
for (int r = 1; r < 5; r++)
{
    Mat kernel2 = getStructuringElement(MORPH_ELLIPSE, Size(2*r+1, 2*r+1));
    morphologyEx(bg, bg, CV_MOP_CLOSE, kernel2);
    morphologyEx(bg, bg, CV_MOP_OPEN, kernel2);
}

// difference = background - initial
Mat dif = bg - gr;
// threshold the difference image so we get dark letters
threshold(dif, bw, 0, 255, CV_THRESH_BINARY_INV | CV_THRESH_OTSU);
// threshold the background image so we get dark region
threshold(bg, dark, 0, 255, CV_THRESH_BINARY_INV | CV_THRESH_OTSU);

// extract pixels in the dark region
vector<unsigned char> darkpix(countNonZero(dark));
int index = 0;
for (int r = 0; r < dark.rows; r++)
{
    for (int c = 0; c < dark.cols; c++)
    {
        if (dark.at<unsigned char>(r, c))
        {
            darkpix[index++] = gr.at<unsigned char>(r, c);
        }
    }
}
// threshold the dark region so we get the darker pixels inside it
threshold(darkpix, darkpix, 0, 255, CV_THRESH_BINARY | CV_THRESH_OTSU);

// paste the extracted darker pixels
index = 0;
for (int r = 0; r < dark.rows; r++)
{
    for (int c = 0; c < dark.cols; c++)
    {
        if (dark.at<unsigned char>(r, c))
        {
            bw.at<unsigned char>(r, c) = darkpix[index++];
        }
    }
}Stack Overflow用户
发布于 2019-09-24 11:29:07
# Import the necessary packages
import cv2
import numpy as np
def back_rm(filename):
# Load the image
img = cv2.imread(filename)
# Convert the image to grayscale
gr = cv2.cvtColor(img, cv2.COLOR_BGR2GRAY)
# Make a copy of the grayscale image
bg = gr.copy()
# Apply morphological transformations
for i in range(5):
kernel2 = cv2.getStructuringElement(cv2.MORPH_ELLIPSE,
(2 * i + 1, 2 * i + 1))
bg = cv2.morphologyEx(bg, cv2.MORPH_CLOSE, kernel2)
bg = cv2.morphologyEx(bg, cv2.MORPH_OPEN, kernel2)
# Subtract the grayscale image from its processed copy
dif = cv2.subtract(bg, gr)
# Apply thresholding
bw = cv2.threshold(dif, 0, 255, cv2.THRESH_BINARY_INV | cv2.THRESH_OTSU)[1]
dark = cv2.threshold(bg, 0, 255, cv2.THRESH_BINARY_INV | cv2.THRESH_OTSU)[1]
# Extract pixels in the dark region
darkpix = gr[np.where(dark > 0)]
# Threshold the dark region to get the darker pixels inside it
darkpix = cv2.threshold(darkpix, 0, 255, cv2.THRESH_BINARY | cv2.THRESH_OTSU)[1]
# Paste the extracted darker pixels in the watermark region
bw[np.where(dark > 0)] = darkpix.T
cv2.imwrite('final.jpg', bw)
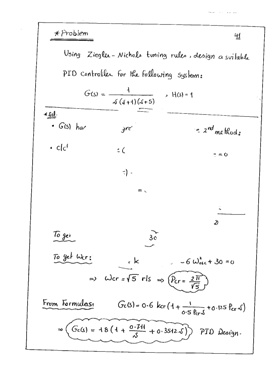
back_rm('watermark.jpg')最后的结果如下:
使用numpy处理时间非常短。
time python back_rm.py

real    0m0.391s
user    0m0.518s
sys     0m0.185s
页面原文内容由Stack Overflow提供。腾讯云小微IT领域专用引擎提供翻译支持
原文链接:
https://stackoverflow.com/questions/32125281
复制相关文章
相似问题
腾讯云开发者

Copyright © 2013 - 2026 Tencent Cloud. All Rights Reserved. 腾讯云 版权所有
深圳市腾讯计算机系统有限公司 ICP备案/许可证号:粤B2-20090059 ![]() 粤公网安备44030502008569号
粤公网安备44030502008569号
腾讯云计算(北京)有限责任公司 京ICP证150476号 | 京ICP备11018762号