
图像opencv中的目标区域检测
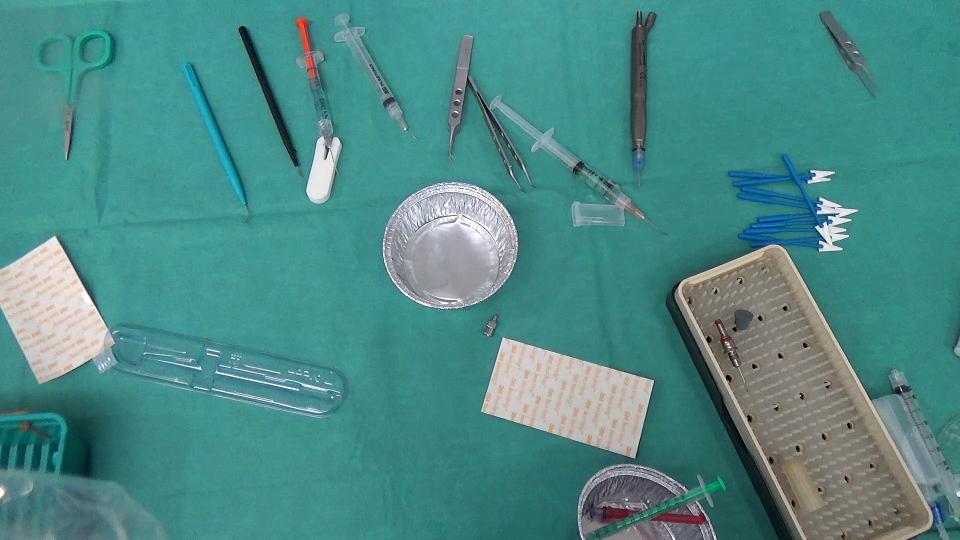
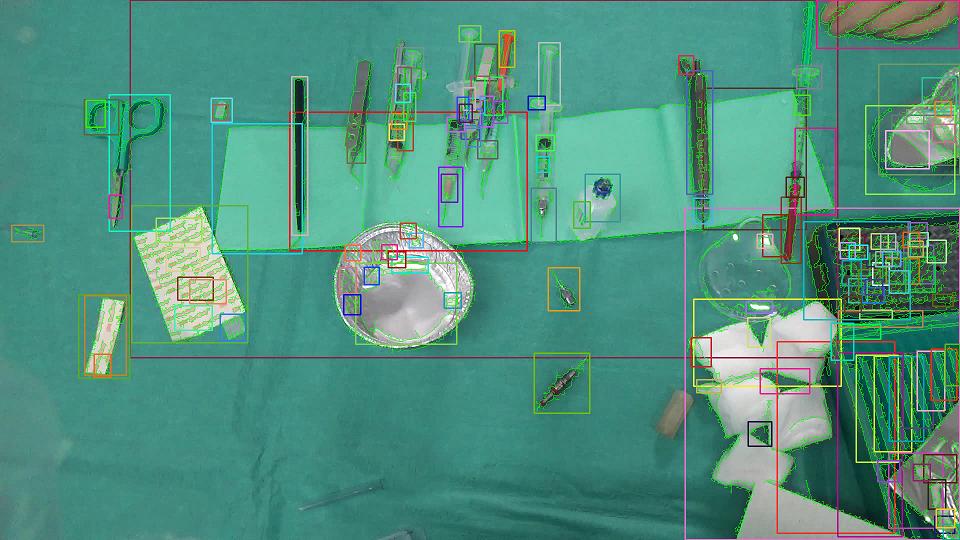
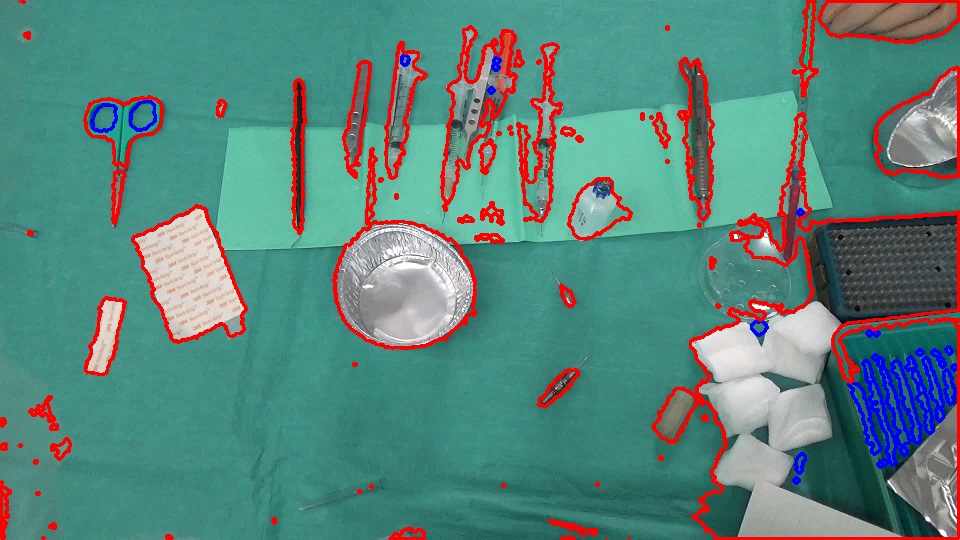
我们目前正在尝试使用OpenCV,C++版本中的方法来检测医疗器械图像中的对象区域。下面显示了一个示例图像:
以下是我们要遵循的步骤:
- 将图像转换为灰度
- 应用中值滤波
- 用sobel滤波器寻找边缘
- 使用25的阈值将结果转换为二值图像
- 骨骼化图像,以确保我们有整洁的边缘
- 求X最大连通分量
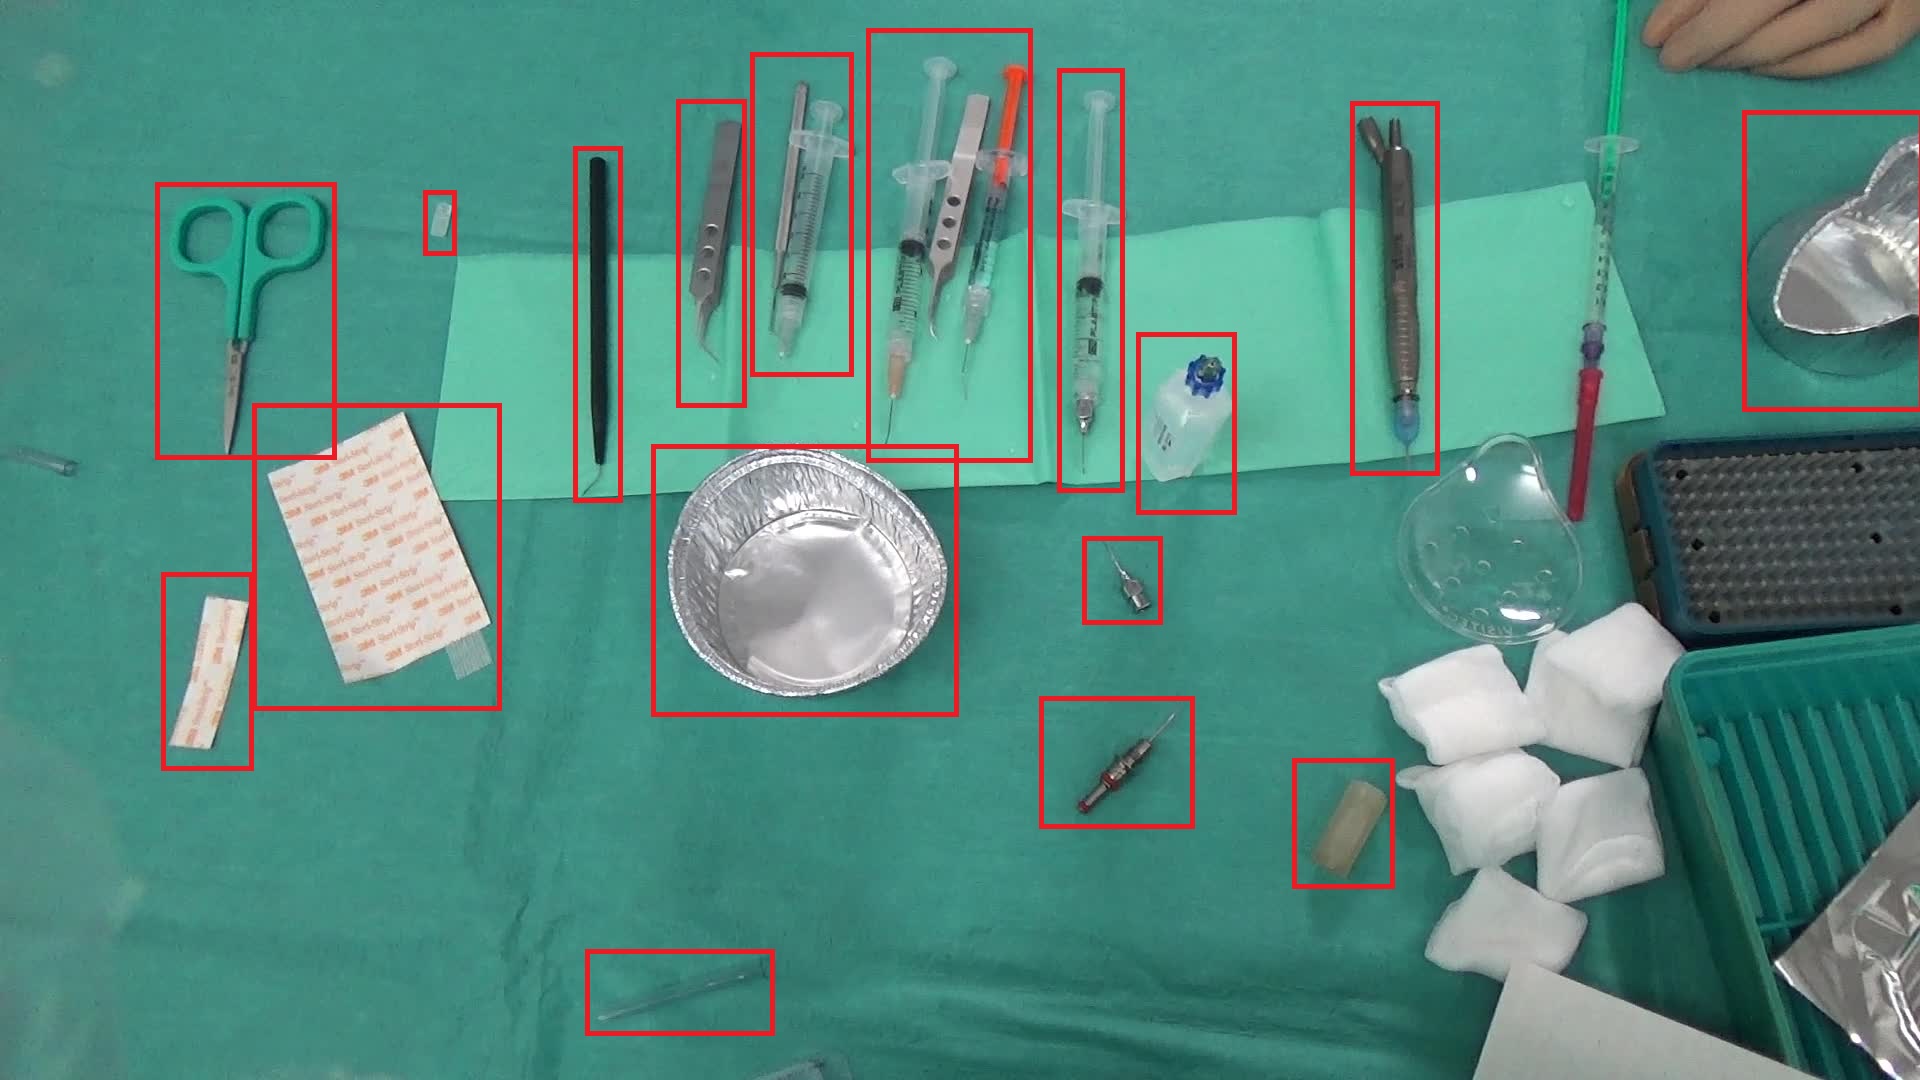
这种方法对图像1非常有效,其结果如下:
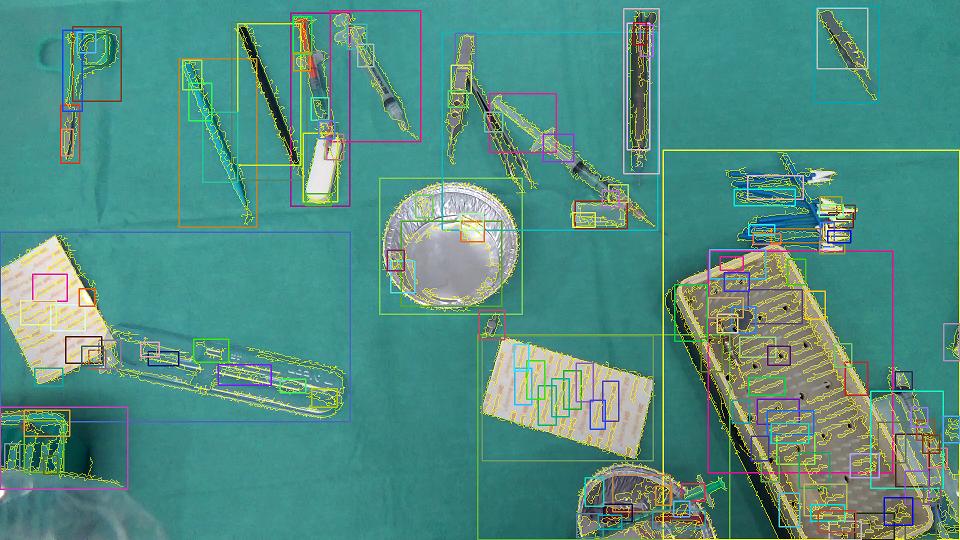
- 黄色边框是检测到的连接组件。
- 矩形只是突出显示连接组件的存在。
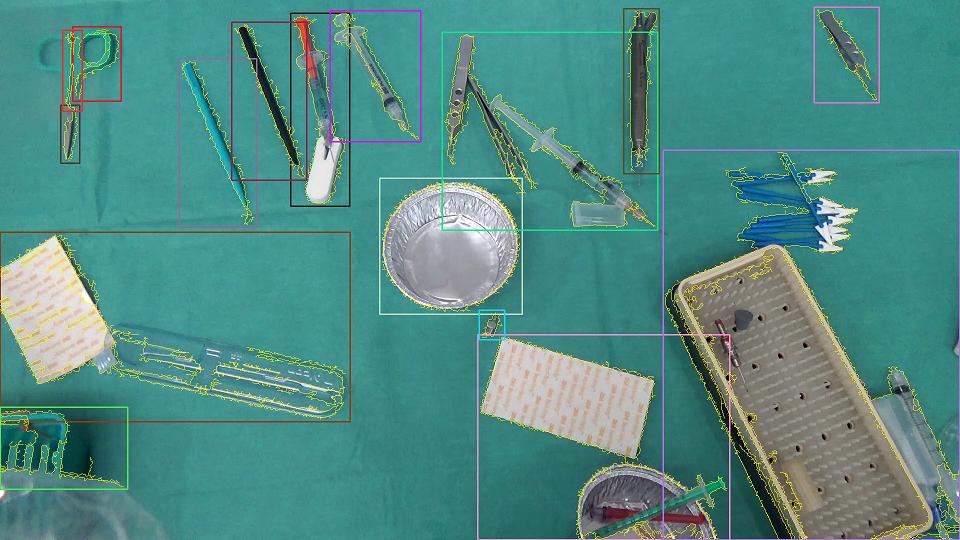
- 为了得到可以理解的结果,我们刚刚删除了连接的组件,这些组件完全位于其他组件中,所以最终的结果如下所示:
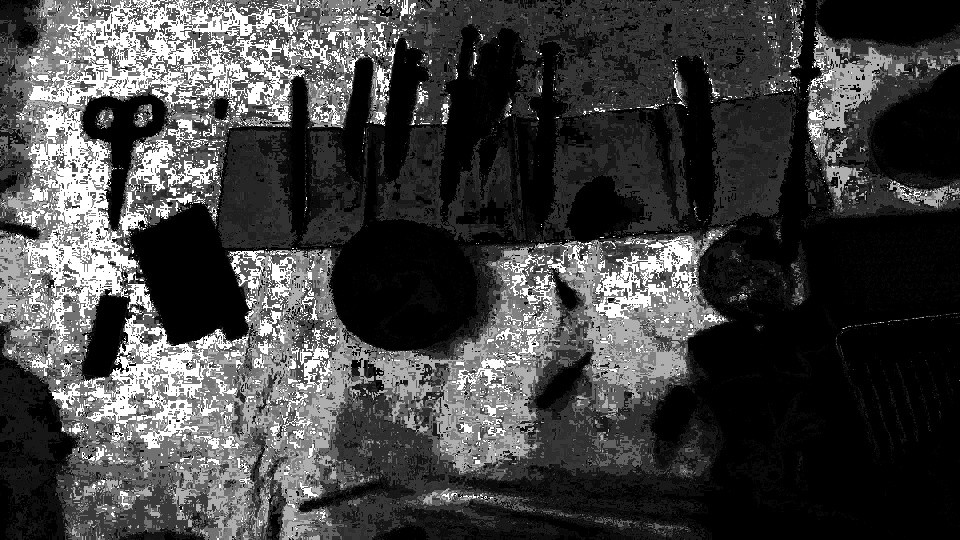
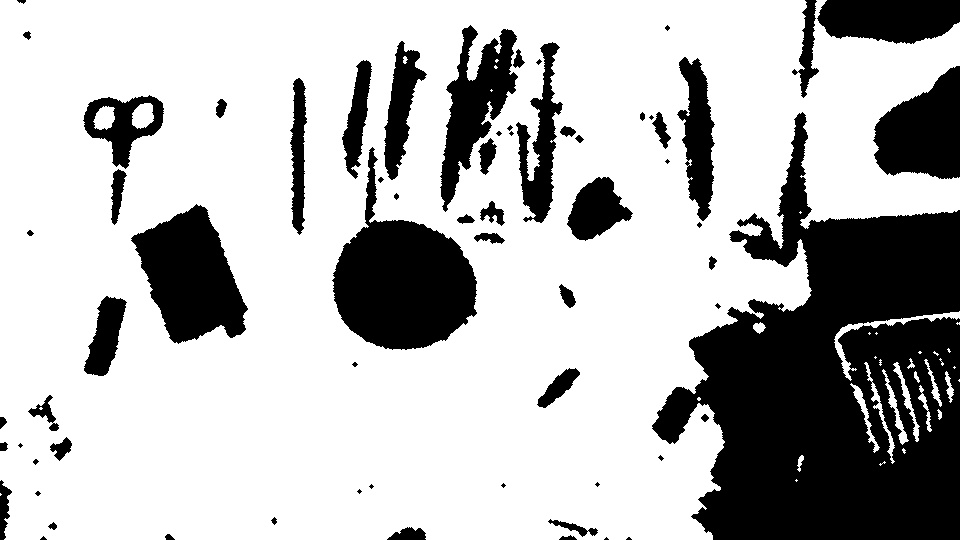
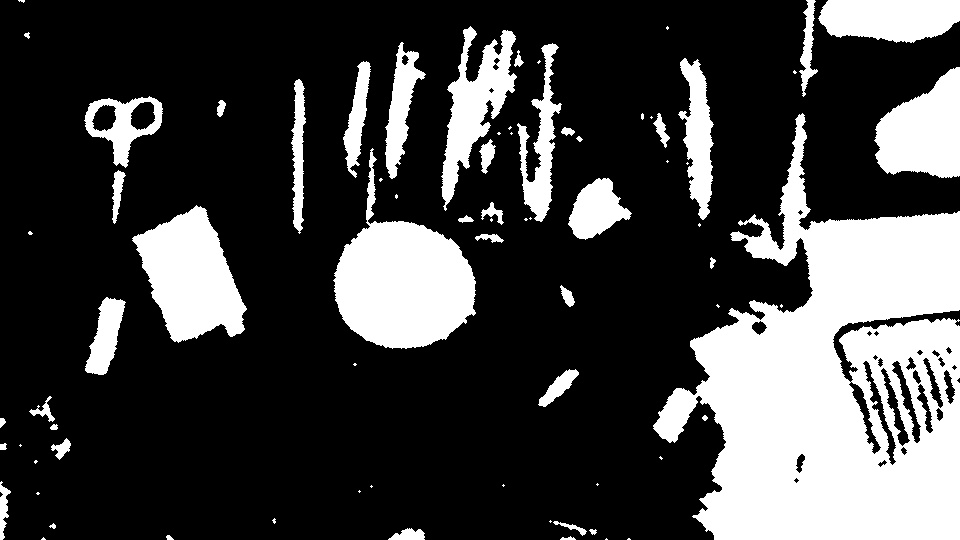
到目前为止,一切都很好,但另一个图像样本复杂了我们的工作如下所示。
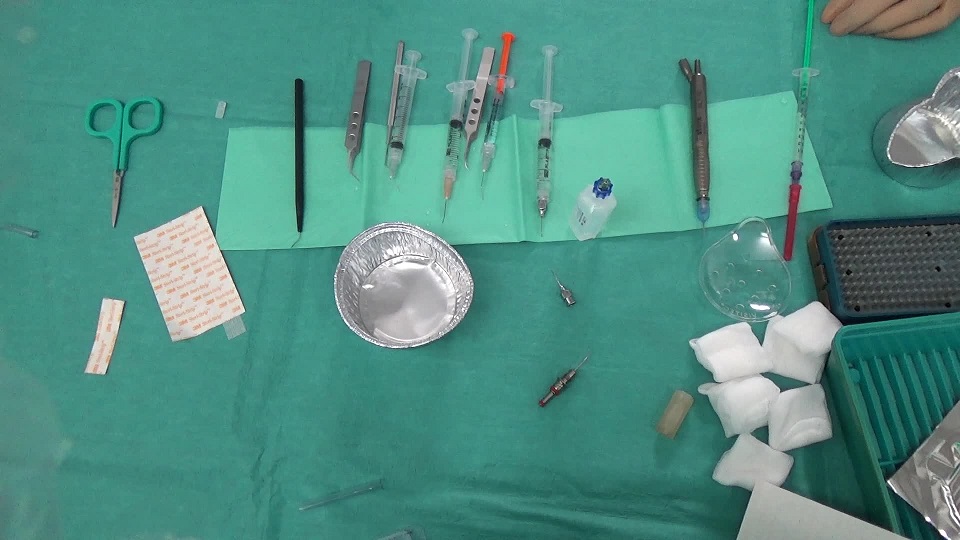
在物体下面有一条浅绿色的小毛巾会产生这样的图像:
在像前面那样过滤区域之后,我们得到了以下内容:

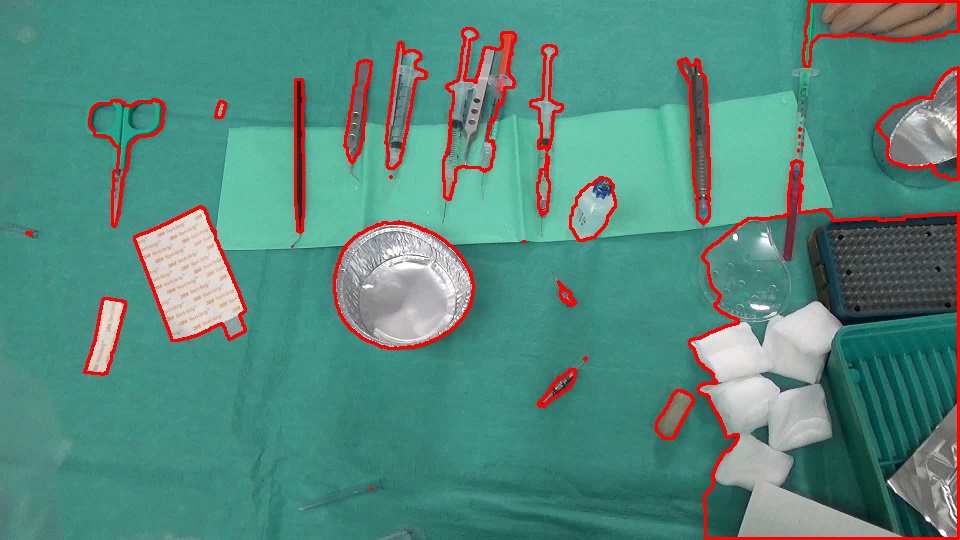
显然,这不是我们所需要的.我们例外的是这样的事情:
我在考虑聚类最近连接的组件(不知怎么的!)因此,我们可以尽量减少毛巾的存在所带来的影响,但还不知道它是可行的,还是有人曾经尝试过这样的东西?此外,有没有人有更好的想法来克服这类问题?
提前谢谢。
回答 3
Stack Overflow用户
发布于 2015-05-26 14:15:07
这是我试过的。
在图像中,背景大多是绿色的,背景面积比前景大得多。因此,如果你采取颜色直方图的图像,绿色的垃圾箱将有更高的价值。阈值这个直方图,以便小值的回收箱被设置为零。这样,我们很可能会保留绿色(更高价值)垃圾桶,并丢弃其他颜色。然后倒排这个直方图。反投影将在图像中突出这些绿色区域。
Backprojection:
- 然后启动这个反投影。这给了我们背景。
背景(经过一些形态过滤后):
- 反转背景以获得前景。
前台(经过一些形态过滤):
- 然后找出前景的轮廓。
我认为这提供了一个合理的分割,并且使用它作为掩码,您可能可以使用像GrabCut这样的分段来细化边界(我还没有尝试过这一点)。
编辑:--我尝试了GrabCut方法,它确实细化了边界。我添加了用于GrabCut分段的代码。
轮廓:
使用前景作为掩码的GrabCut分段:
我使用OpenCV part作为直方图处理部分。
// load the color image
IplImage* im = cvLoadImage("bFly6.jpg");

// get the color histogram
IplImage* im32f = cvCreateImage(cvGetSize(im), IPL_DEPTH_32F, 3);
cvConvertScale(im, im32f);

int channels[] = {0, 1, 2};
int histSize[] = {32, 32, 32};
float rgbRange[] = {0, 256};
float* ranges[] = {rgbRange, rgbRange, rgbRange};

CvHistogram* hist = cvCreateHist(3, histSize, CV_HIST_ARRAY, ranges);
IplImage* b = cvCreateImage(cvGetSize(im32f), IPL_DEPTH_32F, 1);
IplImage* g = cvCreateImage(cvGetSize(im32f), IPL_DEPTH_32F, 1);
IplImage* r = cvCreateImage(cvGetSize(im32f), IPL_DEPTH_32F, 1);
IplImage* backproject32f = cvCreateImage(cvGetSize(im), IPL_DEPTH_32F, 1);
IplImage* backproject8u = cvCreateImage(cvGetSize(im), IPL_DEPTH_8U, 1);
IplImage* bw = cvCreateImage(cvGetSize(im), IPL_DEPTH_8U, 1);
IplConvKernel* kernel = cvCreateStructuringElementEx(3, 3, 1, 1, MORPH_ELLIPSE);

cvSplit(im32f, b, g, r, NULL);
IplImage* planes[] = {b, g, r};
cvCalcHist(planes, hist);

// find min and max values of histogram bins
float minval, maxval;
cvGetMinMaxHistValue(hist, &minval, &maxval);

// threshold the histogram. this sets the bin values that are below the threshold to zero
cvThreshHist(hist, maxval/32);

// backproject the thresholded histogram. backprojection should contain higher values for the
// background and lower values for the foreground
cvCalcBackProject(planes, backproject32f, hist);

// convert to 8u type
double min, max;
cvMinMaxLoc(backproject32f, &min, &max);
cvConvertScale(backproject32f, backproject8u, 255.0 / max);

// threshold backprojected image. this gives us the background
cvThreshold(backproject8u, bw, 10, 255, CV_THRESH_BINARY);

// some morphology on background
cvDilate(bw, bw, kernel, 1);
cvMorphologyEx(bw, bw, NULL, kernel, MORPH_CLOSE, 2);

// get the foreground
cvSubRS(bw, cvScalar(255, 255, 255), bw);
cvMorphologyEx(bw, bw, NULL, kernel, MORPH_OPEN, 2);
cvErode(bw, bw, kernel, 1);

// find contours of the foreground
//CvMemStorage* storage = cvCreateMemStorage(0);
//CvSeq* contours = 0;
//cvFindContours(bw, storage, &contours);
//cvDrawContours(im, contours, CV_RGB(255, 0, 0), CV_RGB(0, 0, 255), 1, 2);

// grabcut
Mat color(im);
Mat fg(bw);
Mat mask(bw->height, bw->width, CV_8U);

mask.setTo(GC_PR_BGD);
mask.setTo(GC_PR_FGD, fg);

Mat bgdModel, fgdModel;
grabCut(color, mask, Rect(), bgdModel, fgdModel, GC_INIT_WITH_MASK);

Mat gcfg = mask == GC_PR_FGD;

vector<vector<cv::Point>> contours;
vector<Vec4i> hierarchy;
findContours(gcfg, contours, hierarchy, CV_RETR_LIST, CV_CHAIN_APPROX_SIMPLE, cv::Point(0, 0));
for(int idx = 0; idx < contours.size(); idx++)
{
    drawContours(color, contours, idx, Scalar(0, 0, 255), 2);
}

// cleanup ...更新:我们可以使用C++接口进行上述操作,如下所示。
const int channels[] = {0, 1, 2};
const int histSize[] = {32, 32, 32};
const float rgbRange[] = {0, 256};
const float* ranges[] = {rgbRange, rgbRange, rgbRange};

Mat hist;
Mat im32fc3, backpr32f, backpr8u, backprBw, kernel;

Mat im = imread("bFly6.jpg");

im.convertTo(im32fc3, CV_32FC3);
calcHist(&im32fc3, 1, channels, Mat(), hist, 3, histSize, ranges, true, false);
calcBackProject(&im32fc3, 1, channels, hist, backpr32f, ranges);

double minval, maxval;
minMaxIdx(backpr32f, &minval, &maxval);
threshold(backpr32f, backpr32f, maxval/32, 255, THRESH_TOZERO);
backpr32f.convertTo(backpr8u, CV_8U, 255.0/maxval);
threshold(backpr8u, backprBw, 10, 255, THRESH_BINARY);

kernel = getStructuringElement(MORPH_ELLIPSE, Size(3, 3));

dilate(backprBw, backprBw, kernel);
morphologyEx(backprBw, backprBw, MORPH_CLOSE, kernel, Point(-1, -1), 2);

backprBw = 255 - backprBw;

morphologyEx(backprBw, backprBw, MORPH_OPEN, kernel, Point(-1, -1), 2);
erode(backprBw, backprBw, kernel);

Mat mask(backpr8u.rows, backpr8u.cols, CV_8U);

mask.setTo(GC_PR_BGD);
mask.setTo(GC_PR_FGD, backprBw);

Mat bgdModel, fgdModel;
grabCut(im, mask, Rect(), bgdModel, fgdModel, GC_INIT_WITH_MASK);

Mat fg = mask == GC_PR_FGD;Stack Overflow用户
发布于 2015-05-23 23:48:49
我会考虑几个选择。我的假设是摄像机不动。我没有使用这些图像,也没有编写任何代码,所以这主要来自于经验。
- 而不是仅仅寻找边缘,尝试使用分割算法分离背景。高斯混合可以帮助这一点。给定同一区域上的一组图像(即视频),您可以取消持久的区域。然后,新的项目,如仪器将弹出。然后,连接的组件可以在这些小块上使用。
- I would look at segmentation algorithms to see if you can optimize the conditions to make this work for you. One major item is to make sure your camera is stable or you stabilize the images yourself pre-processing.
- 我会考虑用兴趣点来识别图像中有很多新材料的区域。考虑到背景相对简单,针头之类的小物体会产生大量的兴趣点。毛巾应该要稀疏得多。也许,将检测到的兴趣点覆盖在连接的组件占用空间上,将给出一个“密度”度量,然后您可以对其进行阈值化。如果连接的组件对项目的区域有很大的兴趣点比率,那么它就是一个有趣的对象。
- On this note, you can even clean up the connected component footprint by using a Convex Hull to prune the objects you have detected. This may help situations such as a medical instrument casting a shadow on the towel which stretches the component region. This is a guess, but interest points can definitely give you more information than just edges.
- 最后,考虑到你有一个稳定的背景和清晰的目标,我会看一看袋子的特征,看看你是否能检测到图像中的每一个单独的物体。这可能很有用,因为这些图像中的对象似乎有一致的模式。你可以建立一个大的数据库,如针,纱布,剪刀等图像。然后BoF,在OpenCV,它会为你找到那些候选人。您还可以将其与正在执行的其他操作混合起来,以比较结果。
- Bag of Features using OpenCV - [http://www.codeproject.com/Articles/619039/Bag-of-Features-Descriptor-on-SIFT-Features-with-O](http://www.codeproject.com/Articles/619039/Bag-of-Features-Descriptor-on-SIFT-Features-with-O)
-
Stack Overflow用户
发布于 2017-04-04 06:21:41
我也会对你的最初版本提出一个建议。您还可以跳过等高线,其区域的宽度和高度大于图像宽度和高度的一半。
//take the rect of the contours

Rect rect = Imgproc.boundingRect(contours.get(i));

if (rect.width < inputImageWidth / 2 && rect.height < inputImageHeight / 2)

//then continue to draw or use for next purposes.https://stackoverflow.com/questions/30352931
复制相似问题
腾讯云开发者

Copyright © 2013 - 2026 Tencent Cloud. All Rights Reserved. 腾讯云 版权所有
深圳市腾讯计算机系统有限公司 ICP备案/许可证号:粤B2-20090059 ![]() 粤公网安备44030502008569号
粤公网安备44030502008569号
腾讯云计算(北京)有限责任公司 京ICP证150476号 | 京ICP备11018762号