
AndroidPlot定制接头
AndroidPlot定制接头
提问于 2014-06-18 11:08:19
我现在试着让我的情节看起来像这样:
但我不知道如何定制点,使黑色的笔画周围橙色填充,所以我的观点现在“粘”到线。
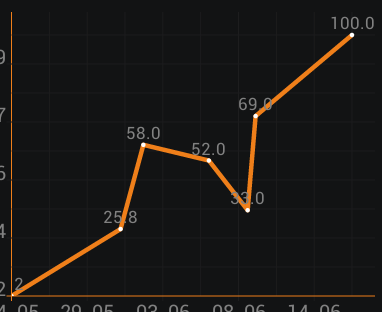
或者,至少如何使它看起来像这样(与线条颜色相同的外圆)。
有什么帮助吗?
回答 1
Stack Overflow用户
回答已采纳
发布于 2014-06-18 15:06:33
我相信底部的图像使用了自定义的LineAndPointRenderer,这也是您需要用来再现最上面的图像的东西。
下面是一个快速而肮脏的例子,说明如何做到这一点。首先,创建一个将保存所需新格式值的自定义格式化程序:
    /**
     * A LineAndPointFormatter with the addition of paint to be used to "stroke" vertices.
     */
    class MyLineAndPointFormatter extends LineAndPointFormatter{
        private Paint strokePaint;

        /**
         * Some quick and dirty hard-coded params
         */
        public MyLineAndPointFormatter() {
            super(Color.RED, Color.RED, null, null);
            strokePaint = new Paint();
            strokePaint.setColor(Color.BLACK);
            strokePaint.setStrokeWidth(PixelUtils.dpToPix(2));
            strokePaint.setStyle(Paint.Style.STROKE);
            strokePaint.setAntiAlias(true);
        }

        public Paint getStrokePaint() {
            return strokePaint;
        }

        @Override
        public Class<? extends SeriesRenderer> getRendererClass() {
            return MyLineAndPointRenderer.class;
        }

        @Override
        public SeriesRenderer getRendererInstance(XYPlot plot) {
            return new MyLineAndPointRenderer(plot);
        }
    }
接下来,自定义渲染器:
    /**
     * A LineAndPointRenderer that can stroke vertices.
     */
    class MyLineAndPointRenderer extends LineAndPointRenderer<MyLineAndPointFormatter> {

        public MyLineAndPointRenderer(XYPlot plot) {
            super(plot);
        }

        /**
         * Overridden draw method to get the "vertex stroke" effect.  99% of this is copy/pasted from
         * the super class' implementation.
         * @param canvas
         * @param plotArea
         * @param series
         * @param formatter
         */
        @Override
        protected void drawSeries(Canvas canvas, RectF plotArea, XYSeries series, LineAndPointFormatter formatter) {
            PointF thisPoint;
            PointF lastPoint = null;
            PointF firstPoint = null;
            Paint  linePaint = formatter.getLinePaint();

            Path path = null;
            ArrayList<Pair<PointF, Integer>> points = new ArrayList<Pair<PointF, Integer>>(series.size());
            for (int i = 0; i < series.size(); i++) {
                Number y = series.getY(i);
                Number x = series.getX(i);

                if (y != null && x != null) {
                    thisPoint = ValPixConverter.valToPix(
                            x,
                            y,
                            plotArea,
                            getPlot().getCalculatedMinX(),
                            getPlot().getCalculatedMaxX(),
                            getPlot().getCalculatedMinY(),
                            getPlot().getCalculatedMaxY());
                    points.add(new Pair<PointF, Integer>(thisPoint, i));
                } else {
                    thisPoint = null;
                }

                if(linePaint != null && thisPoint != null) {

                    // record the first point of the new Path
                    if(firstPoint == null) {
                        path = new Path();
                        firstPoint = thisPoint;
                        // create our first point at the bottom/x position so filling
                        // will look good
                        path.moveTo(firstPoint.x, firstPoint.y);
                    }

                    if(lastPoint != null) {
                        appendToPath(path, thisPoint, lastPoint);
                    }

                    lastPoint = thisPoint;
                } else {
                    if(lastPoint != null) {
                        renderPath(canvas, plotArea, path, firstPoint, lastPoint, formatter);
                    }
                    firstPoint = null;
                    lastPoint = null;
                }
            }
            if(linePaint != null && firstPoint != null) {
                renderPath(canvas, plotArea, path, firstPoint, lastPoint, formatter);
            }

            Paint vertexPaint = formatter.getVertexPaint();
            Paint strokePaint = ((MyLineAndPointFormatter)formatter).getStrokePaint();
            PointLabelFormatter plf = formatter.getPointLabelFormatter();
            if (vertexPaint != null || plf != null) {
                for (Pair<PointF, Integer> p : points) {
                    PointLabeler pointLabeler = formatter.getPointLabeler();

                    // if vertexPaint is available, draw vertex:
                    if(vertexPaint != null) {
                        canvas.drawPoint(p.first.x, p.first.y, vertexPaint);
                    }

                    // if stroke is available, draw stroke:
                    if(strokePaint != null) {
                        // you'll probably want to make the radius a configurable parameter
                        // instead of hard-coded like it is here.
                        canvas.drawCircle(p.first.x, p.first.y, 4, strokePaint);
                    }

                    // if textPaint and pointLabeler are available, draw point's text label:
                    if(plf != null && pointLabeler != null) {
                        canvas.drawText(pointLabeler.getLabel(series, p.second), p.first.x + plf.hOffset, p.first.y + plf.vOffset, plf.getTextPaint());
                    }
                }
            }
        }
    }
最后,在您的活动中使用这些新的部分:
MyLineAndPointFormatter format = new MyLineAndPointFormatter();
plot.addSeries(series, format);
与SimpleXYPlot示例一起使用时,如下所示:
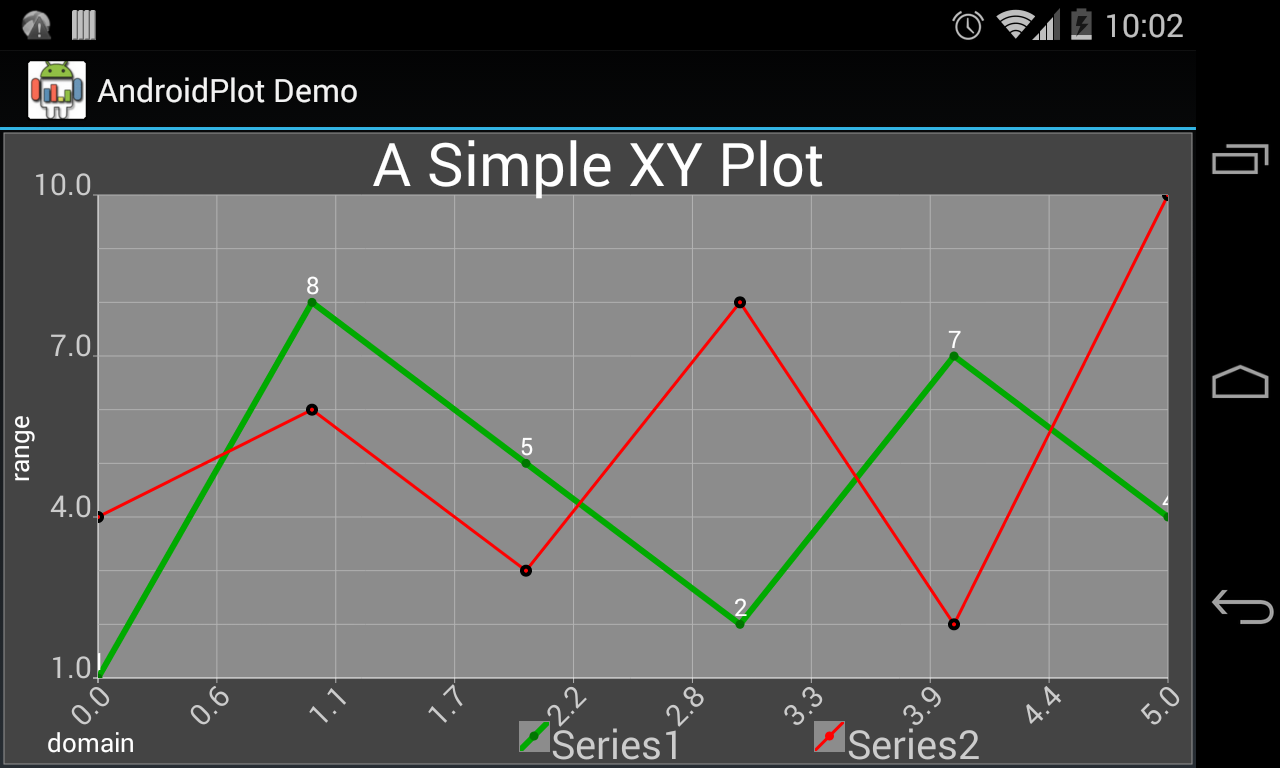
通过加厚线条、选择更好的背景色等方法,它可能会更漂亮,但你得到了这个想法。
页面原文内容由Stack Overflow提供。腾讯云小微IT领域专用引擎提供翻译支持
原文链接:
https://stackoverflow.com/questions/24283978
复制相关文章
相似问题
腾讯云开发者

Copyright © 2013 - 2026 Tencent Cloud. All Rights Reserved. 腾讯云 版权所有
深圳市腾讯计算机系统有限公司 ICP备案/许可证号:粤B2-20090059 ![]() 粤公网安备44030502008569号
粤公网安备44030502008569号
腾讯云计算(北京)有限责任公司 京ICP证150476号 | 京ICP备11018762号