
与opencv python连接/合并图像
与opencv python连接/合并图像
提问于 2020-03-10 20:49:52
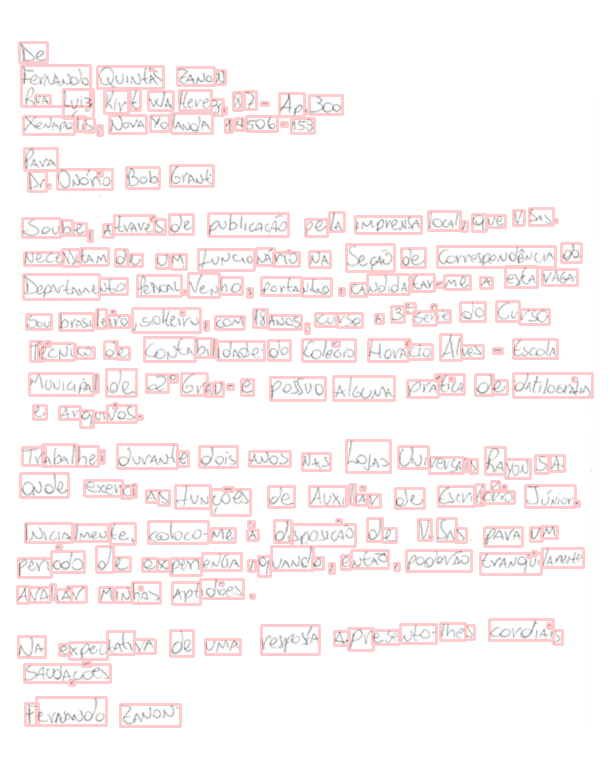
我试图从手写手稿中创建基于纹理的图像。对输入图像( IAM数据库中文本行的二值图像)进行预处理后,利用垂直轮廓投影将输入图像分割成文字/字符。分割的字/字符在不同的大小,我想连接/合并它,以形成所需的纹理基础的图像。输出图像的大小使得连接不可能。我使用openCV和python来完成这个任务,我需要一些想法或方法来完成这样的任务。这种方法的灵感来源于R.K. Hanusiak 文章链接在第219-220页中的一篇文章:“基于纹理特征的作家验证”。
回答 1
Stack Overflow用户
回答已采纳
发布于 2020-03-12 19:01:43
这里有一个可能的解决办法。你必须调整一些参数,当然.
我的示例代码所做的工作:
- 应用
threshold和invert (bitwise_not)图像获得黑色背景和白色字母的二值图像 - 应用一个小
dilate来合并一些小元素并减少检测的次数 - 用
findContours.查找轮廓:) - 计算每个轮廓的
boundingRect和area,返回检测到文字的矩形(可以用来过滤不需要的小元素) - 准备一个将源图像与轮廓和矩形重叠的图像(这部分只是调试所必需的)
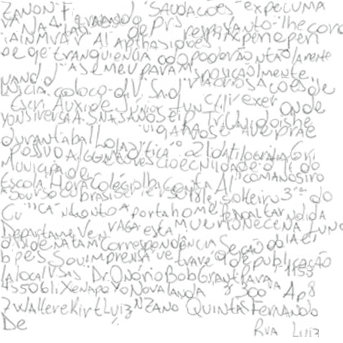
检测到后,代码将继续创建所需的新“纹理图像”:
total_width是所有矩形宽度之和。mean_height是所有直角高度的平均值。total_lines是新图像中的行数;由total_width和mean_height计算,因此得到的图像近似于正方形。- 在一个循环中,我们将每个矩形从
src图像复制到newImg curr_line和curr_width跟踪粘贴src矩形的位置- 我使用
cv.min()将每个新的矩形混合成newImg;这类似于photoshop中的“暗”混合模式
显示探测的图像:
生成的纹理图像:
密码..。
import cv2 as cv
import numpy as np
import math

src = cv.imread("handwriting.jpg")
src_gray = cv.cvtColor(src,cv.COLOR_BGR2GRAY)

# apply threshold
threshold = 230
_, img_thresh = cv.threshold(src_gray, threshold, 255, 0)
img_thresh = cv.bitwise_not(img_thresh)

# apply dilate
dilatation_size = 1
dilatation_type = cv.MORPH_ELLIPSE
element = cv.getStructuringElement(dilatation_type, (2*dilatation_size + 1, 2*dilatation_size+1), (dilatation_size, dilatation_size))
img_dilate = cv.dilate(img_thresh, element)

# find contours
contours = cv.findContours(img_dilate, cv.RETR_EXTERNAL, cv.CHAIN_APPROX_SIMPLE)

# calculate rectangles and areas
boundRect = [None]*len(contours[1])
areas = [None]*len(contours[1])
for i, c in enumerate(contours[1]):
    boundRect[i] = cv.boundingRect(c)
    areas[i] = cv.contourArea(c)

# set drawing
drawing = np.zeros((src.shape[0], src.shape[1], 3), dtype=np.uint8)

# you can use only contours bigger than some area
for i in range(len(contours[1])):
    if areas[i] > 1:
        color = (50,50,0)
        cv.rectangle(drawing, (int(boundRect[i][0]), int(boundRect[i][1])), \
          (int(boundRect[i][0]+boundRect[i][2]), int(boundRect[i][1]+boundRect[i][3])), color, 2)

# set newImg
newImg = np.ones((src.shape[0], src.shape[1], 3), dtype=np.uint8)*255
total_width = 0
mean_height = 0.0
n = len(boundRect)
for r in (boundRect):
    total_width += r[2]
    mean_height += r[3]/n

total_lines = math.ceil(math.sqrt(total_width/mean_height))
max_line_width = math.floor(total_width/total_lines)

# loop through rectangles and perform a kind of copy paste
curr_line = 0
curr_width = 0
for r in (boundRect):
    if curr_width > max_line_width:
        curr_line += 1
        curr_width = 0
    # this is the position in newImg, where to insert source rectangle
    pos = [curr_width, \
           curr_width + r[2], \
           math.floor(curr_line*mean_height), \
           math.floor(curr_line*mean_height) + r[3] ]
    s = src[r[1]:r[1]+r[3], r[0]:r[0]+r[2], :]
    d = newImg[pos[2]:pos[3], pos[0]:pos[1], :]
    newImg[pos[2]:pos[3], pos[0]:pos[1], :] = cv.min(d,s)
    curr_width += r[2]

cv.imwrite('detection.png',cv.subtract(src,drawing))
cv.imshow('blend',cv.subtract(src,drawing))

crop = int(max_line_width*1.1)
cv.imwrite('texture.png',newImg[:crop, :crop, :])
cv.imshow('newImg',newImg[:crop, :crop, :])

cv.waitKey()页面原文内容由Stack Overflow提供。腾讯云小微IT领域专用引擎提供翻译支持
原文链接:
https://stackoverflow.com/questions/60625736
复制相关文章
相似问题
腾讯云开发者

Copyright © 2013 - 2026 Tencent Cloud. All Rights Reserved. 腾讯云 版权所有
深圳市腾讯计算机系统有限公司 ICP备案/许可证号:粤B2-20090059 ![]() 粤公网安备44030502008569号
粤公网安备44030502008569号
腾讯云计算(北京)有限责任公司 京ICP证150476号 | 京ICP备11018762号