
如何提高表面缺陷的检测水平?
如何提高表面缺陷的检测水平?
提问于 2020-12-01 21:56:45
首先,这是我的原始图像,我试图检测缺陷(平行线)在刷铝表面。
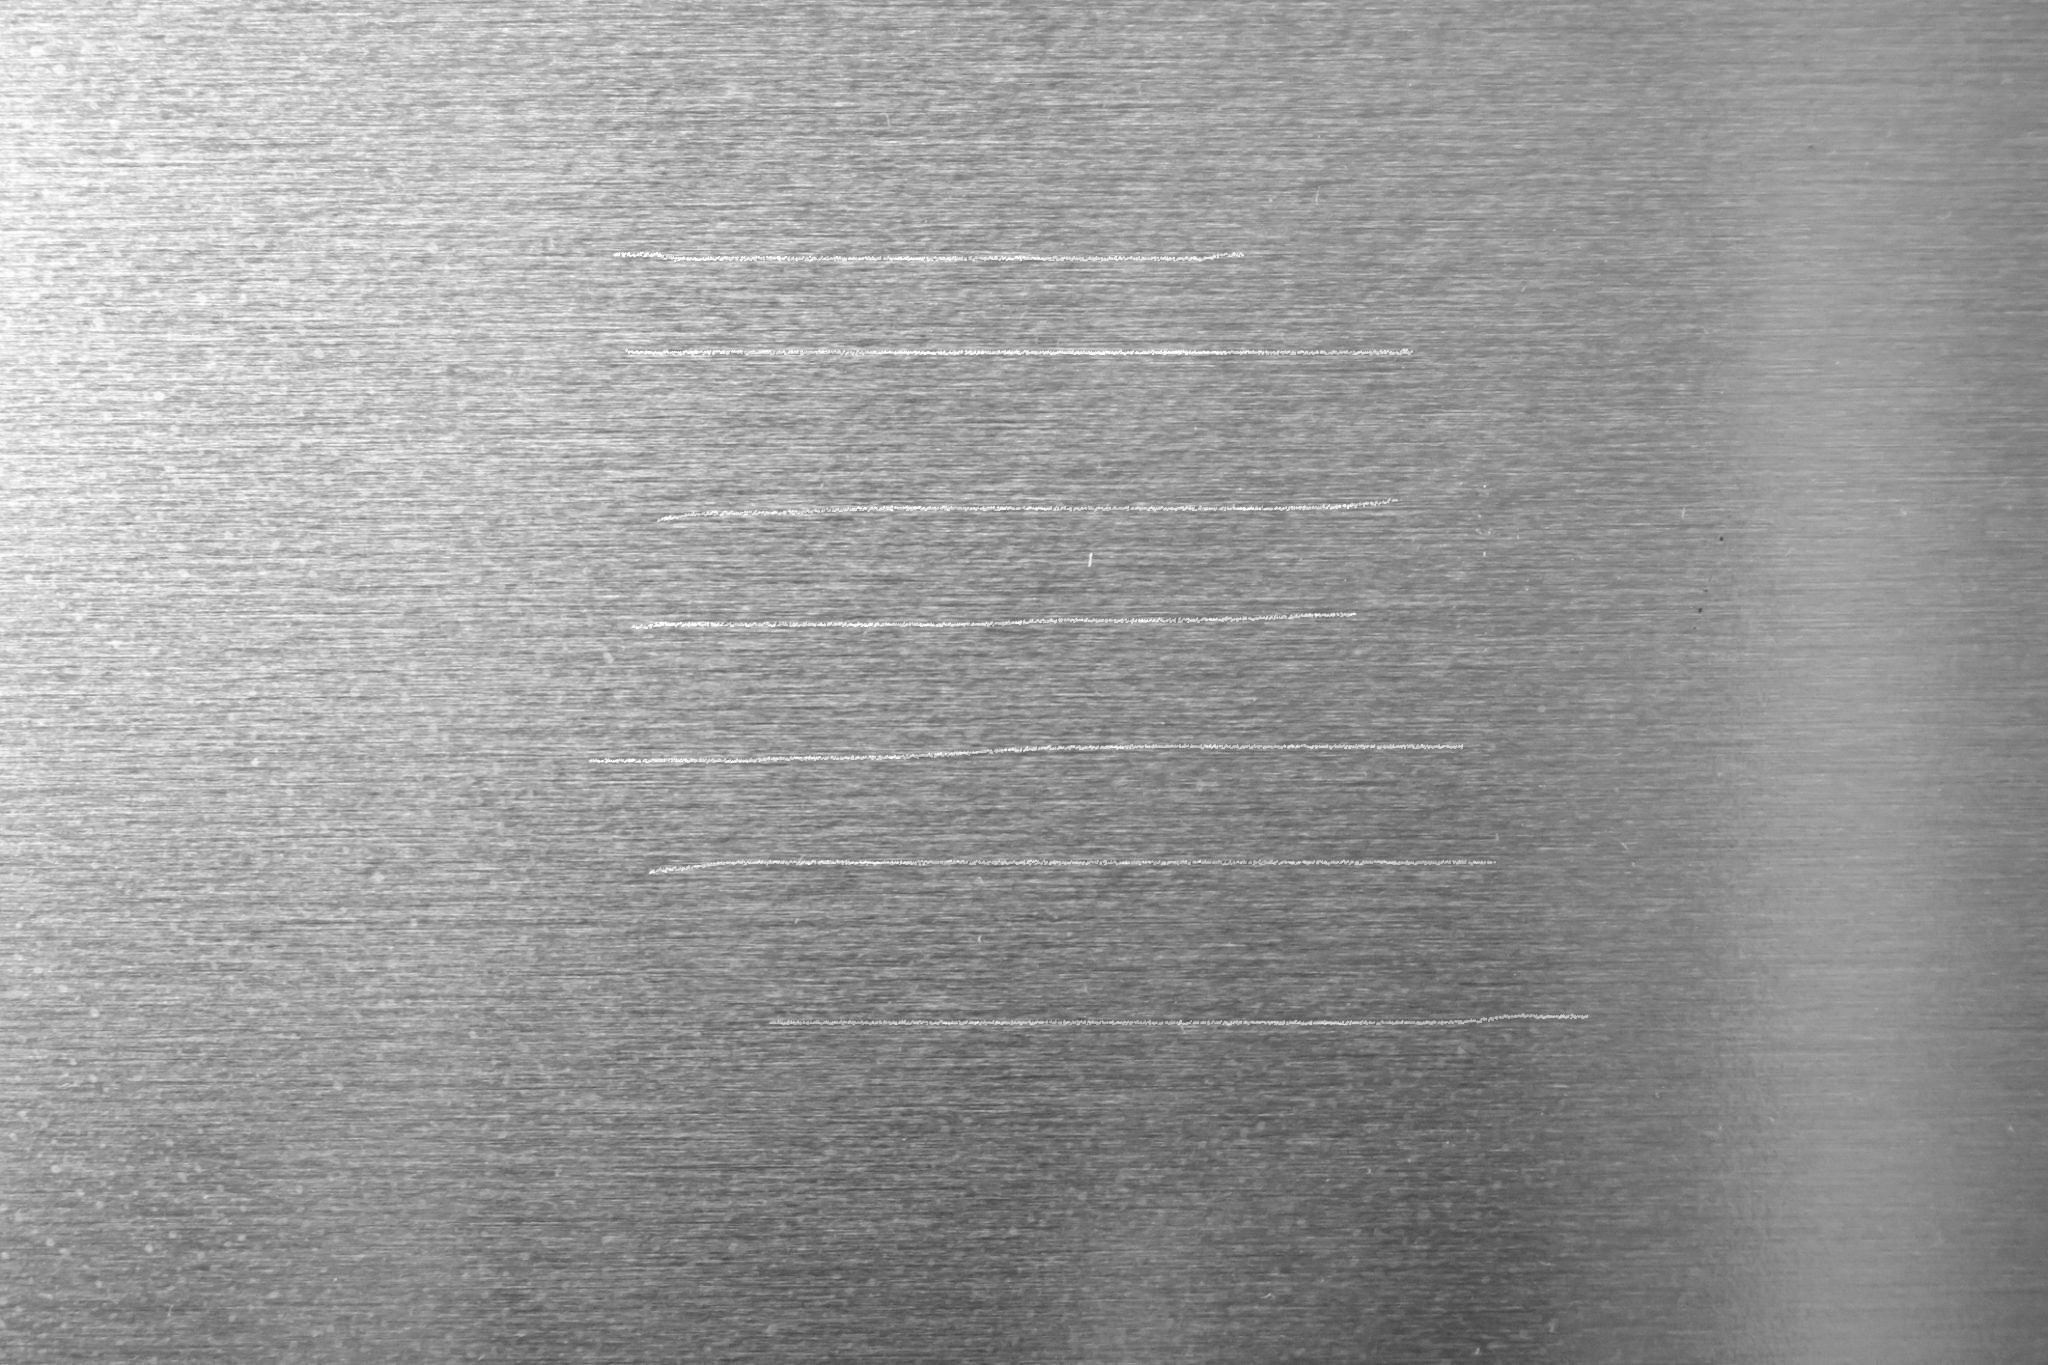
以下是我所采取的步骤:
将image
- Converting图像放大为grayscale
- Morph Close Operation
- Dilate again
- Difference的图像,
- Canny边缘Detection
- Finding contours
- Drawing,轮廓
周围的绿色线
这是我的代码:
import numpy as np
import cv2
from matplotlib import pyplot as plt
import imutils
path = ''
path_output = ''

img_bgr = cv2.imread(path)
plt.imshow(img_bgr)

# bgr to rgb
img_rgb = cv2.cvtColor(img_bgr, cv2.COLOR_BGR2RGB)
plt.imshow(img_rgb)

# Converting to grayscale
img_just_gray = cv2.cvtColor(img_rgb, cv2.COLOR_BGR2GRAY)

# Displaying the grayscale image
plt.imshow(img_just_gray, cmap='gray')

# Gaussian Blur
ksize_w = 13
ksize_h = 13

img_first_gb = cv2.GaussianBlur(img_rgb, (ksize_w,ksize_h), 0, 0, cv2.BORDER_REPLICATE);
plt.imshow(img_first_gb)

# Dilate the image

dilated_img = cv2.dilate(img_first_gb, np.ones((11,11), np.uint8))
plt.imshow(dilated_img)

# Converting to grayscale
img_gray_operated = cv2.cvtColor(dilated_img, cv2.COLOR_BGR2GRAY)

# Displaying the grayscale image
plt.imshow(img_gray_operated, cmap='gray')

# closing:
kernel_closing = np.ones((7,7),np.uint8)
img_closing = cv2.morphologyEx(img_gray_operated, cv2.MORPH_CLOSE, kernel_closing)
plt.imshow(img_closing, cmap='gray')

# dilation:
# add pixels to the boundaries of objects in an image
kernel_dilation = np.ones((3,3),np.uint8)
img_dilation2 = cv2.dilate(img_closing, kernel_dilation, iterations = 1)
plt.imshow(img_dilation2, cmap='gray')

diff_img = 255 - cv2.absdiff(img_just_gray, img_dilation2)
plt.imshow(diff_img, cmap='gray')

# canny
edgesToFindImage = img_dilation2

v = np.median(img_just_gray)
#print(v)
sigma = 0.33
lower_thresh = int(max(0,(1.0-sigma)*v))
higher_thresh = int(min(255,(1.0+sigma)*v))

img_edges =  cv2.Canny(edgesToFindImage, lower_thresh, higher_thresh)
plt.imshow(img_edges, cmap='gray')

kernel_dilation2 = np.ones((2,2),np.uint8)
img_dilation2 = cv2.dilate(img_edges, kernel_dilation, iterations = 2)
plt.imshow(img_dilation2, cmap='gray')

# find contours
contoursToFindImage = img_dilation2

(_, cnts, _) = cv2.findContours(contoursToFindImage.copy(), cv2.RETR_EXTERNAL,
        cv2.CHAIN_APPROX_SIMPLE)
print(type(cnts))
print(len(cnts))

# -1 for all
cntsWhichOne = -1

# -1 for infill
# >0 for edge thickness
cntsInfillOrEdgeThickness = 3

img_drawing_contours_on_rgb_image = cv2.drawContours(img_rgb.copy(), cnts, cntsWhichOne, (0, 255, 0), cntsInfillOrEdgeThickness)
plt.imshow(img_drawing_contours_on_rgb_image)
这就是结果。
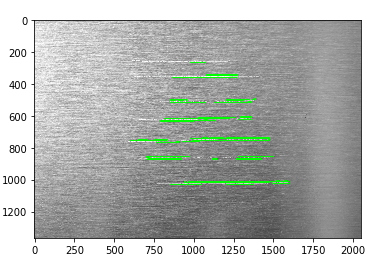
如何改进这一检测?是否有更有效的方法来检测线条?
回答 1
Stack Overflow用户
回答已采纳
发布于 2020-12-01 23:50:08
这里是Python OpenCV的一种方式。您是接近的,您应该使用自适应阈值,形态学清理小区域和跳过精明的边缘。
输入:

import cv2
import numpy as np

# load image
img = cv2.imread('scratches.jpg')

# convert to grayscale
gray = cv2.cvtColor(img, cv2.COLOR_BGR2GRAY)

# adaptive threshold
thresh = cv2.adaptiveThreshold(gray, 255, cv2.ADAPTIVE_THRESH_MEAN_C, cv2.THRESH_BINARY, 11, -35)

# apply morphology
kernel = np.ones((3,30),np.uint8)
morph = cv2.morphologyEx(thresh, cv2.MORPH_CLOSE, kernel)
kernel = np.ones((3,35),np.uint8)
morph = cv2.morphologyEx(morph, cv2.MORPH_OPEN, kernel)

# get hough line segments
threshold = 25
minLineLength = 10
maxLineGap = 20
lines = cv2.HoughLinesP(morph, 1, 30*np.pi/360, threshold, minLineLength, maxLineGap)

# draw lines
linear1 = np.zeros_like(thresh)
linear2 = img.copy()
for [line] in lines:
    x1 = line[0]
    y1 = line[1]
    x2 = line[2]
    y2 = line[3]
    cv2.line(linear1, (x1,y1), (x2,y2), 255, 1)
    cv2.line(linear2, (x1,y1), (x2,y2), (0,0,255), 1)

print('number of lines:',len(lines))

# save resulting masked image
cv2.imwrite('scratches_thresh.jpg', thresh)
cv2.imwrite('scratches_morph.jpg', morph)
cv2.imwrite('scratches_lines1.jpg', linear1)
cv2.imwrite('scratches_lines2.jpg', linear2)

# display result
cv2.imshow("thresh", thresh)
cv2.imshow("morph", morph)
cv2.imshow("lines1", linear1)
cv2.imshow("lines2", linear2)
cv2.waitKey(0)
cv2.destroyAllWindows()
阈值图像:

形态学清洁图像:
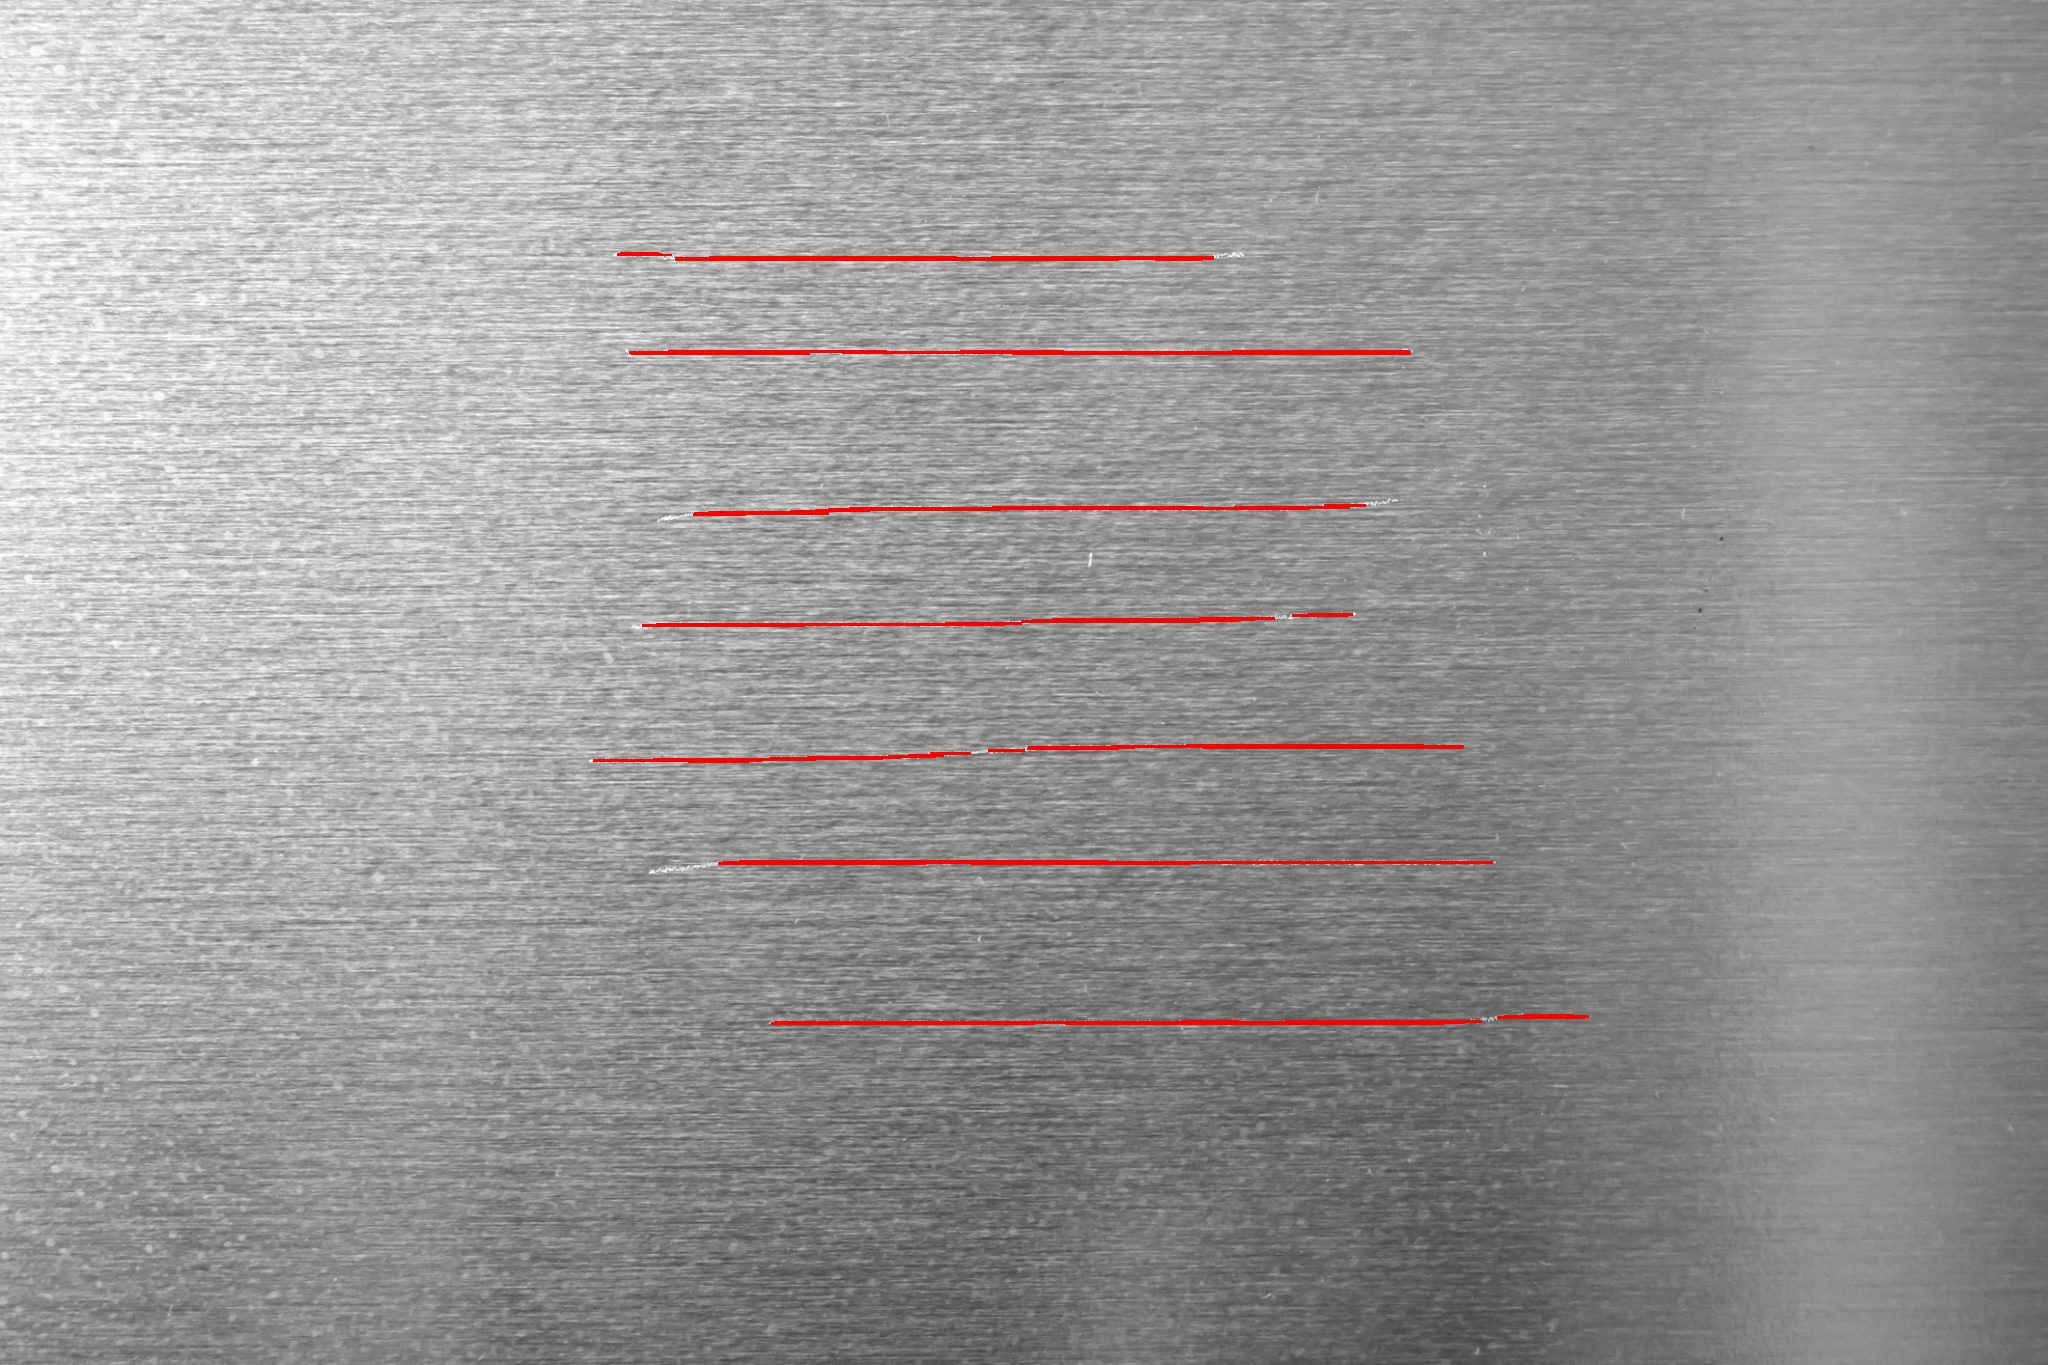
原始图像上的线条:
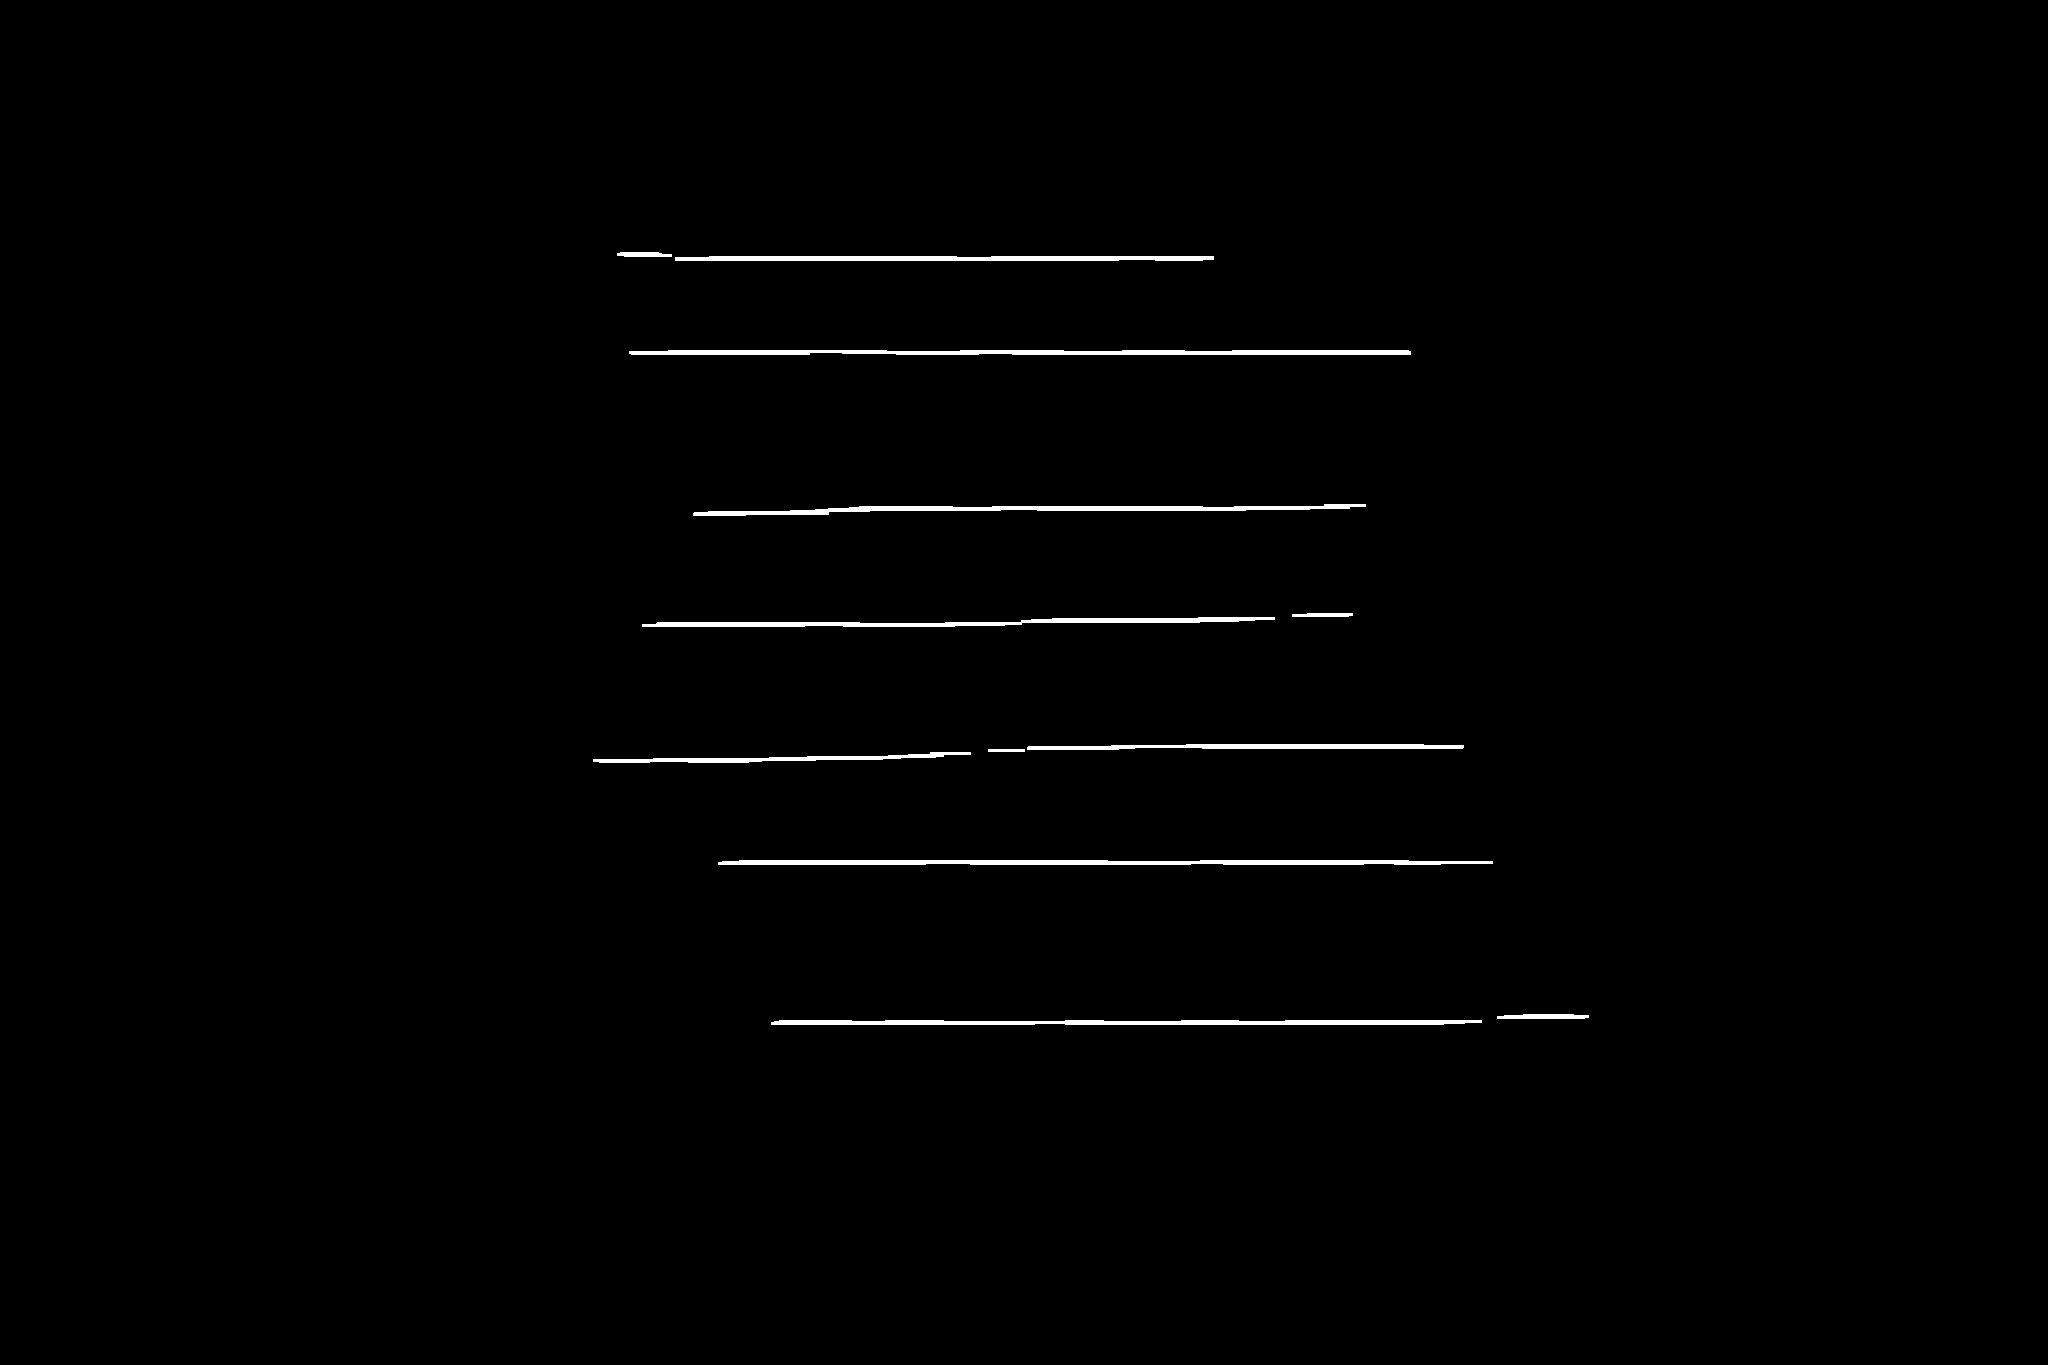
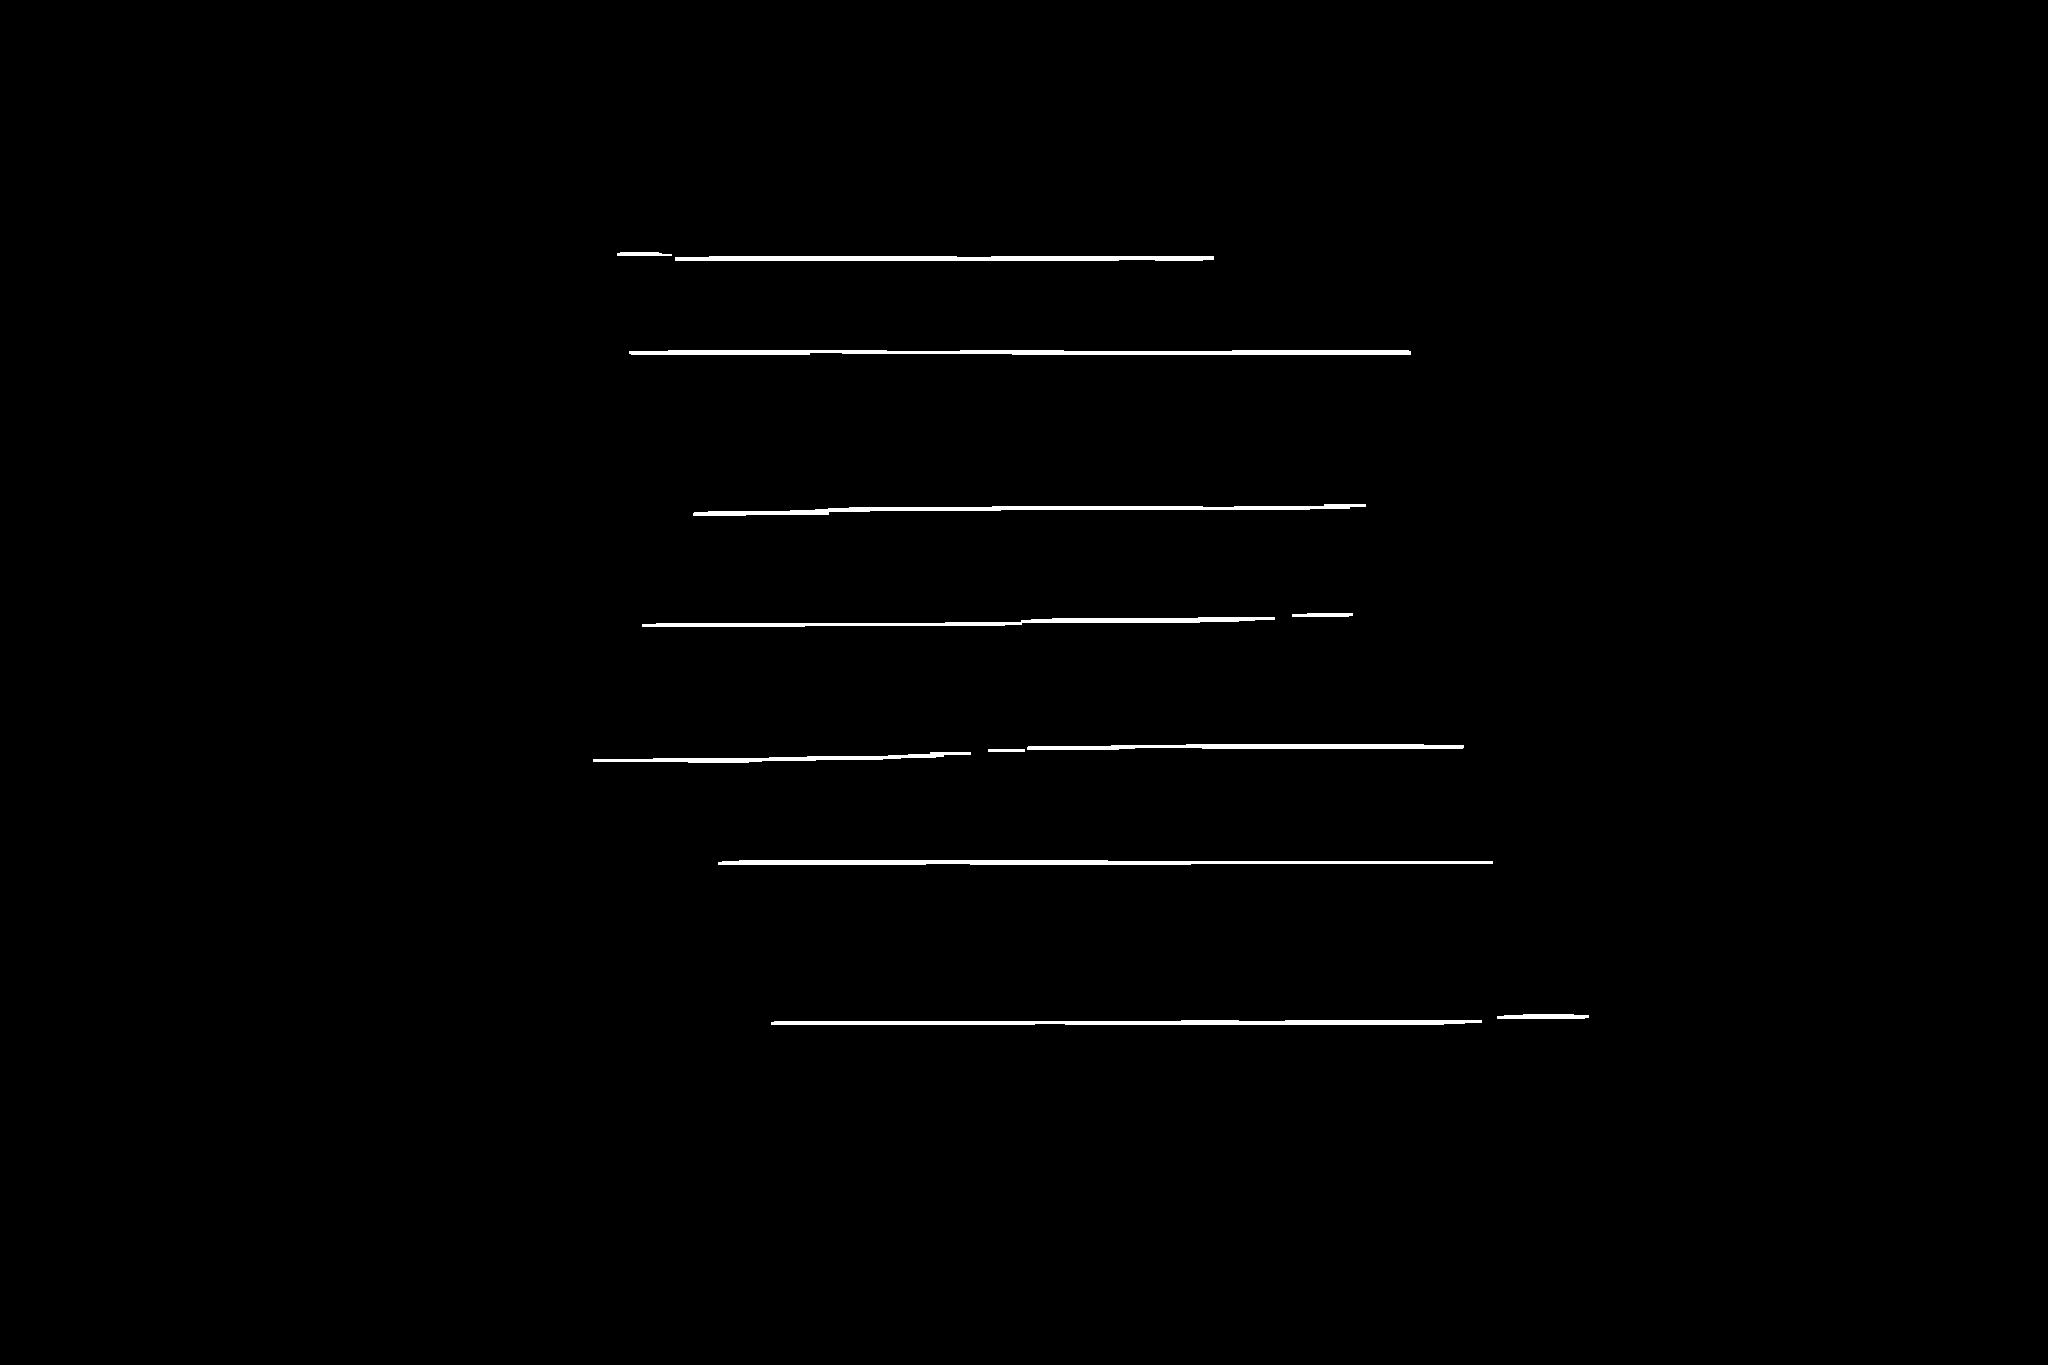
黑色背景线:
页面原文内容由Stack Overflow提供。腾讯云小微IT领域专用引擎提供翻译支持
原文链接:
https://stackoverflow.com/questions/65099144
复制相关文章
相似问题
腾讯云开发者

Copyright © 2013 - 2026 Tencent Cloud. All Rights Reserved. 腾讯云 版权所有
深圳市腾讯计算机系统有限公司 ICP备案/许可证号:粤B2-20090059 ![]() 粤公网安备44030502008569号
粤公网安备44030502008569号
腾讯云计算(北京)有限责任公司 京ICP证150476号 | 京ICP备11018762号