
如何在设置图层的anchorPoint后使uiview不移动
我有一个需要更改UIView层的anchorPoint的要求,但是在更改anchorPoint之后不能移动视图。我知道当视图由框架(CGRect:.)定义时是可能的。就像这样:
let width = SCREEN_WIDTH - 40
let view2 = UIView(frame: CGRect(x: 20, y: 300, width: width, height: 200))
view2.backgroundColor = .blue
self.view.addSubview(view2)
let oldFrame2 = view2.frame
view2.layer.anchorPoint = CGPoint(x: 0, y: 0.5)
view2.frame = oldFrame2
这个很管用。
但是我的视图是由Autolayout定义的,我像上面的代码一样尝试解决方案,但是它不起作用。代码:
let view1 = UIView()
view1.backgroundColor = .orange
self.view.addSubview(view1)
view1.snp.makeConstraints { (maker) in
maker.top.equalToSuperview().offset(50)
maker.leading.equalToSuperview().offset(20)
maker.trailing.equalToSuperview().offset(-20)
maker.height.equalTo(200)
}
let oldFrame1 = view1.frame
view1.layer.anchorPoint = CGPoint(x: 0, y: 0.5)
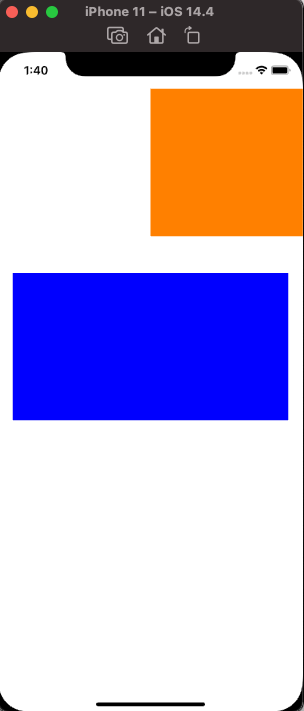
view1.frame = oldFrame1结果是:橙色的view1被移动,它应该像改变anchorPoint后的蓝色view2。
有人能给我一些建议吗?
正如@DonMag的回答一样,我们可以通过更新使用Autolayout时视图而不是框架的约束来实现这一要求。下面是SnapKit编写的代码:
let view1 = UIView()
view1.backgroundColor = .orange
view1.translatesAutoresizingMaskIntoConstraints = false
self.view.addSubview(view1)
view1.snp.makeConstraints { (maker) in
    maker.top.equalToSuperview().offset(100)
    maker.leading.equalToSuperview().offset(20)
    maker.trailing.equalToSuperview().offset(-20)
    maker.height.equalTo(200)
}

// important!!!
view1.layoutIfNeeded()

let oldFrame1 = view1.frame
view1.layer.anchorPoint = CGPoint(x: 0, y: 0.5)

// update constraints by updateConstraints function
// if you use @IBOutlet NSLayoutConstraint from xib,
// you can also just set xxx.constant = yyy to update the constraints.
view1.snp.updateConstraints { (maker) in
    let subOffset = oldFrame1.width * 0.5
    maker.leading.equalToSuperview().offset(20 - subOffset)
    maker.trailing.equalToSuperview().offset(-20 - subOffset)
}

let width = SCREEN_WIDTH - 40
let view2 = UIView(frame: CGRect(x: 20, y: 300, width: width, height: 200))
view2.backgroundColor = .blue
self.view.addSubview(view2)
let oldFrame2 = view2.frame
view2.layer.anchorPoint = CGPoint(x: 0, y: 0.5)
view2.frame = oldFrame2另一种解决方案是通过设置translatesAutoresizingMaskIntoConstraints = true将autolayout视图更改为框架,如下所示:
let width = SCREEN_WIDTH - 40
let view1 = UIView()
view1.backgroundColor = .orange

self.view.addSubview(view1)
// Autolayout
view1.snp.makeConstraints { (maker) in
    maker.top.equalToSuperview().offset(100)
    maker.leading.equalToSuperview().offset(20)
    maker.trailing.equalToSuperview().offset(-20)
    maker.height.equalTo(200)
}

// change autolayout to frame
view1.translatesAutoresizingMaskIntoConstraints = true
view1.frame = CGRect(x: 20, y: 100, width: width, height: 200)
let oldFrame1 = view1.frame
view1.layer.anchorPoint = CGPoint(x: 0, y: 0.5)
view1.frame = oldFrame1

let view2 = UIView(frame: CGRect(x: 20, y: 300, width: width, height: 200))
view2.backgroundColor = .blue
self.view.addSubview(view2)
let oldFrame2 = view2.frame
view2.layer.anchorPoint = CGPoint(x: 0, y: 0.5)
view2.frame = oldFrame2回答 1
Stack Overflow用户
发布于 2021-05-07 14:22:21
首先,当使用自动布局/约束时,直接设置视图的.frame不会带来预期的结果。一旦自动布局更新用户界面,约束将被重新应用.
当您更改.anchorPoint时,您将更改视图的几何形状。因此,您最好使用.frame而不是自动布局。
如果do需要/希望使用自动布局,则需要更新约束的.constant值,以考虑几何变化。
我不知道如何使用SnapKit实现这一点,但这里有一个使用“标准”约束语法的示例。
variables
- assign
- 声明前导和尾随约束,并激活constraints
- tell自动布局以计算框架
- ,更改anchorPoint
- update前导和尾随约束常量,以反映几何变化
。
注意:,这是示例代码!
class ViewController: UIViewController {
// these will have their .constant values changed
// to account for layer.anchorPoint change
var leadingConstraint: NSLayoutConstraint!
var trailingConstraint: NSLayoutConstraint!
override func viewDidLoad() {
super.viewDidLoad()
// NOT using auto-layout constraints
let width = view.frame.width - 40
let view2 = UIView(frame: CGRect(x: 20, y: 300, width: width, height: 200))
view2.backgroundColor = .blue
self.view.addSubview(view2)
let oldFrame2 = view2.frame
view2.layer.anchorPoint = CGPoint(x: 0, y: 0.5)
view2.frame = oldFrame2
// USING auto-layout constraints
let view1 = UIView()
view1.backgroundColor = .orange
view1.translatesAutoresizingMaskIntoConstraints = false
self.view.addSubview(view1)
// create leading and trailing constraints
leadingConstraint = view1.leadingAnchor.constraint(equalTo: view.leadingAnchor, constant: 20.0)
trailingConstraint = view1.trailingAnchor.constraint(equalTo: view.trailingAnchor, constant: -20.0)
// activate constraints
NSLayoutConstraint.activate([
view1.topAnchor.constraint(equalTo: view.topAnchor, constant: 80.0),
view1.heightAnchor.constraint(equalToConstant: 200.0),
leadingConstraint,
trailingConstraint,
])
// auto-layout has not run yet, so force it to layout
// the view frame
view1.layoutIfNeeded()
// get the auto-layout generated frame
let oldFrame1 = view1.frame
// change the anchorPoint
view1.layer.anchorPoint = CGPoint(x: 0, y: 0.5)
// we've move the X anchorPoint from 0.5 to 0.0, so
// we need to adjust the leading and trailing constants
// by 0.5 * the frame width
leadingConstraint.constant -= oldFrame1.width * 0.5
trailingConstraint.constant -= oldFrame1.width * 0.5
}
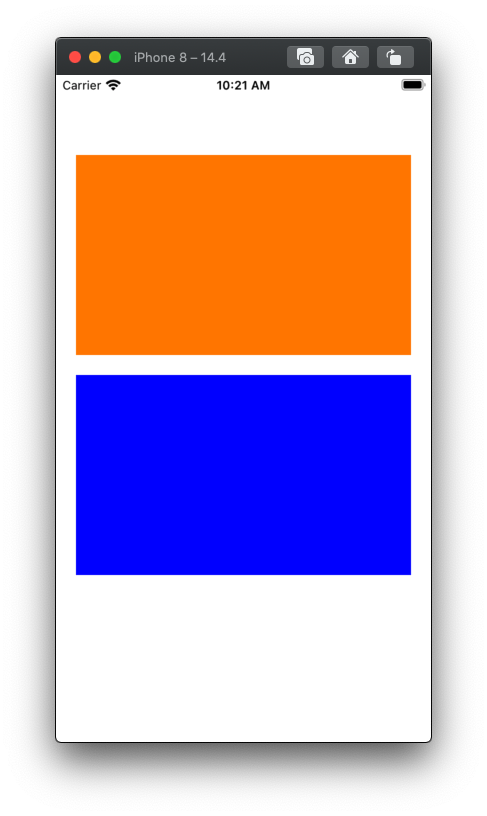
}结果:
https://stackoverflow.com/questions/67430066
复制相似问题
腾讯云开发者

Copyright © 2013 - 2026 Tencent Cloud. All Rights Reserved. 腾讯云 版权所有
深圳市腾讯计算机系统有限公司 ICP备案/许可证号:粤B2-20090059 ![]() 粤公网安备44030502008569号
粤公网安备44030502008569号
腾讯云计算(北京)有限责任公司 京ICP证150476号 | 京ICP备11018762号