PentestGPT-基于AI的自动化渗透测试代理

PentestGPT-基于AI的自动化渗透测试代理

山行AI
发布于 2026-03-13 18:18:22
发布于 2026-03-13 18:18:22
警告
PentestGPT 仅为研究原型
PentestGPT是一个开创性地将生成型AI应用于网络安全的研究原型。请注意,某些第三方服务可能声称提供收费的PentestGPT产品——原始项目是免费的并且是开源的。
演示
安装演示
观看 YouTube[1]
PentestGPT 实时演示
观看 YouTube[2]
v1.0 新功能 (Agentic 升级)
•自主代理 - 使用 Agentic 管道进行智能、自动化的渗透测试•会话持久性 - 保存并恢复渗透测试会话•以 Docker 为主 - 提供隔离的、可重复的环境,内置安全工具
正在开发中: 支持 OpenAI、Gemini 和其他大型语言模型(LLM)提供商的多模型支持
功能特点
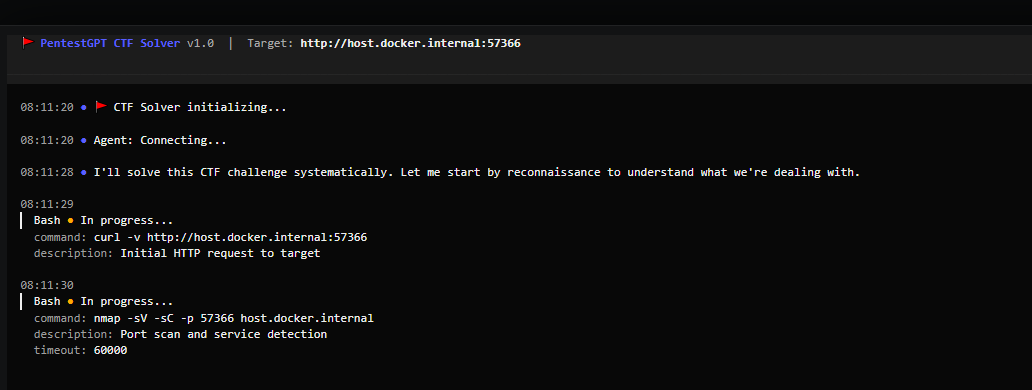
•AI 驱动的挑战解决器 - 利用大型语言模型的高级推理能力进行渗透测试和 CTF 挑战•实时指导 - 跟踪代理在解决挑战时的每一步•多类别支持 - 支持 Web、加密、逆向工程、取证、PWN、特权提升等类别•实时反馈 - 通过活动更新实时观察 AI 的工作过程•可扩展架构 - 干净、模块化的设计,便于未来的扩展
快速开始
前置条件
•Docker(必需) - 安装 Docker[3]•LLM 提供商(选择一个):•从 Anthropic 控制台[4] 获取 API 密钥•Claude OAuth 登录(需要 Claude 订阅)•OpenRouter[5] 获取替代模型
安装步骤
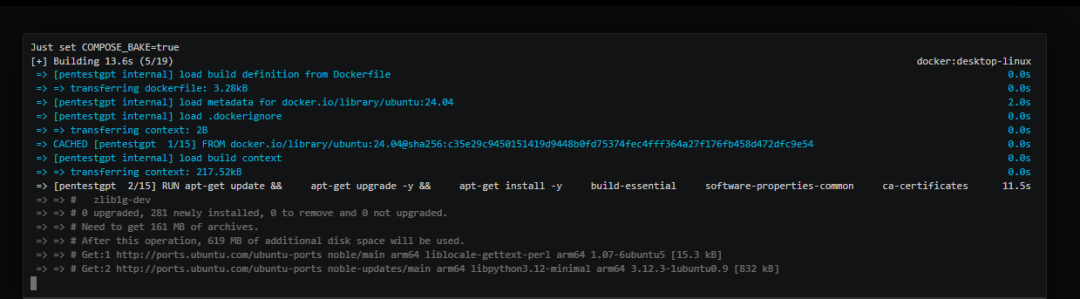
1.克隆并构建
git clone --recurse-submodules https://github.com/GreyDGL/PentestGPT.gitcd PentestGPTmake install2.配置认证(仅第一次需要)
make config3.连接到容器
make connect注意: --recurse-submodules 标志会下载基准测试套件。如果你已经没有使用此标志进行克隆,可以运行以下命令来更新子模块:
git submodule update --init --recursive
尝试基准测试运行:
uv run pentestgpt-benchmark start XBEN-037-24然后连接到容器并运行:
pentestgpt --target http://host.docker.internal:8000命令参考
描述使用方法
# 交互式 TUI 模式(默认)
pentestgpt --target 10.10.11.234

# 非交互模式
pentestgpt --target 10.10.11.100--non-interactive

# 带挑战上下文
pentestgpt --target 10.10.11.50--instruction "WordPress 网站,重点关注插件漏洞"键盘快捷键:F1帮助 | Ctrl+P 暂停/恢复 | Ctrl+Q 退出
使用本地 LLM(大语言模型)
PentestGPT 支持将请求路由到运行在您主机上的本地 LLM 服务器(如 LM Studio、Ollama、text-generation-webui 等)。
前提条件
•本地 LLM 服务器,且支持 OpenAI 兼容的 API 接口。•LM Studio:启用服务器模式(默认端口 1234)•Ollama:运行 ollama serve(默认端口 11434)
设置步骤
1.配置 PentestGPT 使用本地 LLM:
make config2.选择选项 4:Local LLM(本地 LLM) 3.启动您主机上的本地 LLM 服务器。 4.然后连接到容器:
make connect自定义模型
编辑 scripts/ccr-config-template.json 文件来自定义配置:
•localLLM.api_base_url:您的 LLM 服务器 URL(默认:host.docker.internal:1234)•localLLM.models:您服务器上可用的模型名称•Router 部分:指定哪些模型处理哪些操作
路由 | 目的 | 默认模型 |
|---|---|---|
default | 一般任务 | openai/gpt-oss-20b |
background | 背景操作 | openai/gpt-oss-20b |
think | 推理密集型任务 | qwen/qwen3-coder-30b |
longContext | 大上下文处理 | qwen/qwen3-coder-30b |
webSearch | 网络搜索操作 | openai/gpt-oss-20b |
故障排除
•连接被拒绝:确保您的 LLM 服务器正在运行并监听配置的端口。•Docker 网络问题:从 Docker 访问主机服务时,请使用 host.docker.internal(而不是 localhost)。•查看 CCR 日志:在容器内运行以下命令查看日志:cat /tmp/ccr.log
开发
前提条件
•uv(必需) - Python 包管理器:curl -LsSf https://astral.sh/uv/install.sh | sh•Claude Code CLI - 配置方式:claude login 或 export ANTHROPIC_API_KEY='your-key'•教程: 使用本地模型与 Claude Code[6]
本地开发
uv sync                                      # 安装依赖
uv run pentestgpt --target 10.10.11.234# 本地运行
项目命令
make test                         # 运行 pytest 测试
make lint                          # 运行 ruff linter
make typecheck           # 运行 mypy 类型检查
make ci                             # 运行完整的 CI 模拟(包括:linter、格式化、类型检查、测试、构建)
make ci-quick                # 快速 CI(不包括构建步骤)
旧版本
之前支持 OpenAI、Gemini、Deepseek 和 Ollama 的多 LLM 版本(v0.15)已归档在 legacy/ 目录中:
cd legacy && pip install -e .&& pentestgpt --reasoning gpt-4o好了,今天的分享就到这里了,下期见!
https://github.com/GreyDGL/PentestGPT?tab=readme-ov-fileReferences
[1] 观看 YouTube:https://www.youtube.com/watch?v=RUNmoXqBwVg
[2]观看 YouTube:https://www.youtube.com/watch?v=cWi3Yb7RmZA
[3]Docker:https://docs.docker.com/get-started/get-docker/
[4]Anthropic 控制台:https://console.anthropic.com/login?returnTo=%2F%3F
[5]OpenRouter:https://openrouter.ai/sign-in?redirect_url=https%3A%2F%2Fopenrouter.ai%2Fsettings%2Fkeys
[6]教程: 使用本地模型与 Claude Code: https://docs.google.com/document/d/1ixK7x-wlr5t5TYZJdfm75UME5KnPCpS46boLkUXKg1w/edit?usp=sharing&pli=1&authuser=0
本文参与 腾讯云自媒体同步曝光计划,分享自微信公众号。
原始发表:2025-12-22,如有侵权请联系 cloudcommunity@tencent.com 删除
评论
登录后参与评论
推荐阅读
目录
腾讯云开发者

Copyright © 2013 - 2026 Tencent Cloud. All Rights Reserved. 腾讯云 版权所有
深圳市腾讯计算机系统有限公司 ICP备案/许可证号:粤B2-20090059 ![]() 粤公网安备44030502008569号
粤公网安备44030502008569号
腾讯云计算(北京)有限责任公司 京ICP证150476号 | 京ICP备11018762号