中秋前夕-我居然使用技术来鞭策兄弟


中秋前夕-我居然使用技术来鞭策兄弟
前言
最近在带领一些小伙伴在完成功能,因为人数不少,那么我们如何统计大家有没有摸鱼偷懒呢?
聪明的朋友们可以想到,利用git的提交记录统计。
因为git提交时,会给我们带上一些关键的信息。如
- 提交的次数 - 提交次数多,就认为该伙计是个好🐮🐴
- 提交的备注 - 具体看到提交的内容
- 最后提交的日期 - 提交的日期时间越晚(比如熬夜),就认为该伙计是个好🐮🐴
定下了目标,那么就开始分析如何实现吧
分析
附带流程图
- 引导填写姓名和git仓库
- 整理成json格式
- 使用axios 和 cheeir 获取目标数据
- node注入到html中
- 渲染成表格或者图表

image-20240916212632780
引导填写姓名和git仓库
可以通过在线表格的方式让小伙伴填写自己的姓名和仓库。如:
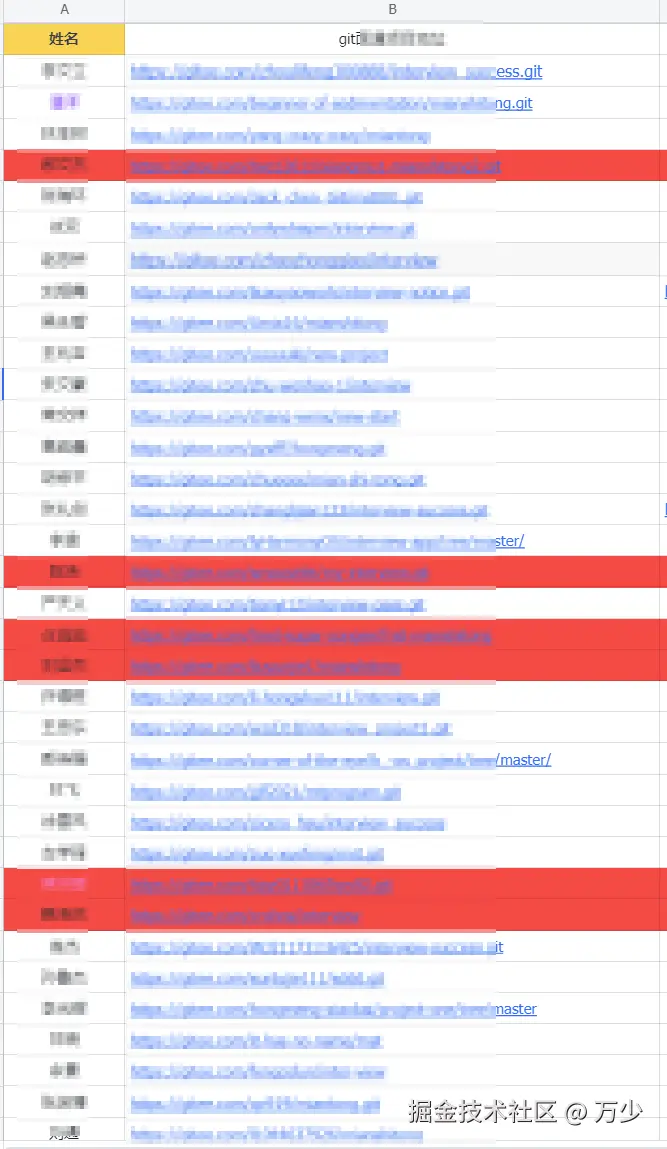
image-20240916205007101
整理成json格式
这个如果熟练使用工具的小伙伴应该可以很快完成这个操作。
最后到手是这个数据格式
注意,url 需要替换成自己的码云git地址
[
  {
    "name": "万小弟1",
    "url": "https://www.baidu.com/s?wd=%E7%99%BE%E5%BA%A6&tn=25017023_2_dg&ch=8&ie=utf-8"
  },
  {
    "name": "万小弟2",
    "url": "https://www.baidu.com/s?wd=%E7%99%BE%E5%BA%A6&tn=25017023_2_dg&ch=8&ie=utf-8"
  },
  {
    "name": "万小弟3",
    "url": "https://www.baidu.com/s?wd=%E7%99%BE%E5%BA%A6&tn=25017023_2_dg&ch=8&ie=utf-8"
  }
]
使用axios 和 cheeir 获取目标数据
虽然码云提供了openAPI,但是你如果短时间内多发几次ajax请求,那么码云后端就会封禁你了。你再发就是403
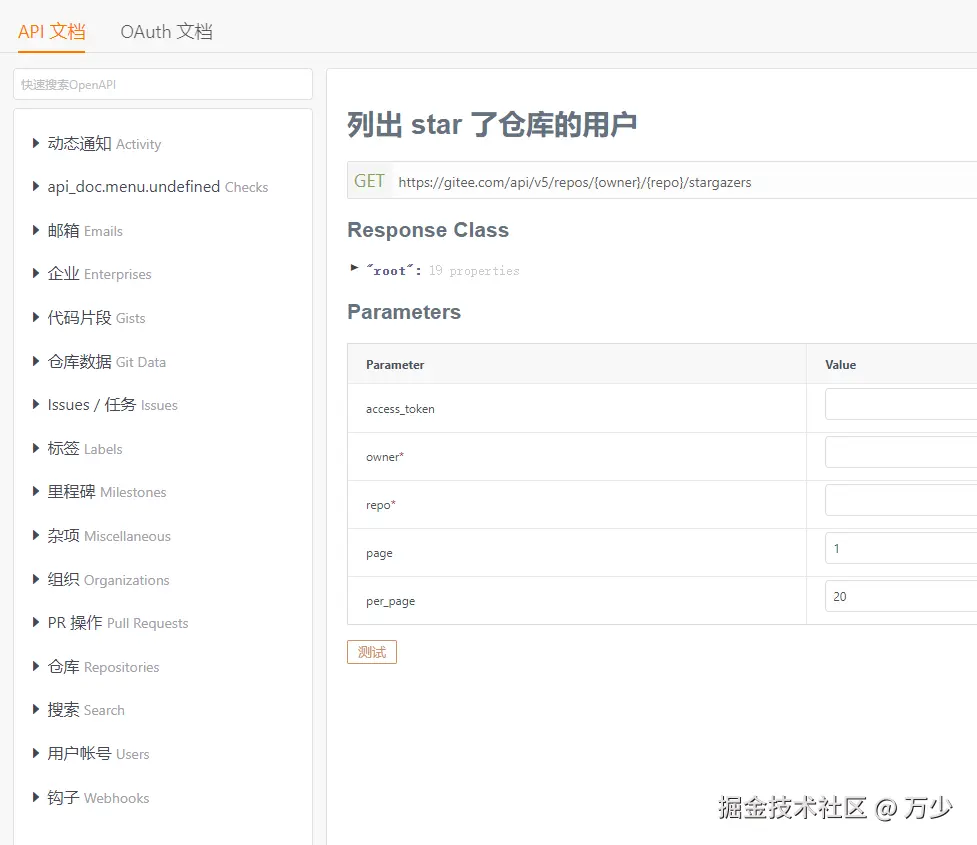
image-20240916210331637
因此我们通过node,在后端直接请求目标页面,然后直接解析 整个html即可。
新建一个英文文件夹

image-20240916210446320
目录内初始化
打开终端,输入
npm init -y 得到项目描述文件

image-20240916210545594
安装相关依赖
npm i axios cheerio 新建需要遍历的数据文件
data.json
也就是刚才整理好的json文件
[ { "name": "万小弟1", "url": "https://gitee.com/ukSir/GGMusic" }, { "name": "万小弟2", "url": "https://gitee.com/ukSir/GGMusic" }, { "name": "万小弟3", "url": "https://gitee.com/ukSir/GGMusic" }]新建node程序入口文件
index.js
const axios = require('axios')
const cheerio = require('cheerio')

// 引入数据文件
let list = require("./data.json")

async function getMainContent(target_url, name) {
  // 发送get请求
  const res = await axios.get(target_url)
  // 获取返回的页面数据
  const html = res.data
  // 使用 cheerio 加载返回的内容数据 后面可以通过 $ 类似jquery的方式来获取html中的内容
  const $ = cheerio.load(html)

}

// 遍历数据发送请求
list.forEach(item => {
  getMainContent(item.url, item.name)
})
获取码云页面上需要收集的数据
提交次数
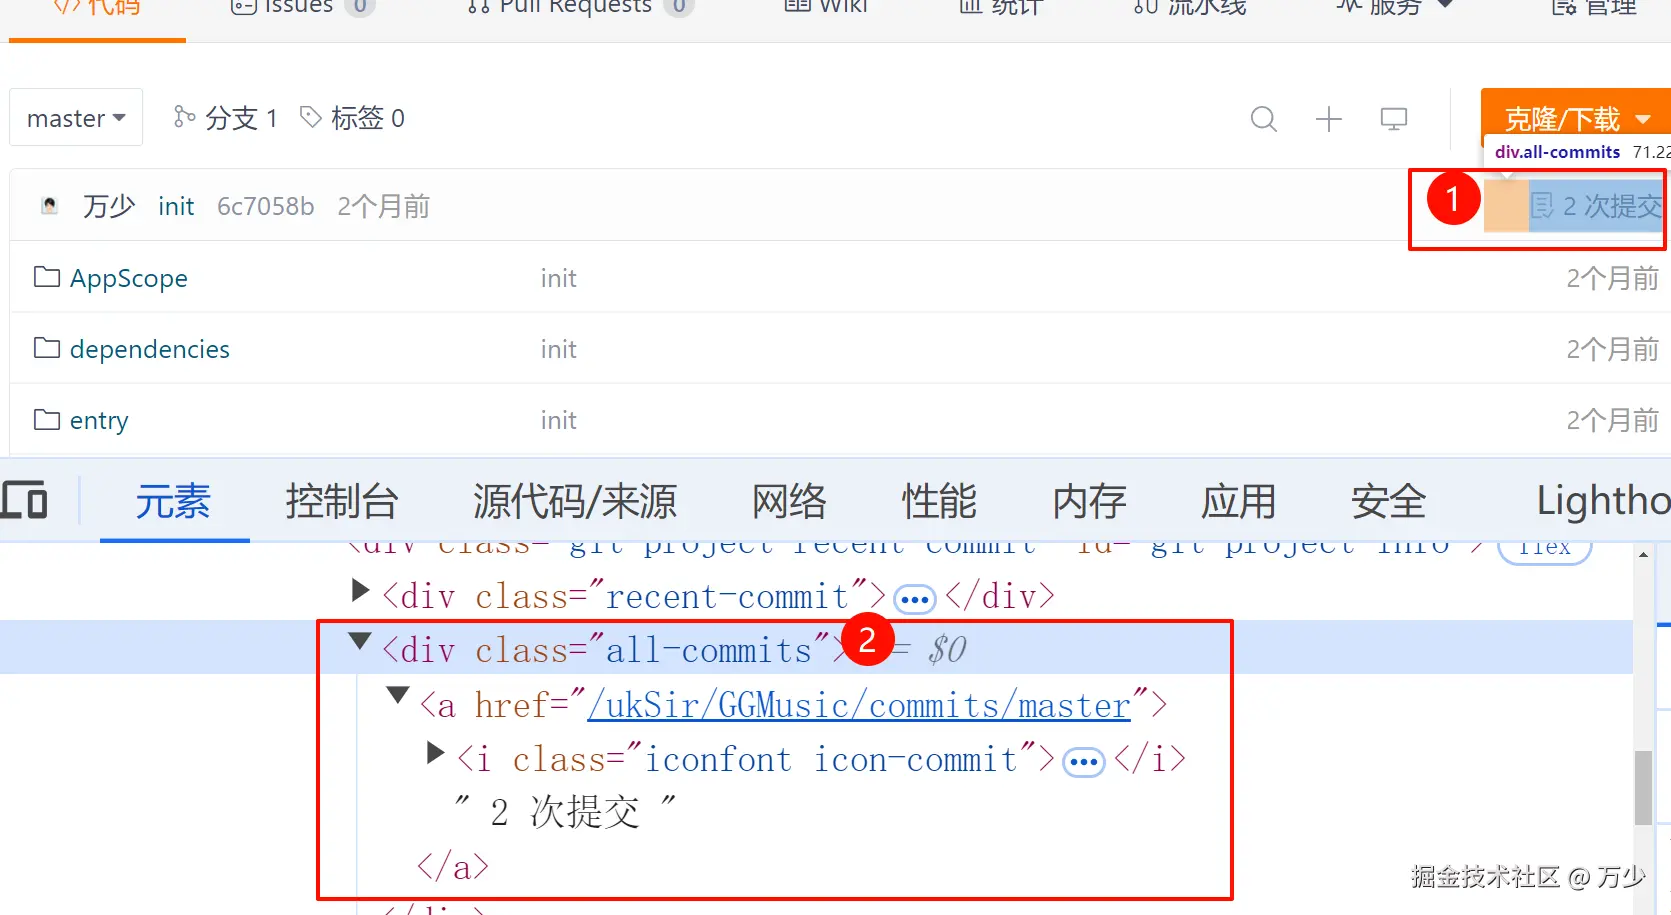
image-20240916211603919
可以看到提交次数的关键标签的选择器为 all-commits
那么我们可以使用刚才的 cheerio 来读取它的数据
let commitTimes = $(".all-commits").text()如果想要只获取它的数字部分,那么使用正则简单解析下即可
let commitTimes = $(".all-commits").text()
commitTimes = commitTimes.replace(/\s/g, '').match(/\w+/g)[0]
最后提交日期
同理
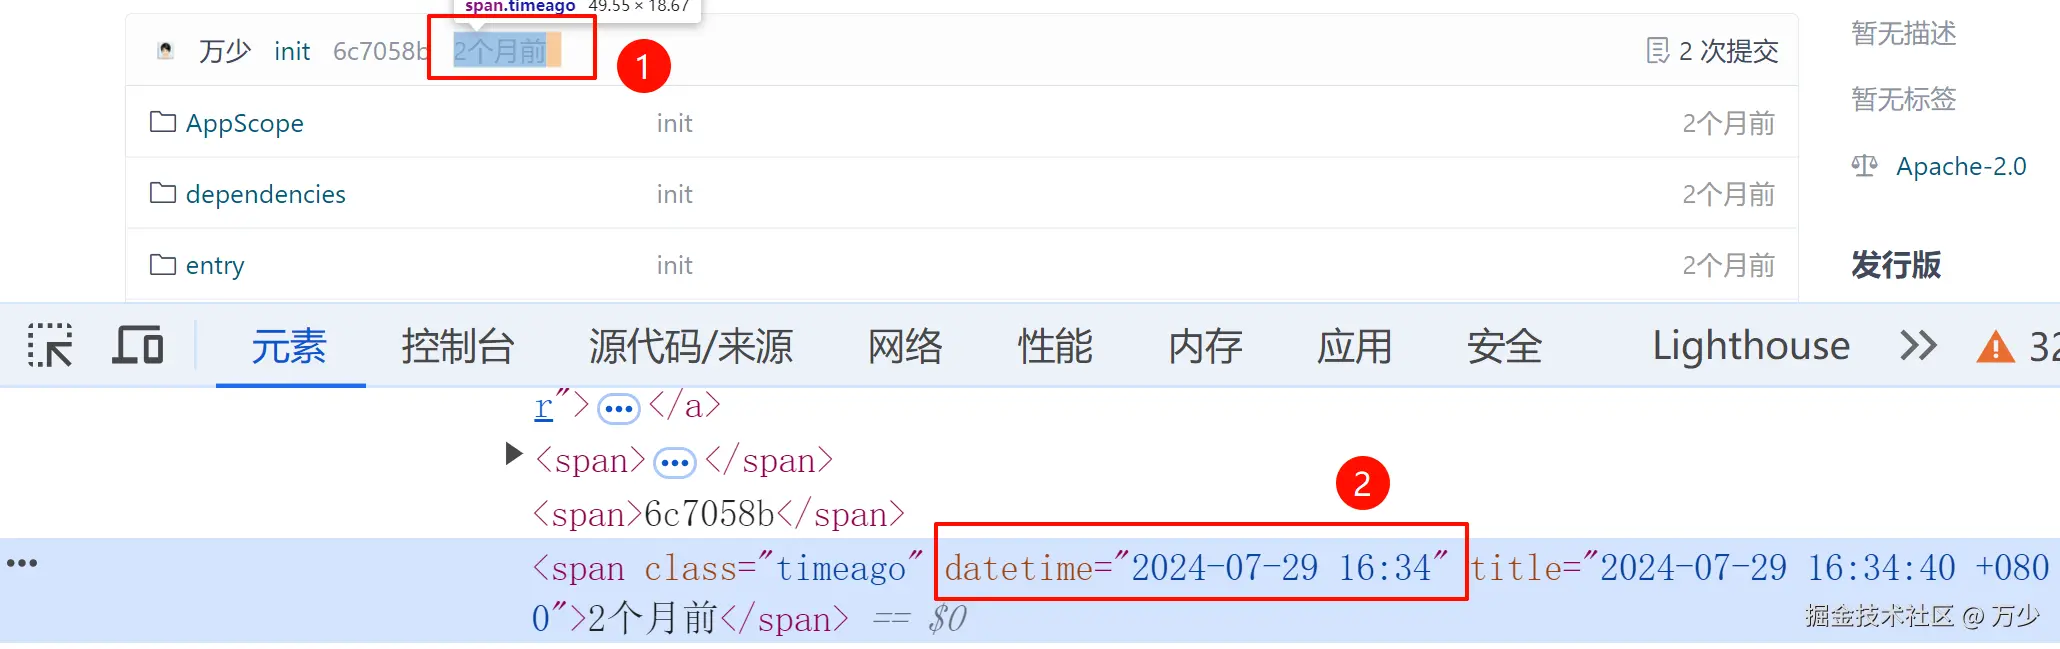
image-20240916211850569
const lastTime = $(".timeago").prop("datetime")最后提交备注
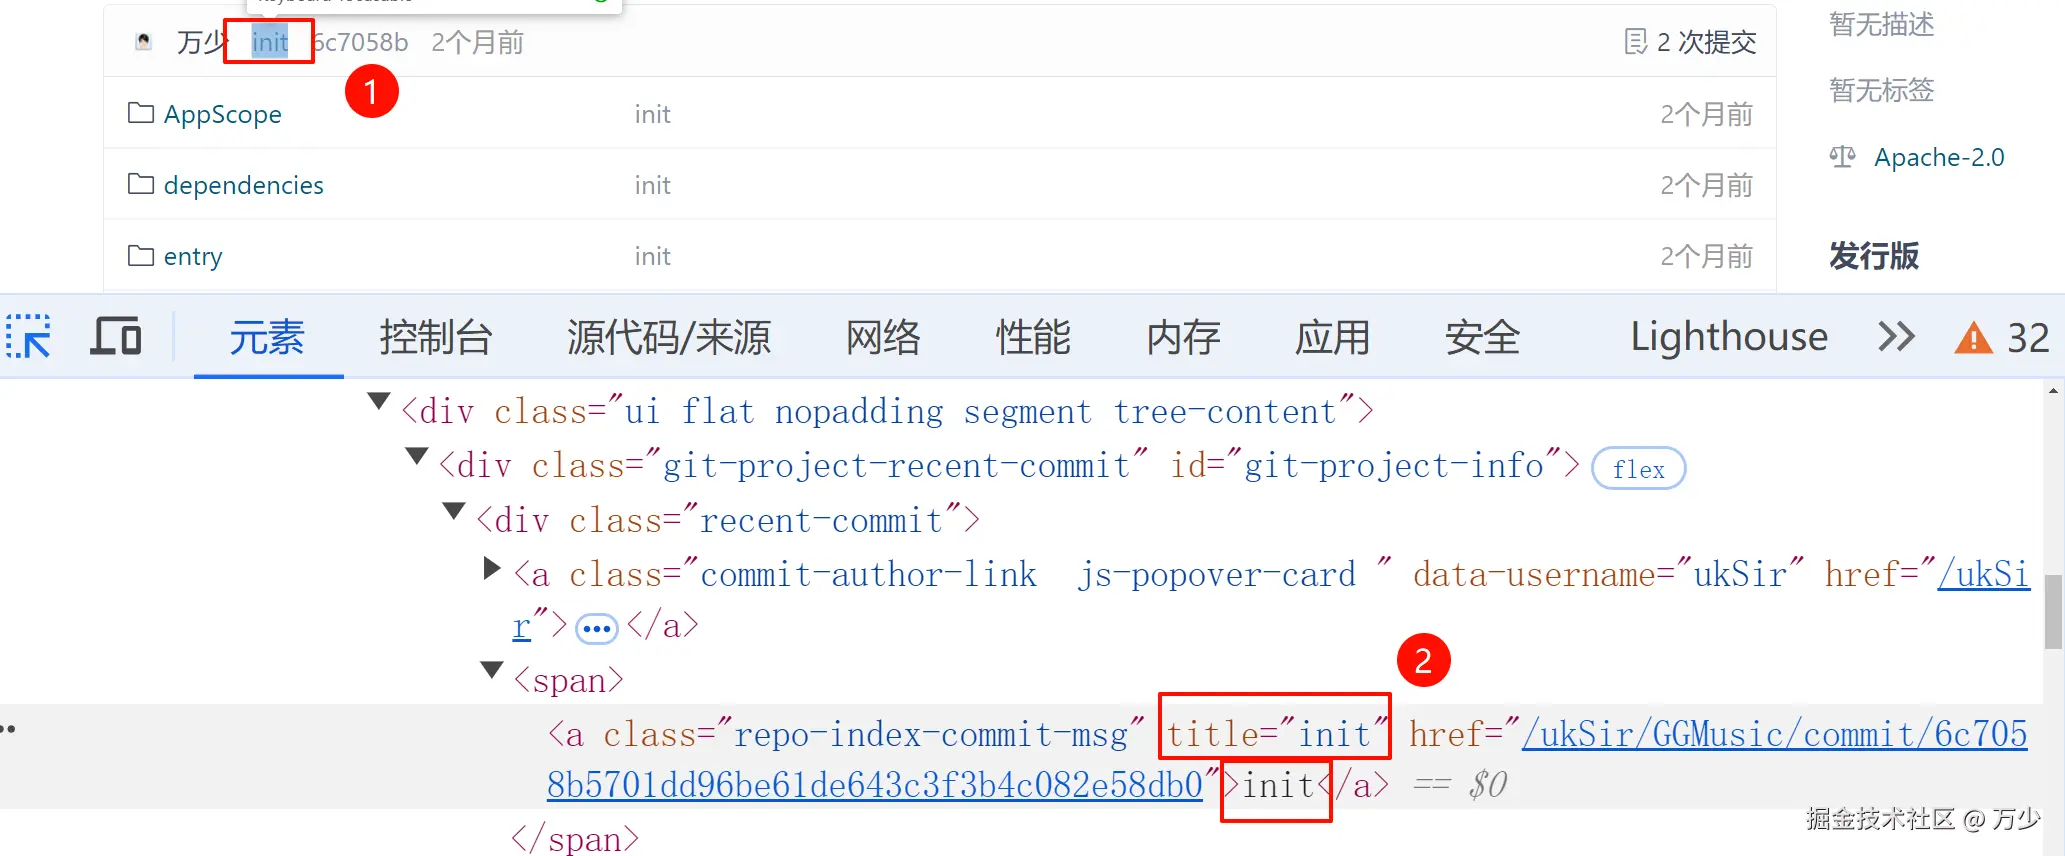
image-20240916211951968
const comment = $(".repo-index-commit-msg").prop("title")拼接数据
获取到想要的关键数据后,可以开始拼接成自己想要的数据了
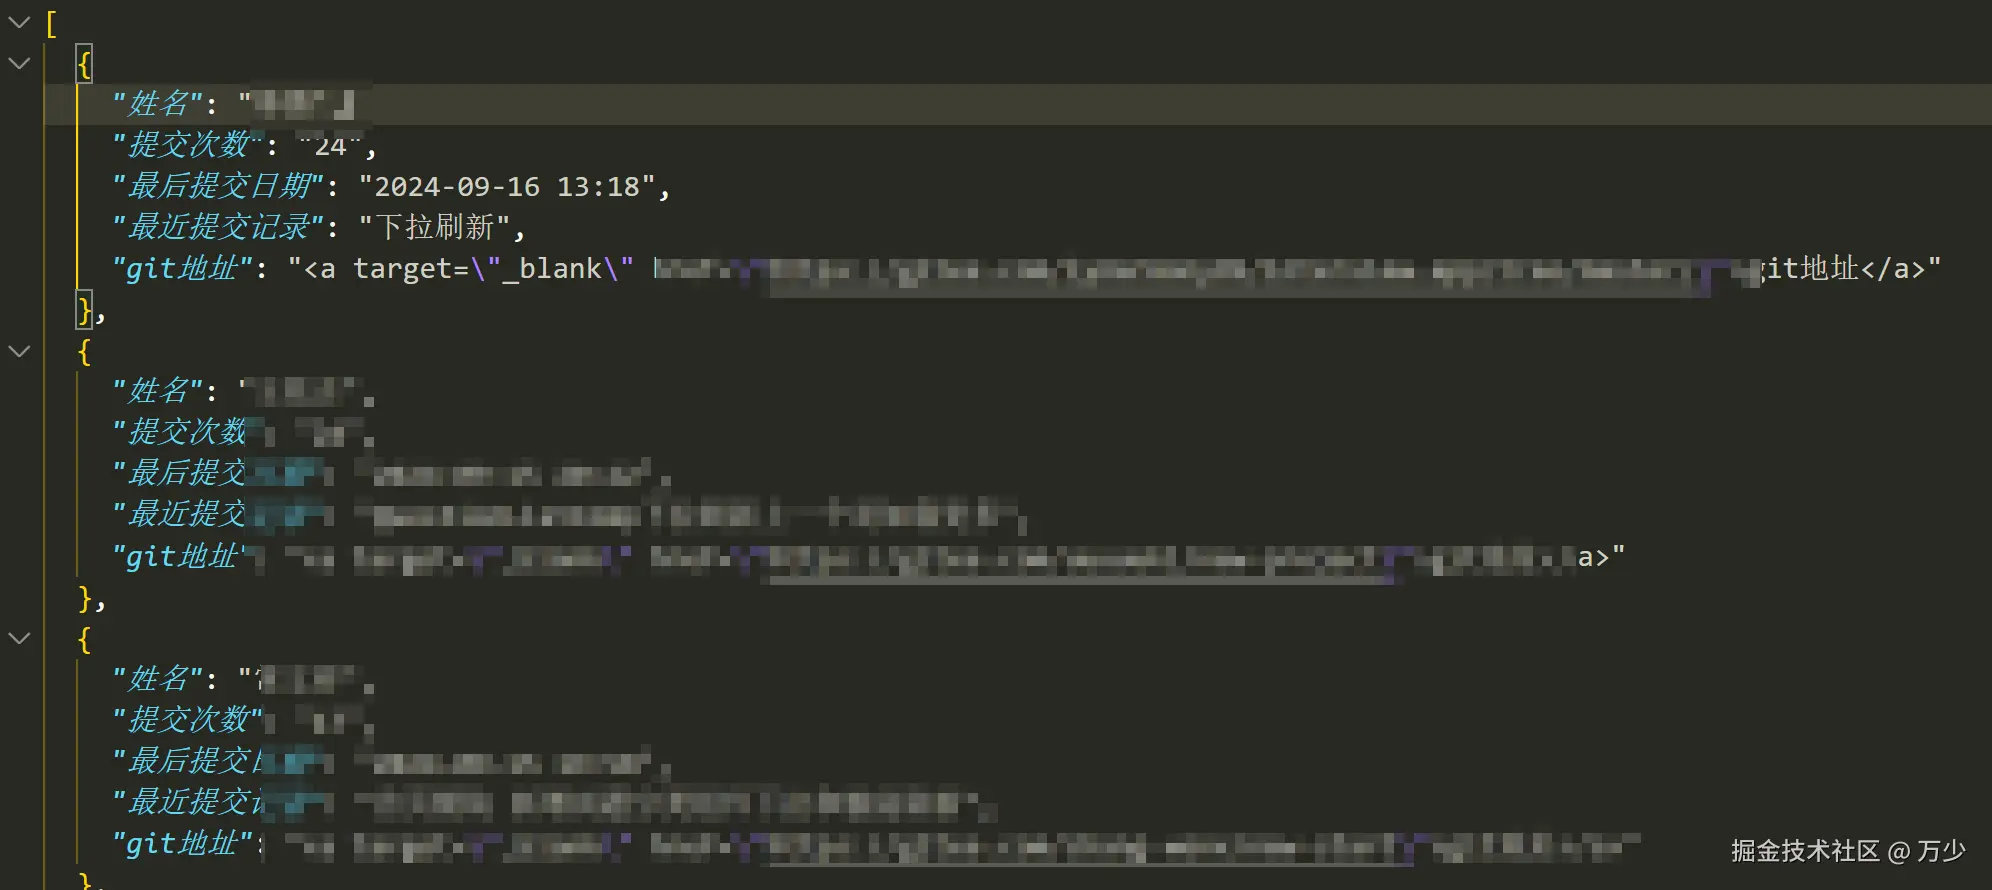
image-20240916212140114
const axios = require('axios')
const cheerio = require('cheerio')
let list = require("./data.json")
const fs = require("fs")
// 想要拼接的数据数组
let resultList = []

async function getMainContent(target_url, name) {
  try {
    const res = await axios.get(target_url)
    const html = res.data
    const $ = cheerio.load(html)
    let commitTimes = $(".all-commits").text()
    commitTimes = commitTimes.replace(/\s/g, '').match(/\w+/g)[0]
    const lastTime = $(".timeago").prop("datetime")
    const comment = $(".repo-index-commit-msg").prop("title")
    // console.log(commitTimes, lastTime, comment)
    resultList.push({
      "姓名": name,
      "提交次数": commitTimes,
      "最后提交日期": lastTime,
      "最近提交记录": comment,
      "git地址": `<a target="_blank" href="${target_url}">git地址</a>`
    })
  } catch (e) {
    resultList.push({
      "姓名": name,
      "提交次数": 0,
      "最后提交日期": 0,
      "最近提交记录": `<b>地址错误</b>`,
      "git地址": `<a target="_blank" href="${target_url}">git地址</a>`
    })
  }
  finally {
    if (resultList.length === list.length) {
        // resultList 为拼接好的数组
    }
  }
}


list.forEach(item => {
  getMainContent(item.url, item.name)
})
node注入到html中
这个步骤的具体目标是想要将生成的数据可以直接注入到html,然后打开html便可直接观察到了。如
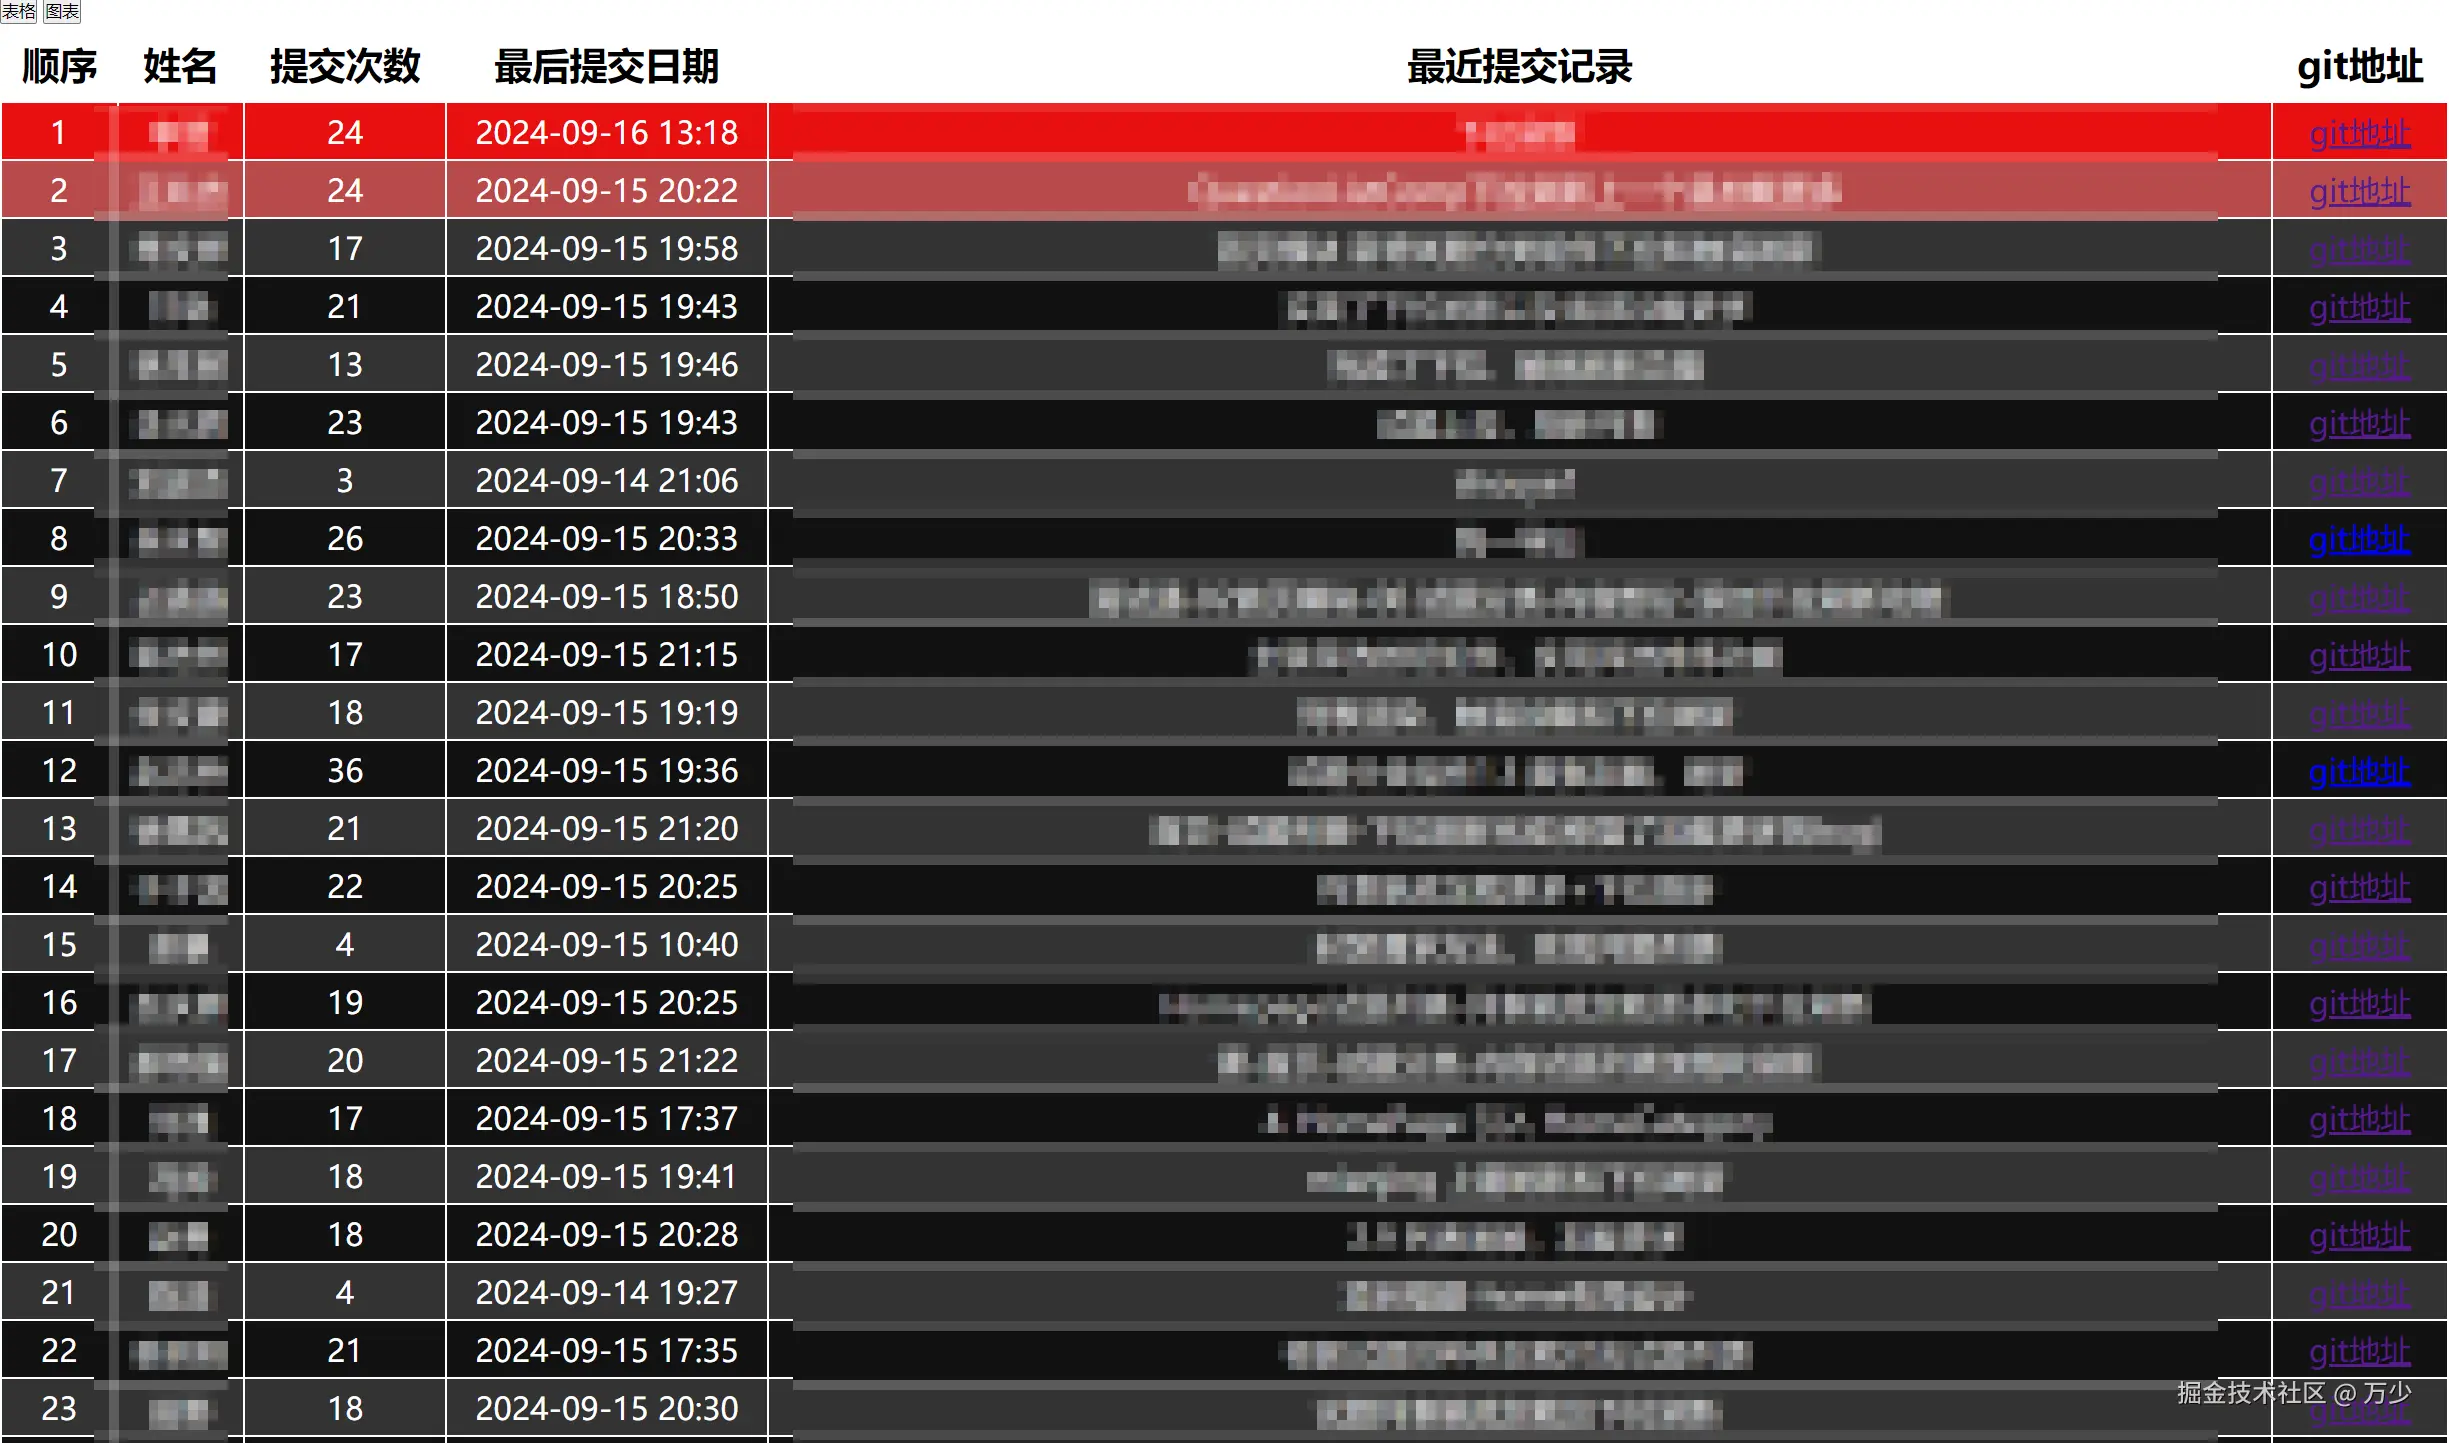
image-20240916212952185
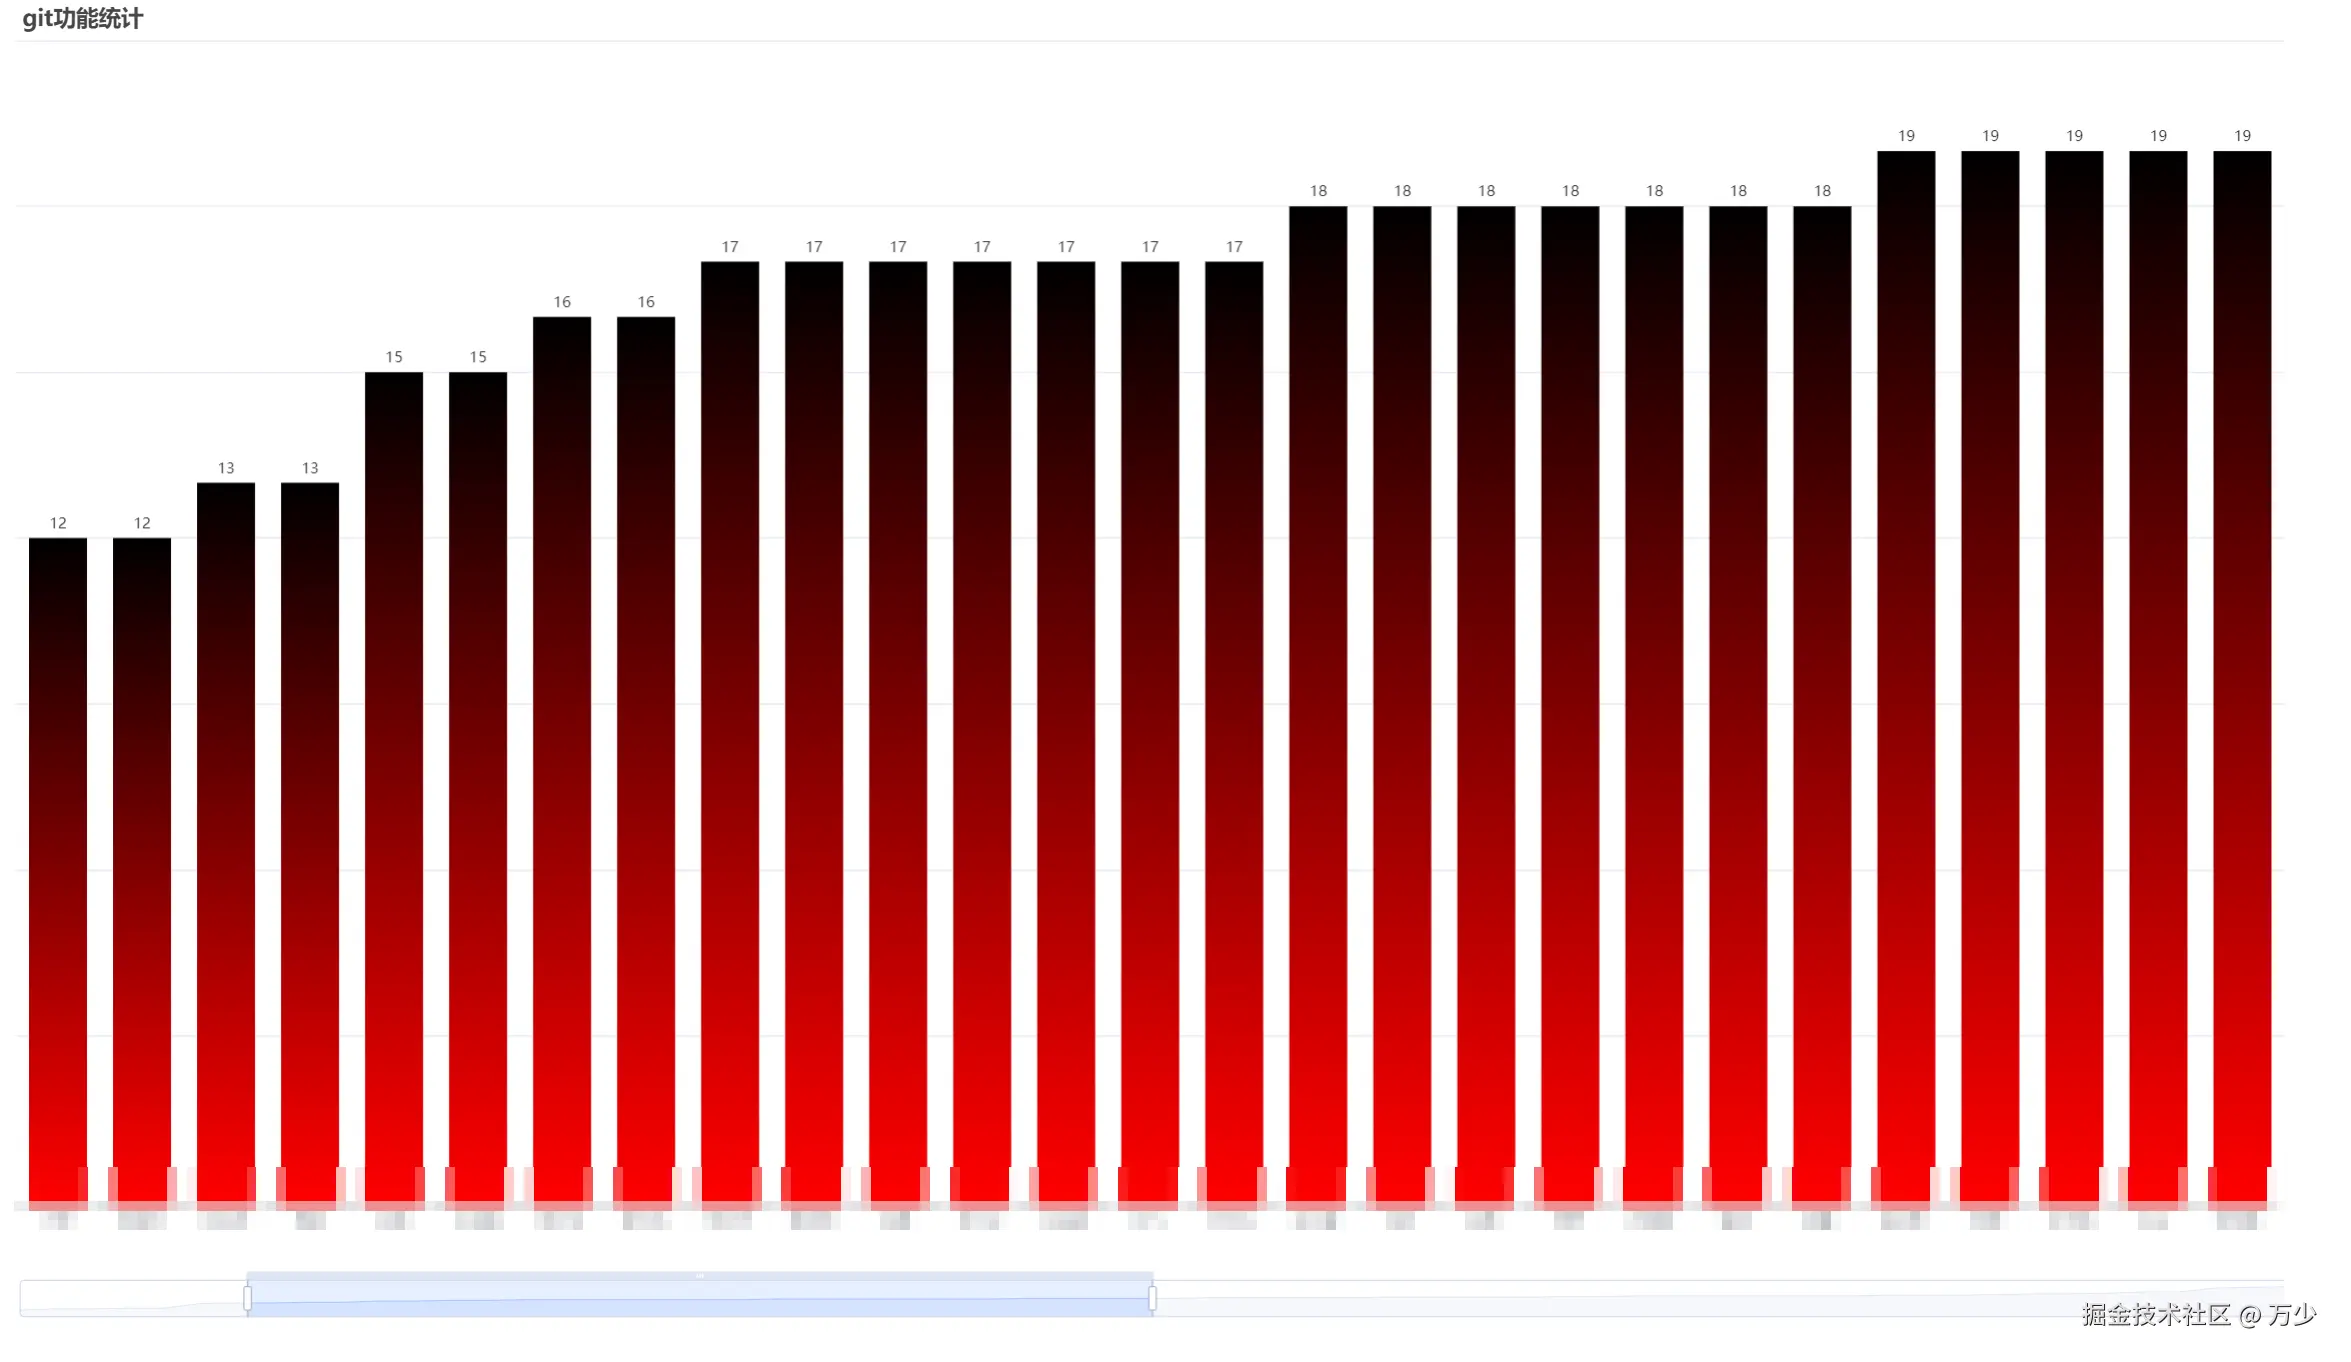
image-20240916213007730
准备好html模板
这个其实也是服务端渲染的流程,先提前将模板准备好,然后通过node读取,当成字符来处理,注入数据即可
新建模板文件 index.html
下图中的
${ script }是自定义的标记,可以根据自己爱好来定义
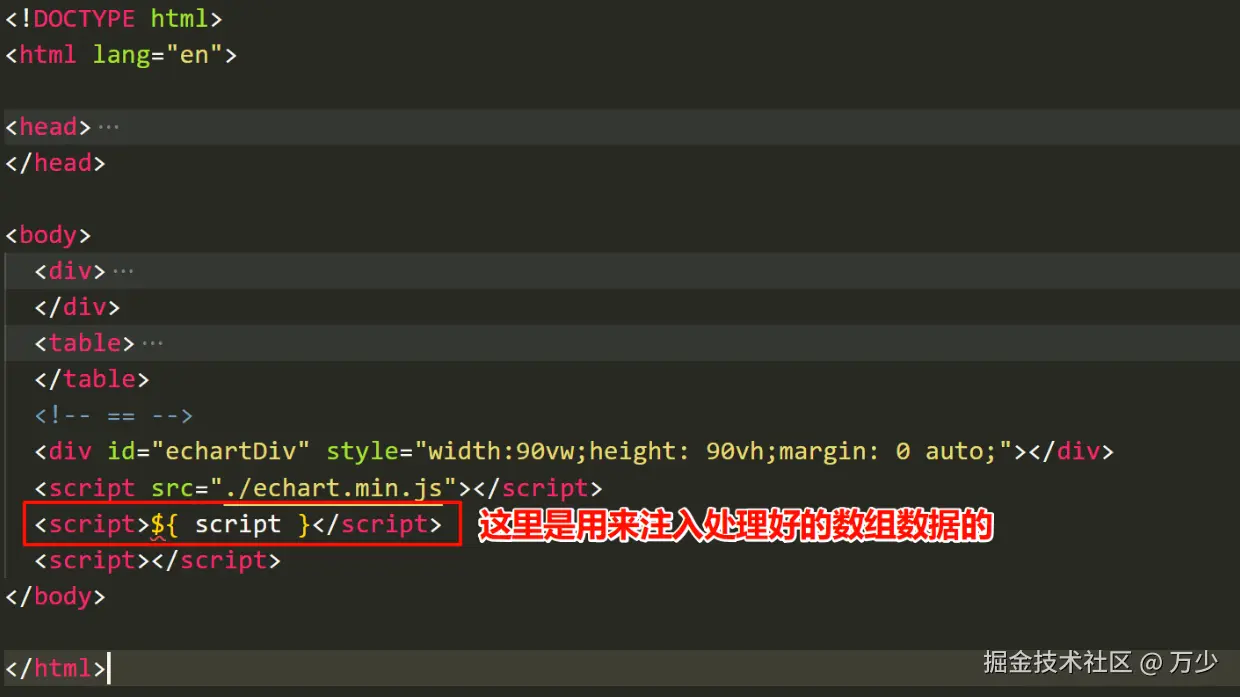
image-20240916213339272
node中开始注入
先读取模板,然后再开始注入
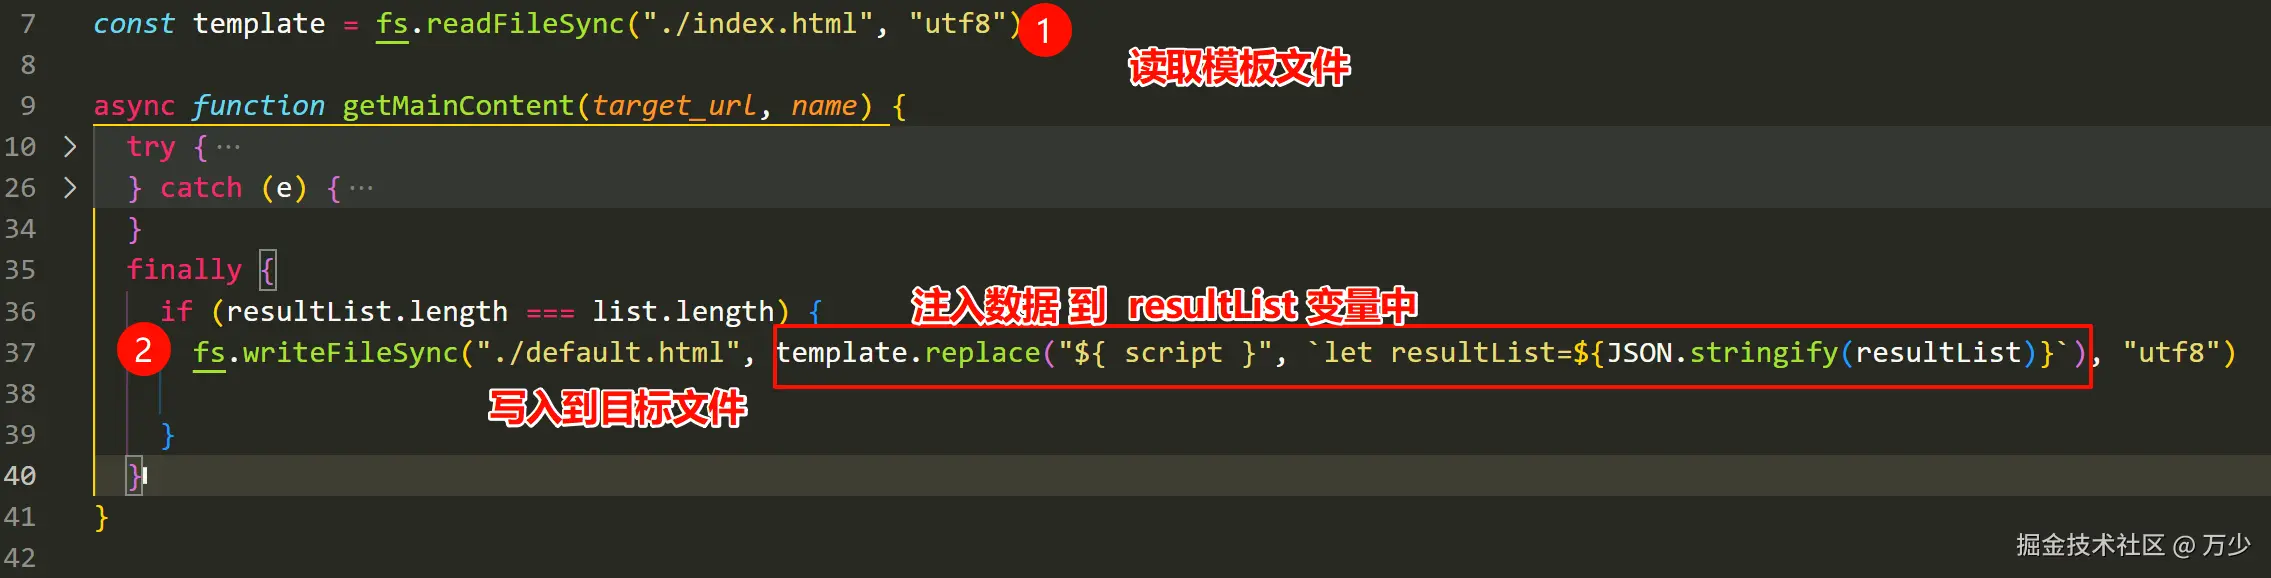
image-20240916213649098
当完成注入后,结果页面 default.html 效果如下
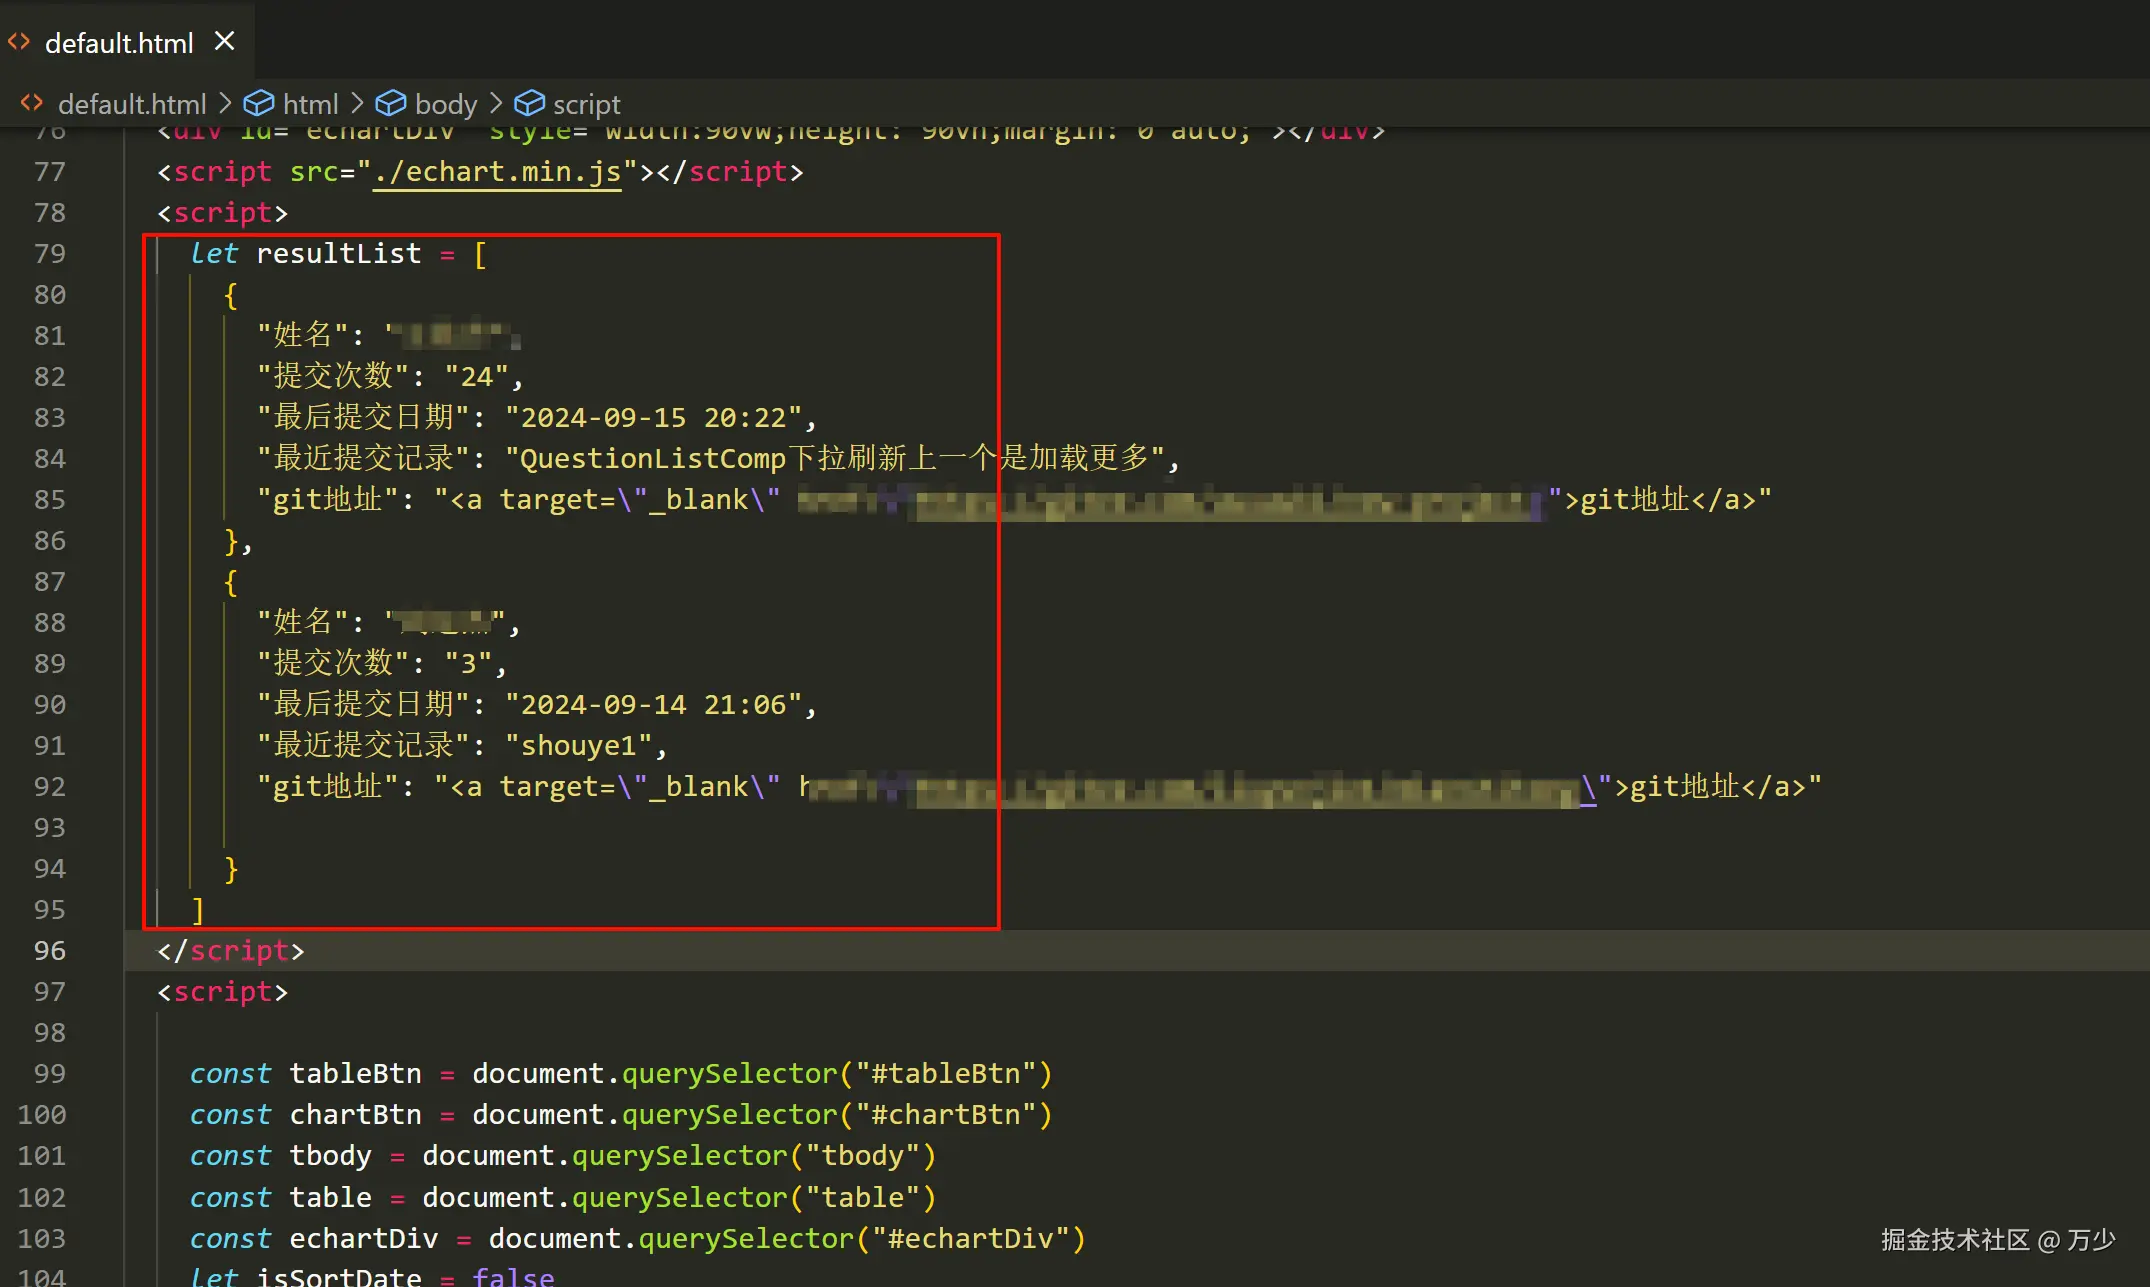
image-20240916214007155
渲染成表格或者图表
此时,我们便得到了有个 resultList数组了,最后根据自己需求完成渲染的效果即可
一键启动
为了方便在本地直接运行程序得到结果。我们需要加入以下手段
- 双击打开脚本自动运行程序
- 自动调用浏览器打开页面
双击打开脚本自动运行程序
新建 start.bat 文件,加入以下内容
node index.js后续 直接双击该文件即可
image-20240916214542002
自动调用浏览器打开页面
利用 child_process中 exec 方法,便可直接在程序中启动指定页面
引入
const template = fs.readFileSync("./index.html", "utf8")启动
exec(`start ./default.html`)项目目录结构
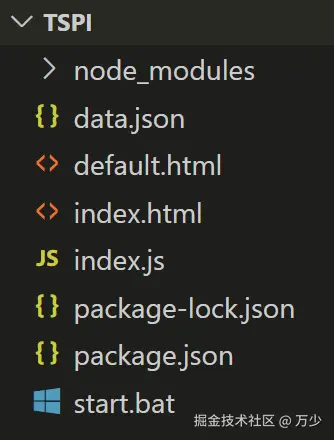
image-20240916214605522
后续
如果想要直接发布到网上,通过一个简单的网址便可以实现以上功能,可以考虑uniapp中提供的云函数和静态托管功能,几乎没有成本便可以使用。但是需要进行简单的改造,如果有想要了解的小朋友可以在文章下留言,我可以抽空整理下这个迁移步骤
总结
基于以上功能,我们便可以知道小伙伴的工作程度了
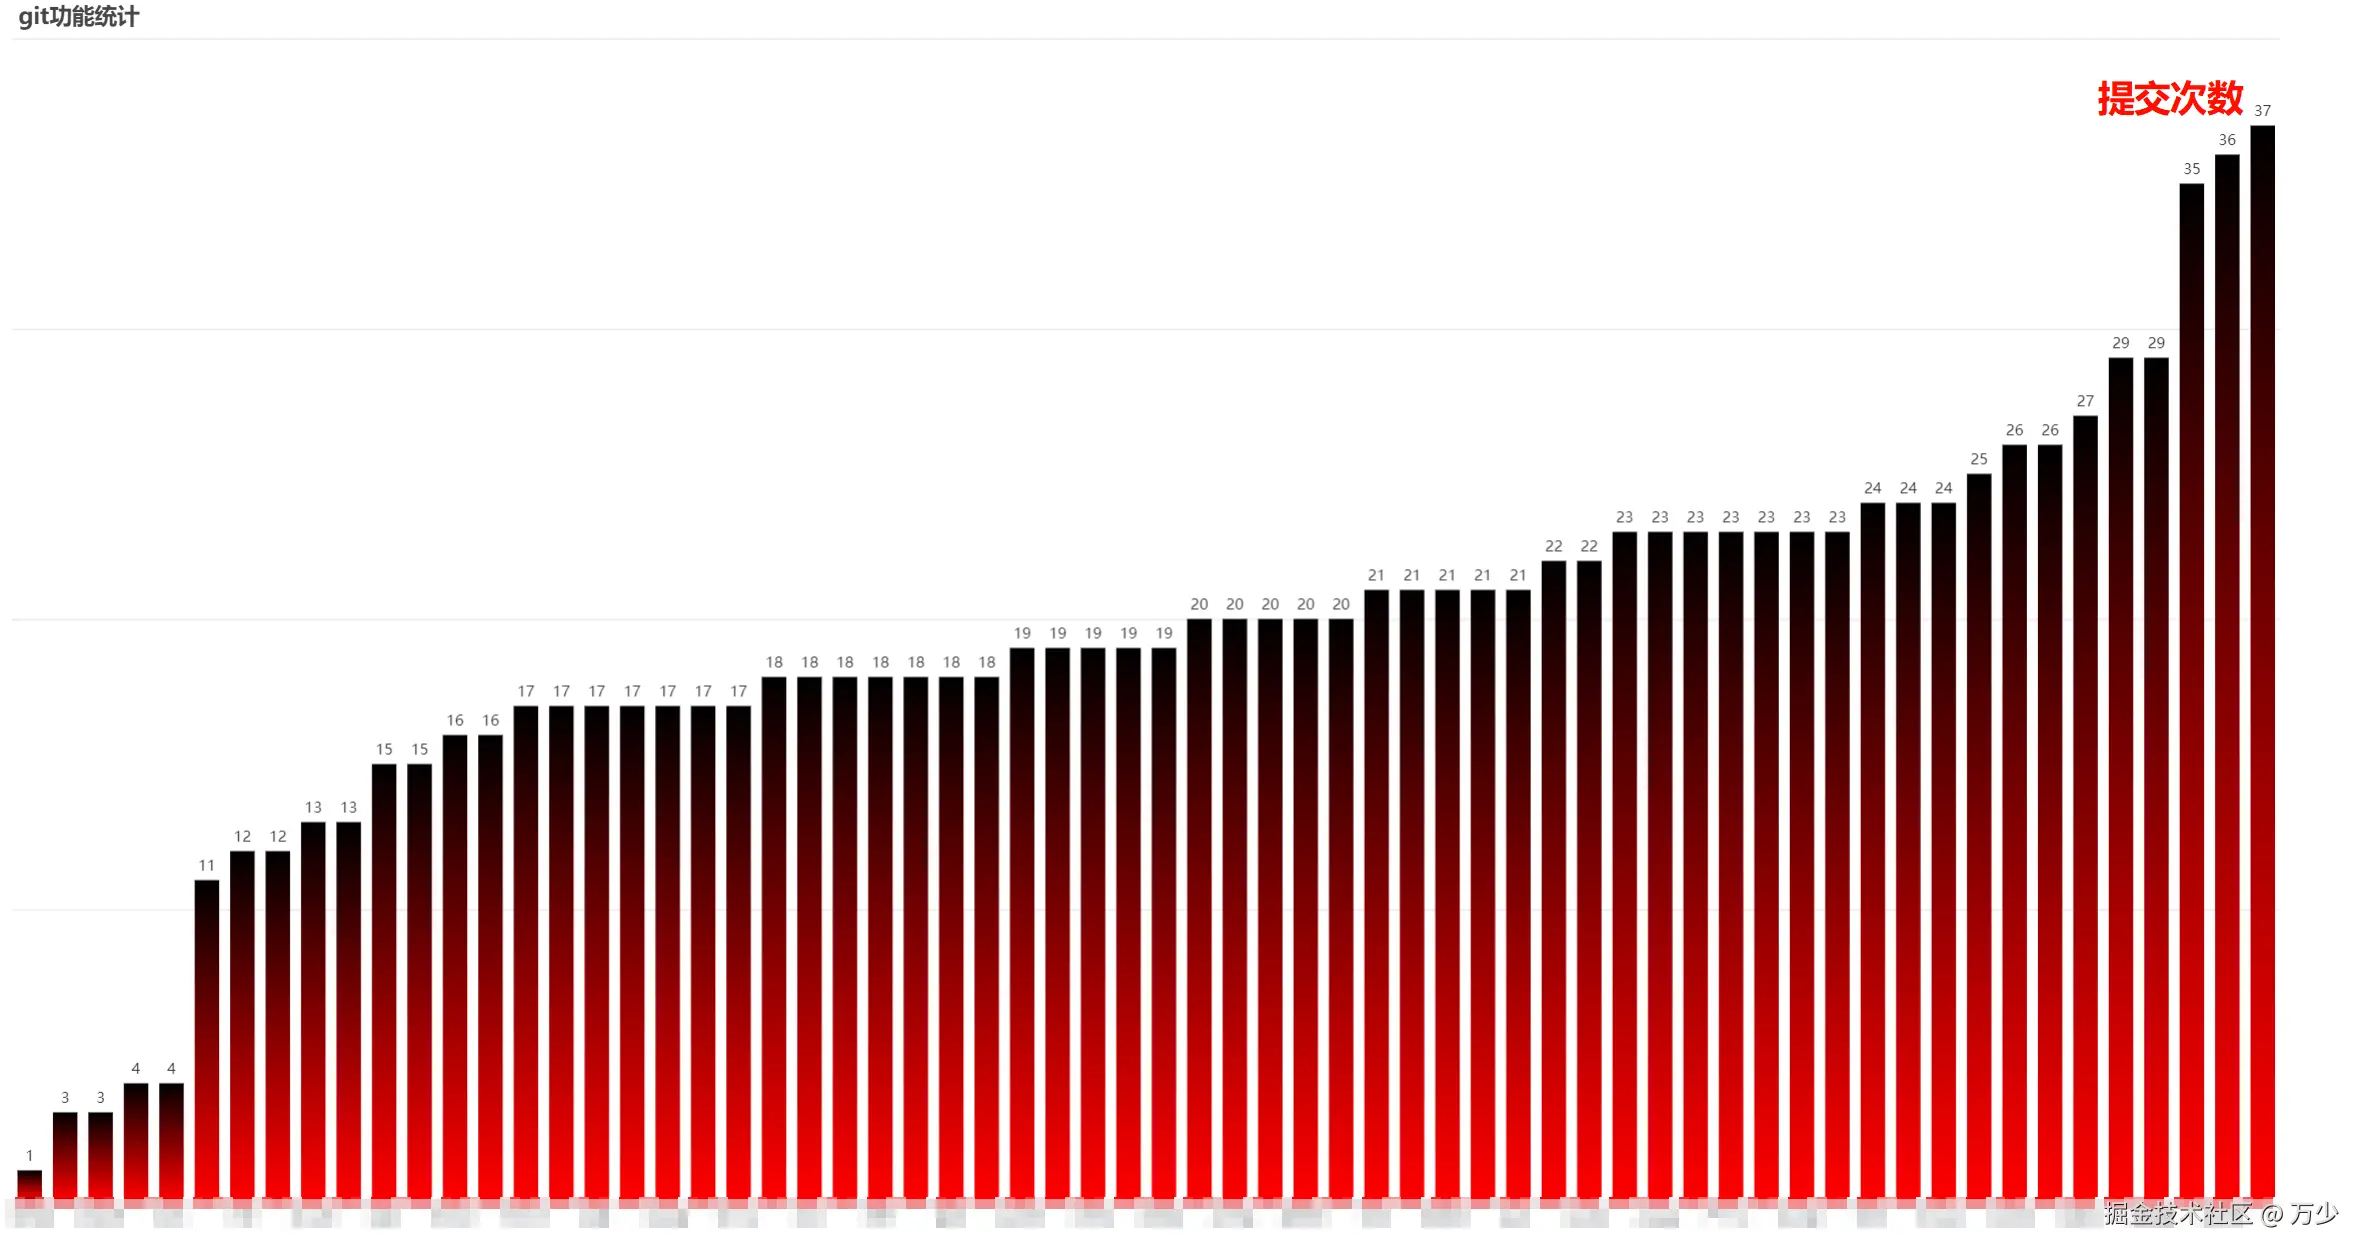
image-20240916214945248
本文参与 腾讯云自媒体同步曝光计划,分享自作者个人站点/博客。
原始发表:2025-02-09,如有侵权请联系 cloudcommunity@tencent.com 删除
目录
腾讯云开发者

Copyright © 2013 - 2026 Tencent Cloud. All Rights Reserved. 腾讯云 版权所有
深圳市腾讯计算机系统有限公司 ICP备案/许可证号:粤B2-20090059  粤公网安备44030502008569号
腾讯云计算(北京)有限责任公司 京ICP证150476号 | 京ICP备11018762号